
Hello My Arty and Crafty Friends,
This is Archana Here, Hope you guys are enjoying this month of Love,
I am super excited today to be here with another love theme based Mixed Media Project… But before moving ahead Belated Happy Valentine’s Day…

Im sure, you all are pretty excited about our craft challenges,
which is ongoing for this lovely month of February, and we have just few days left to call the winners.
Challenge#20,”LOVE IS IN THE AIR”.
You can create Cards, layouts, a journal page, Canvases, interactive/3D cards,
mixed media, altered art, Flower Crafts …anything crafty,With the colors of love in it!
But keep in mind, Craftyscrappers products as focus.
- Last date of submission is 27th FEBRUARY,2018

To win the amazing goodie bags !
Okay so Here are the projects which we are going to create Today:
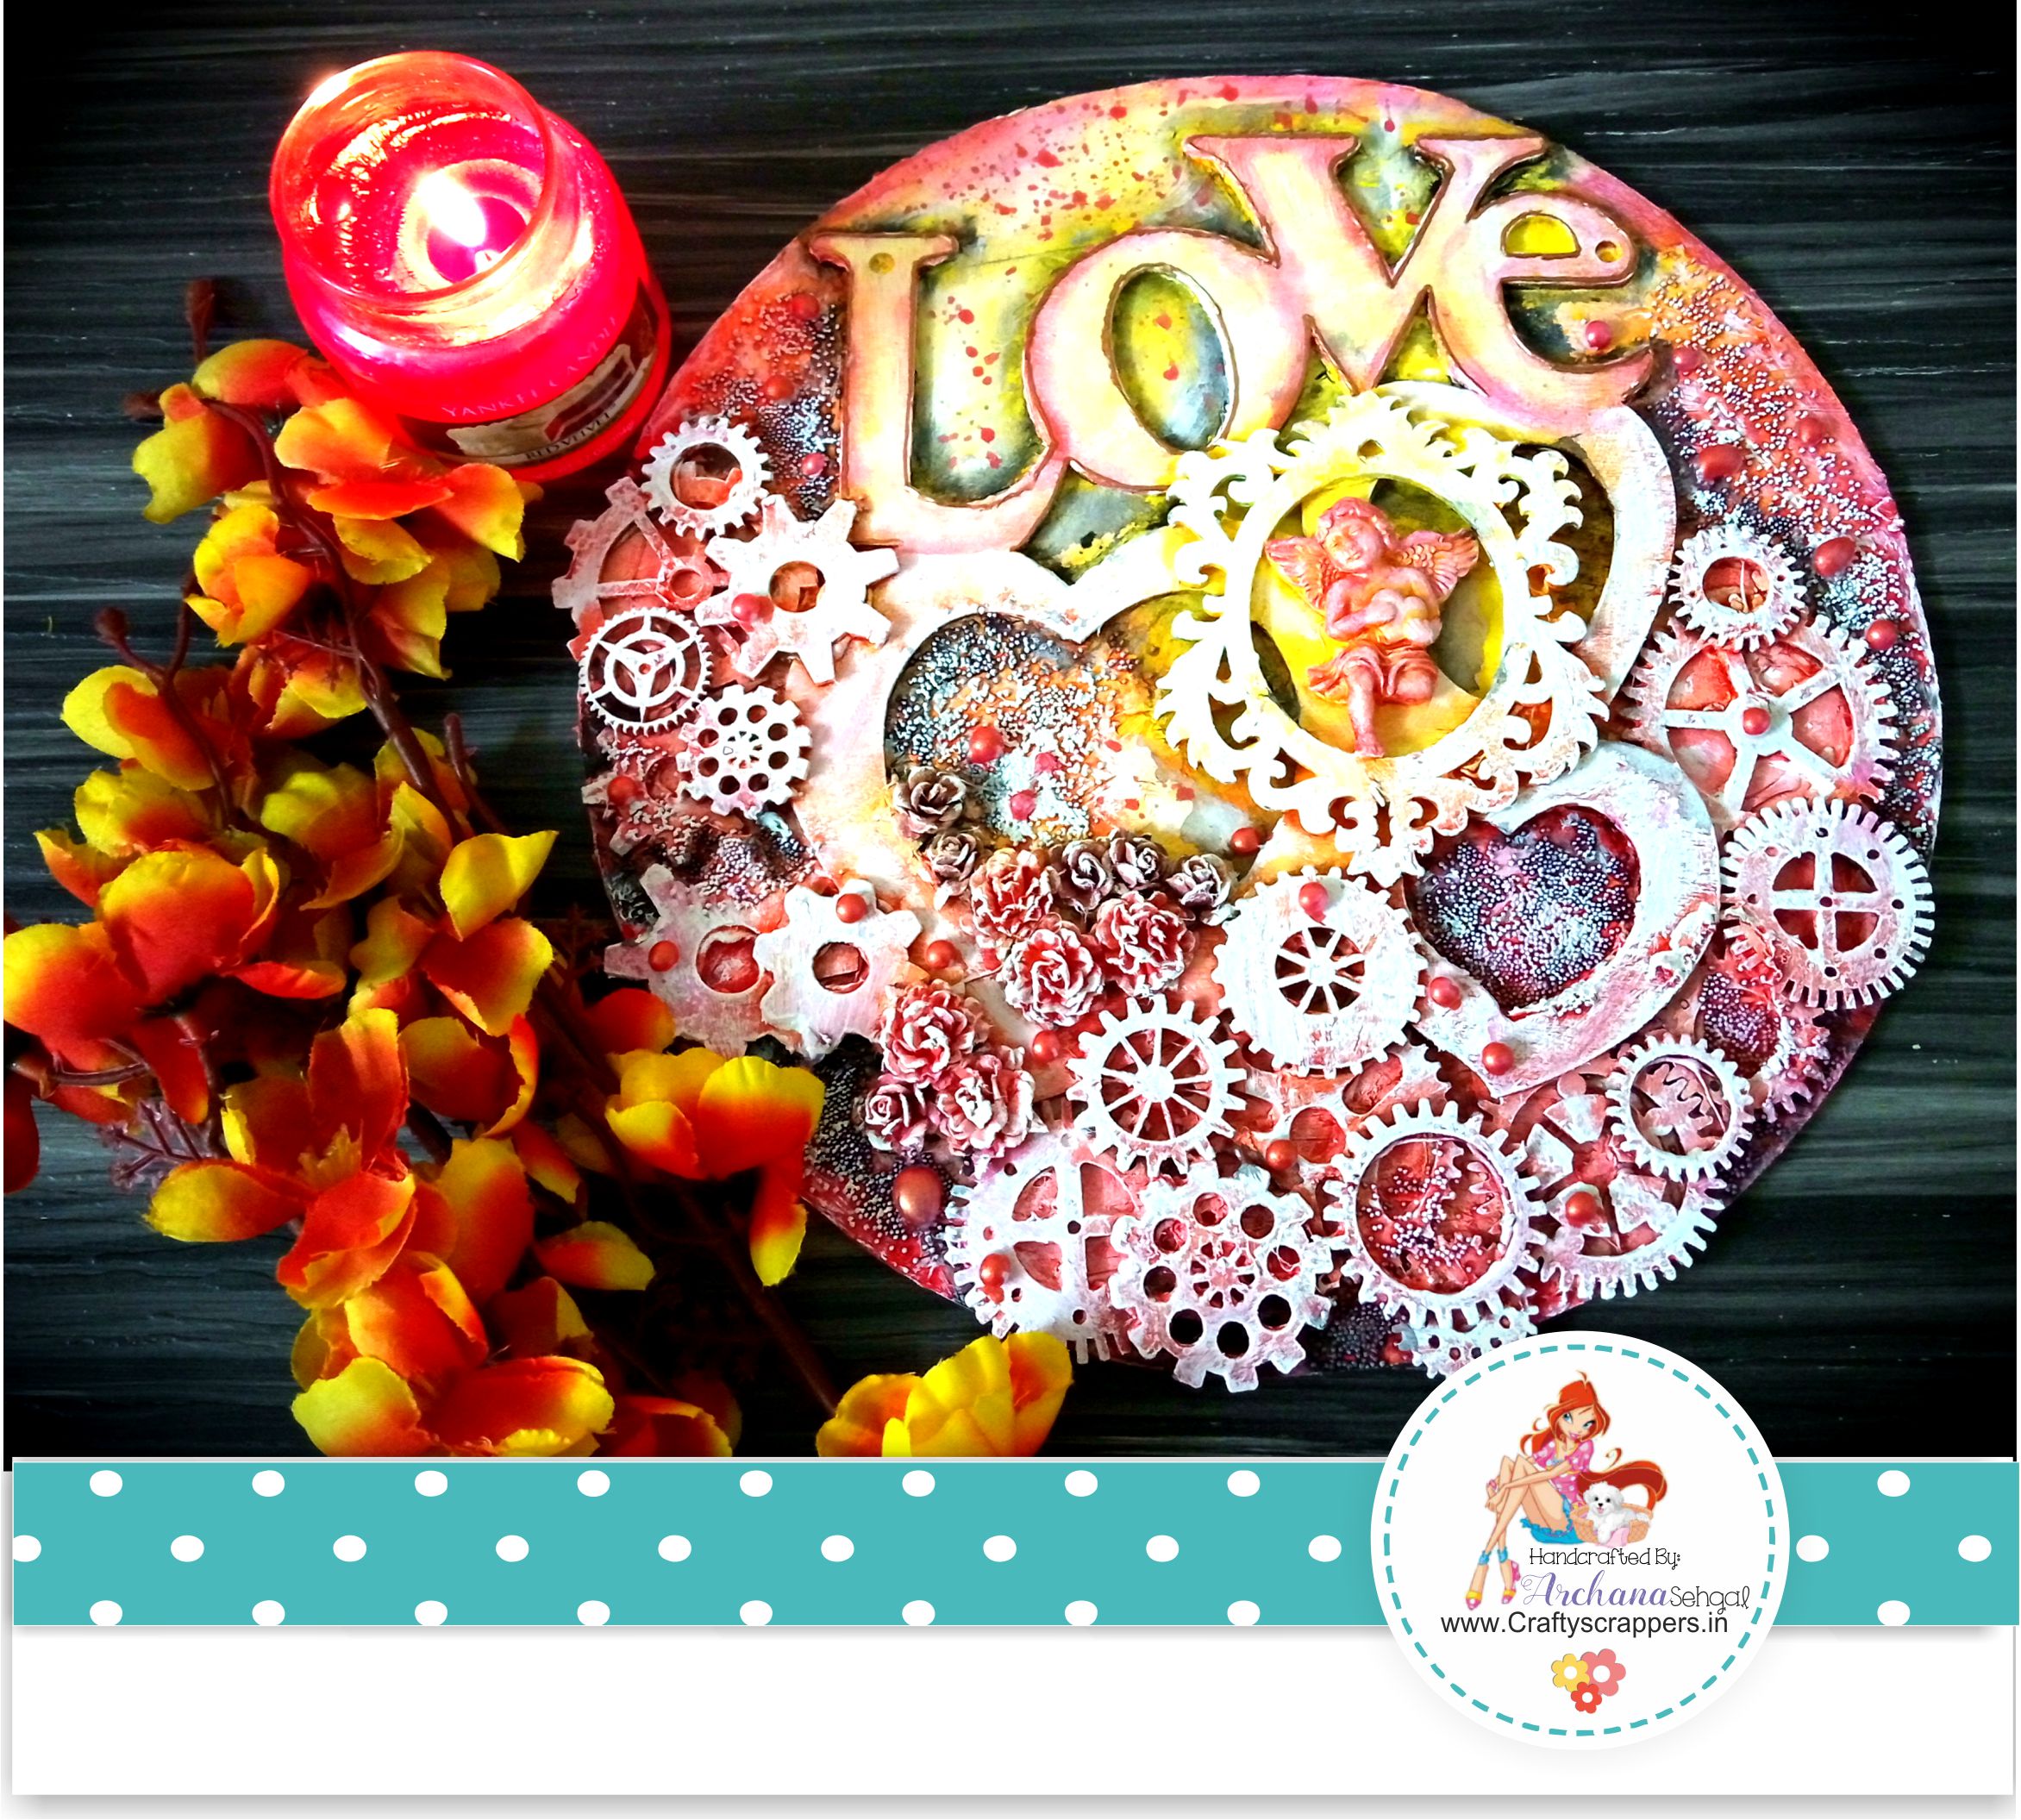
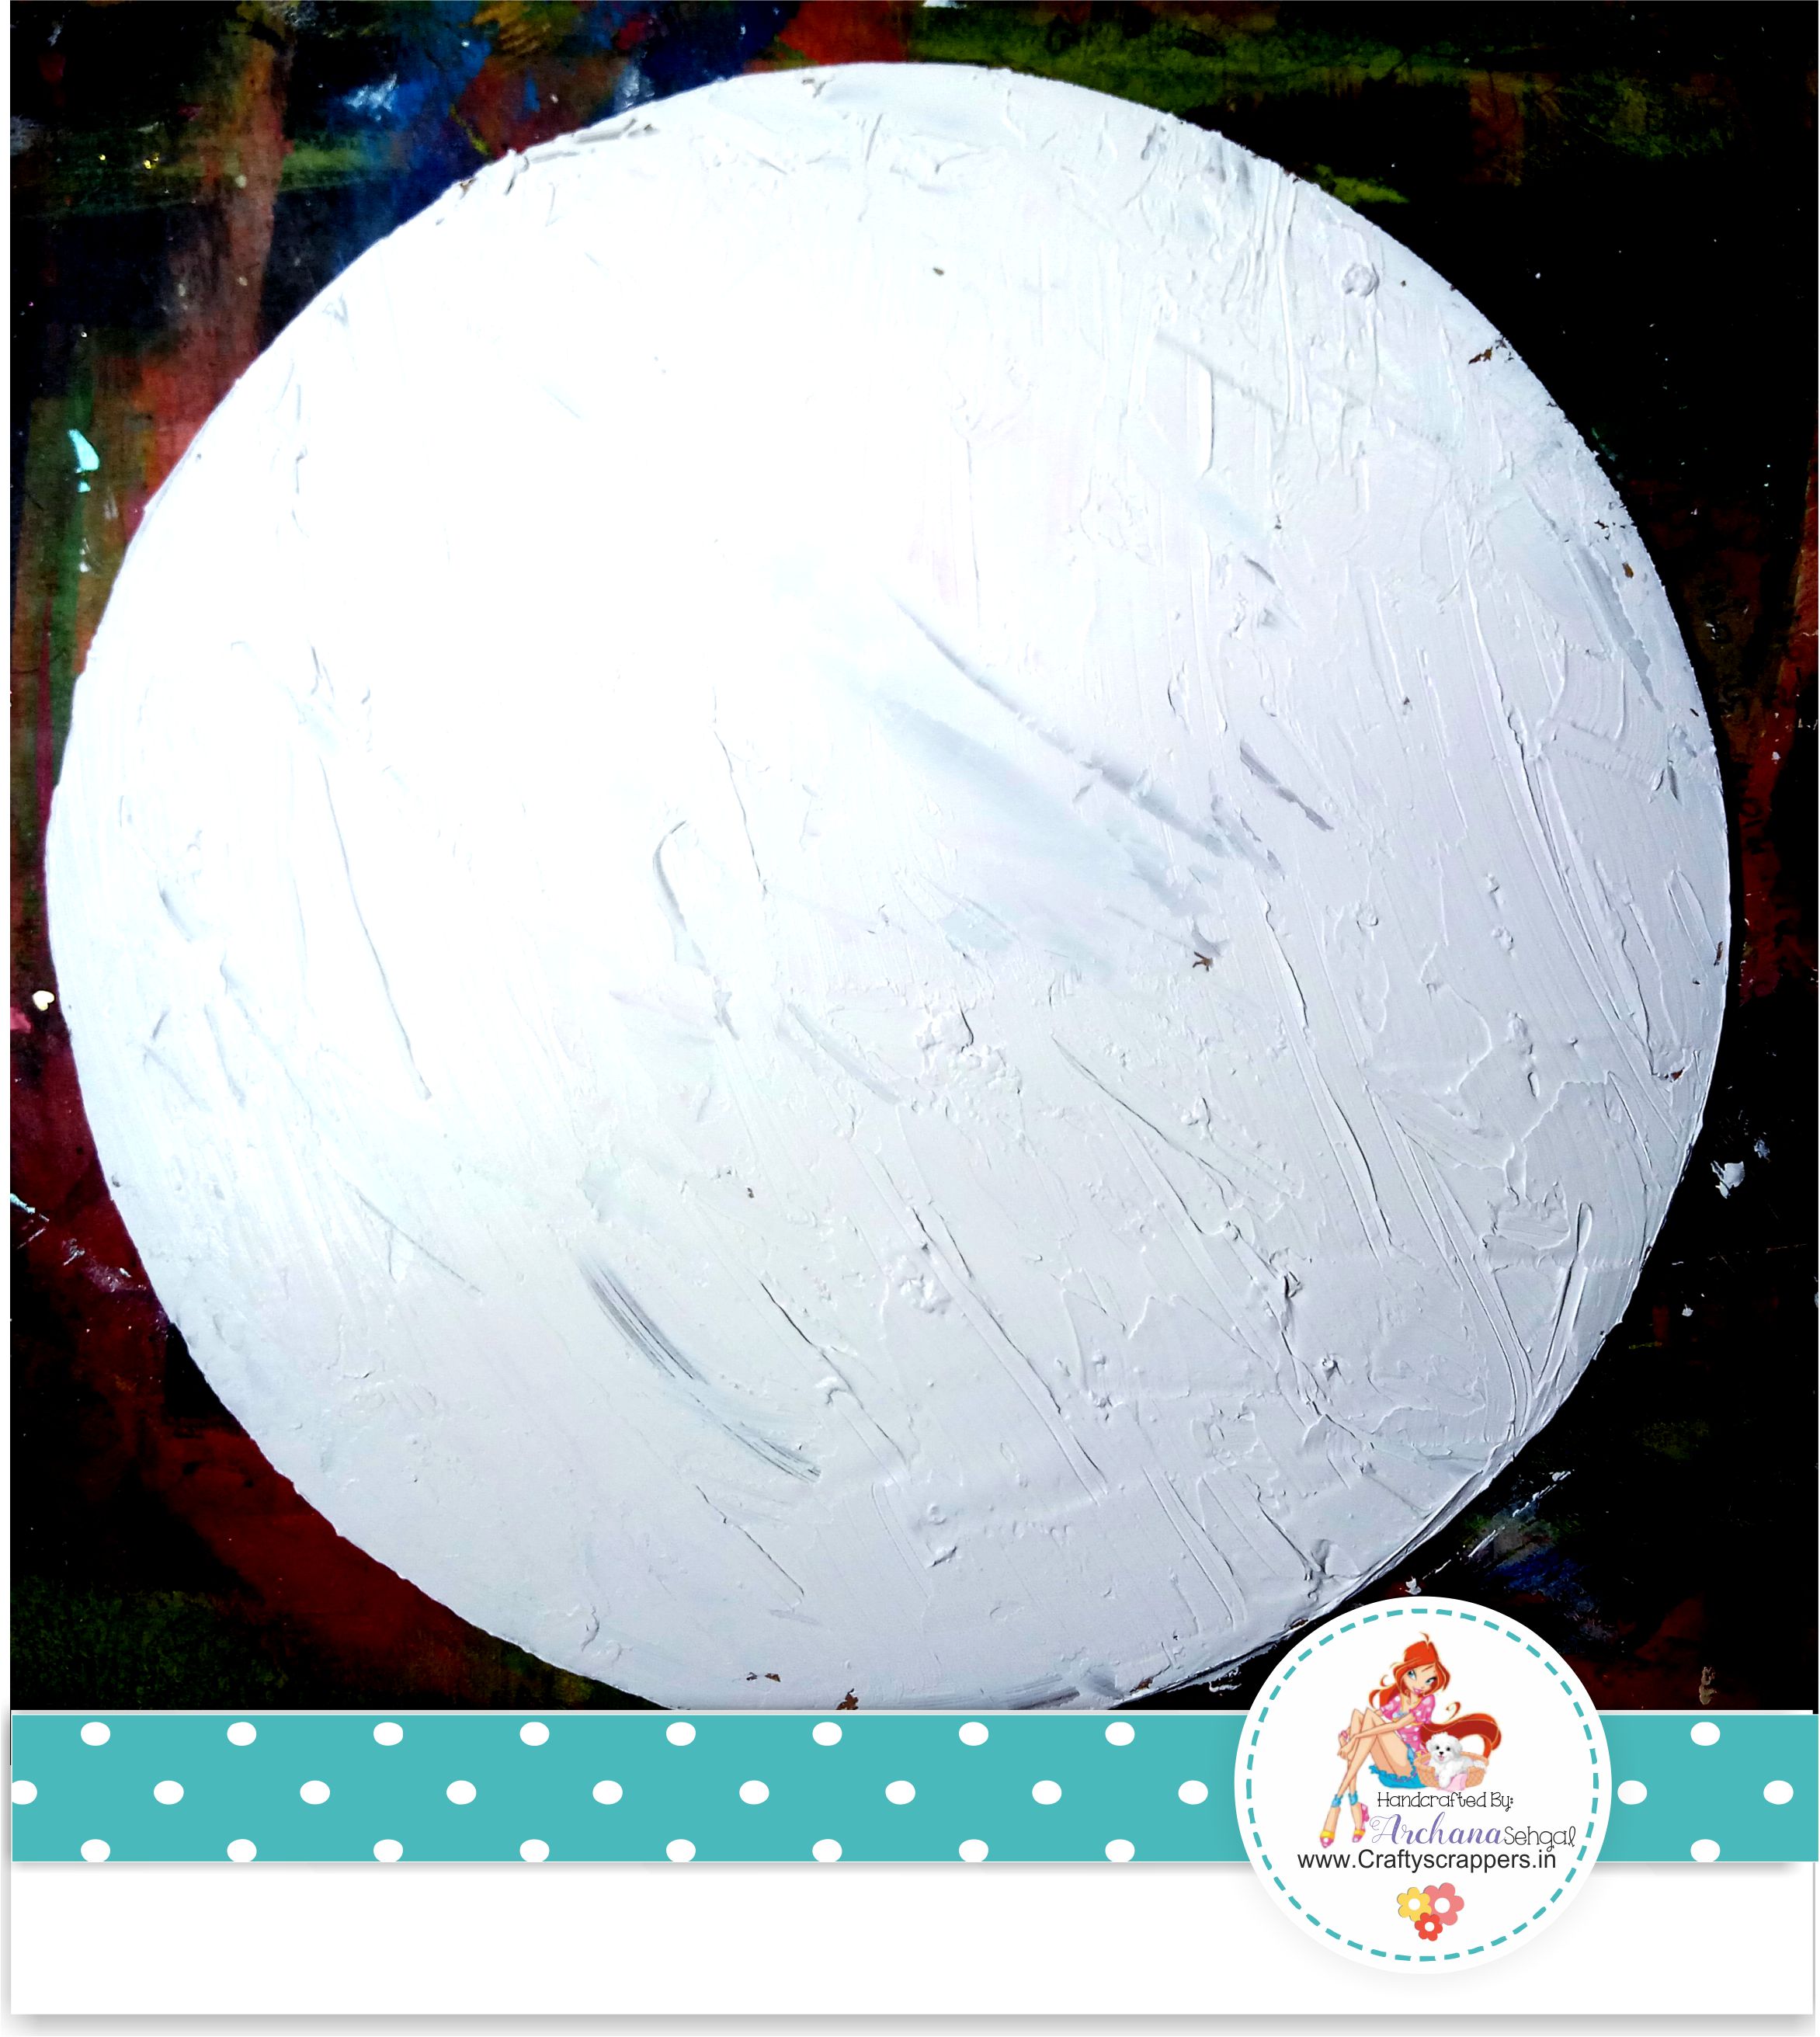
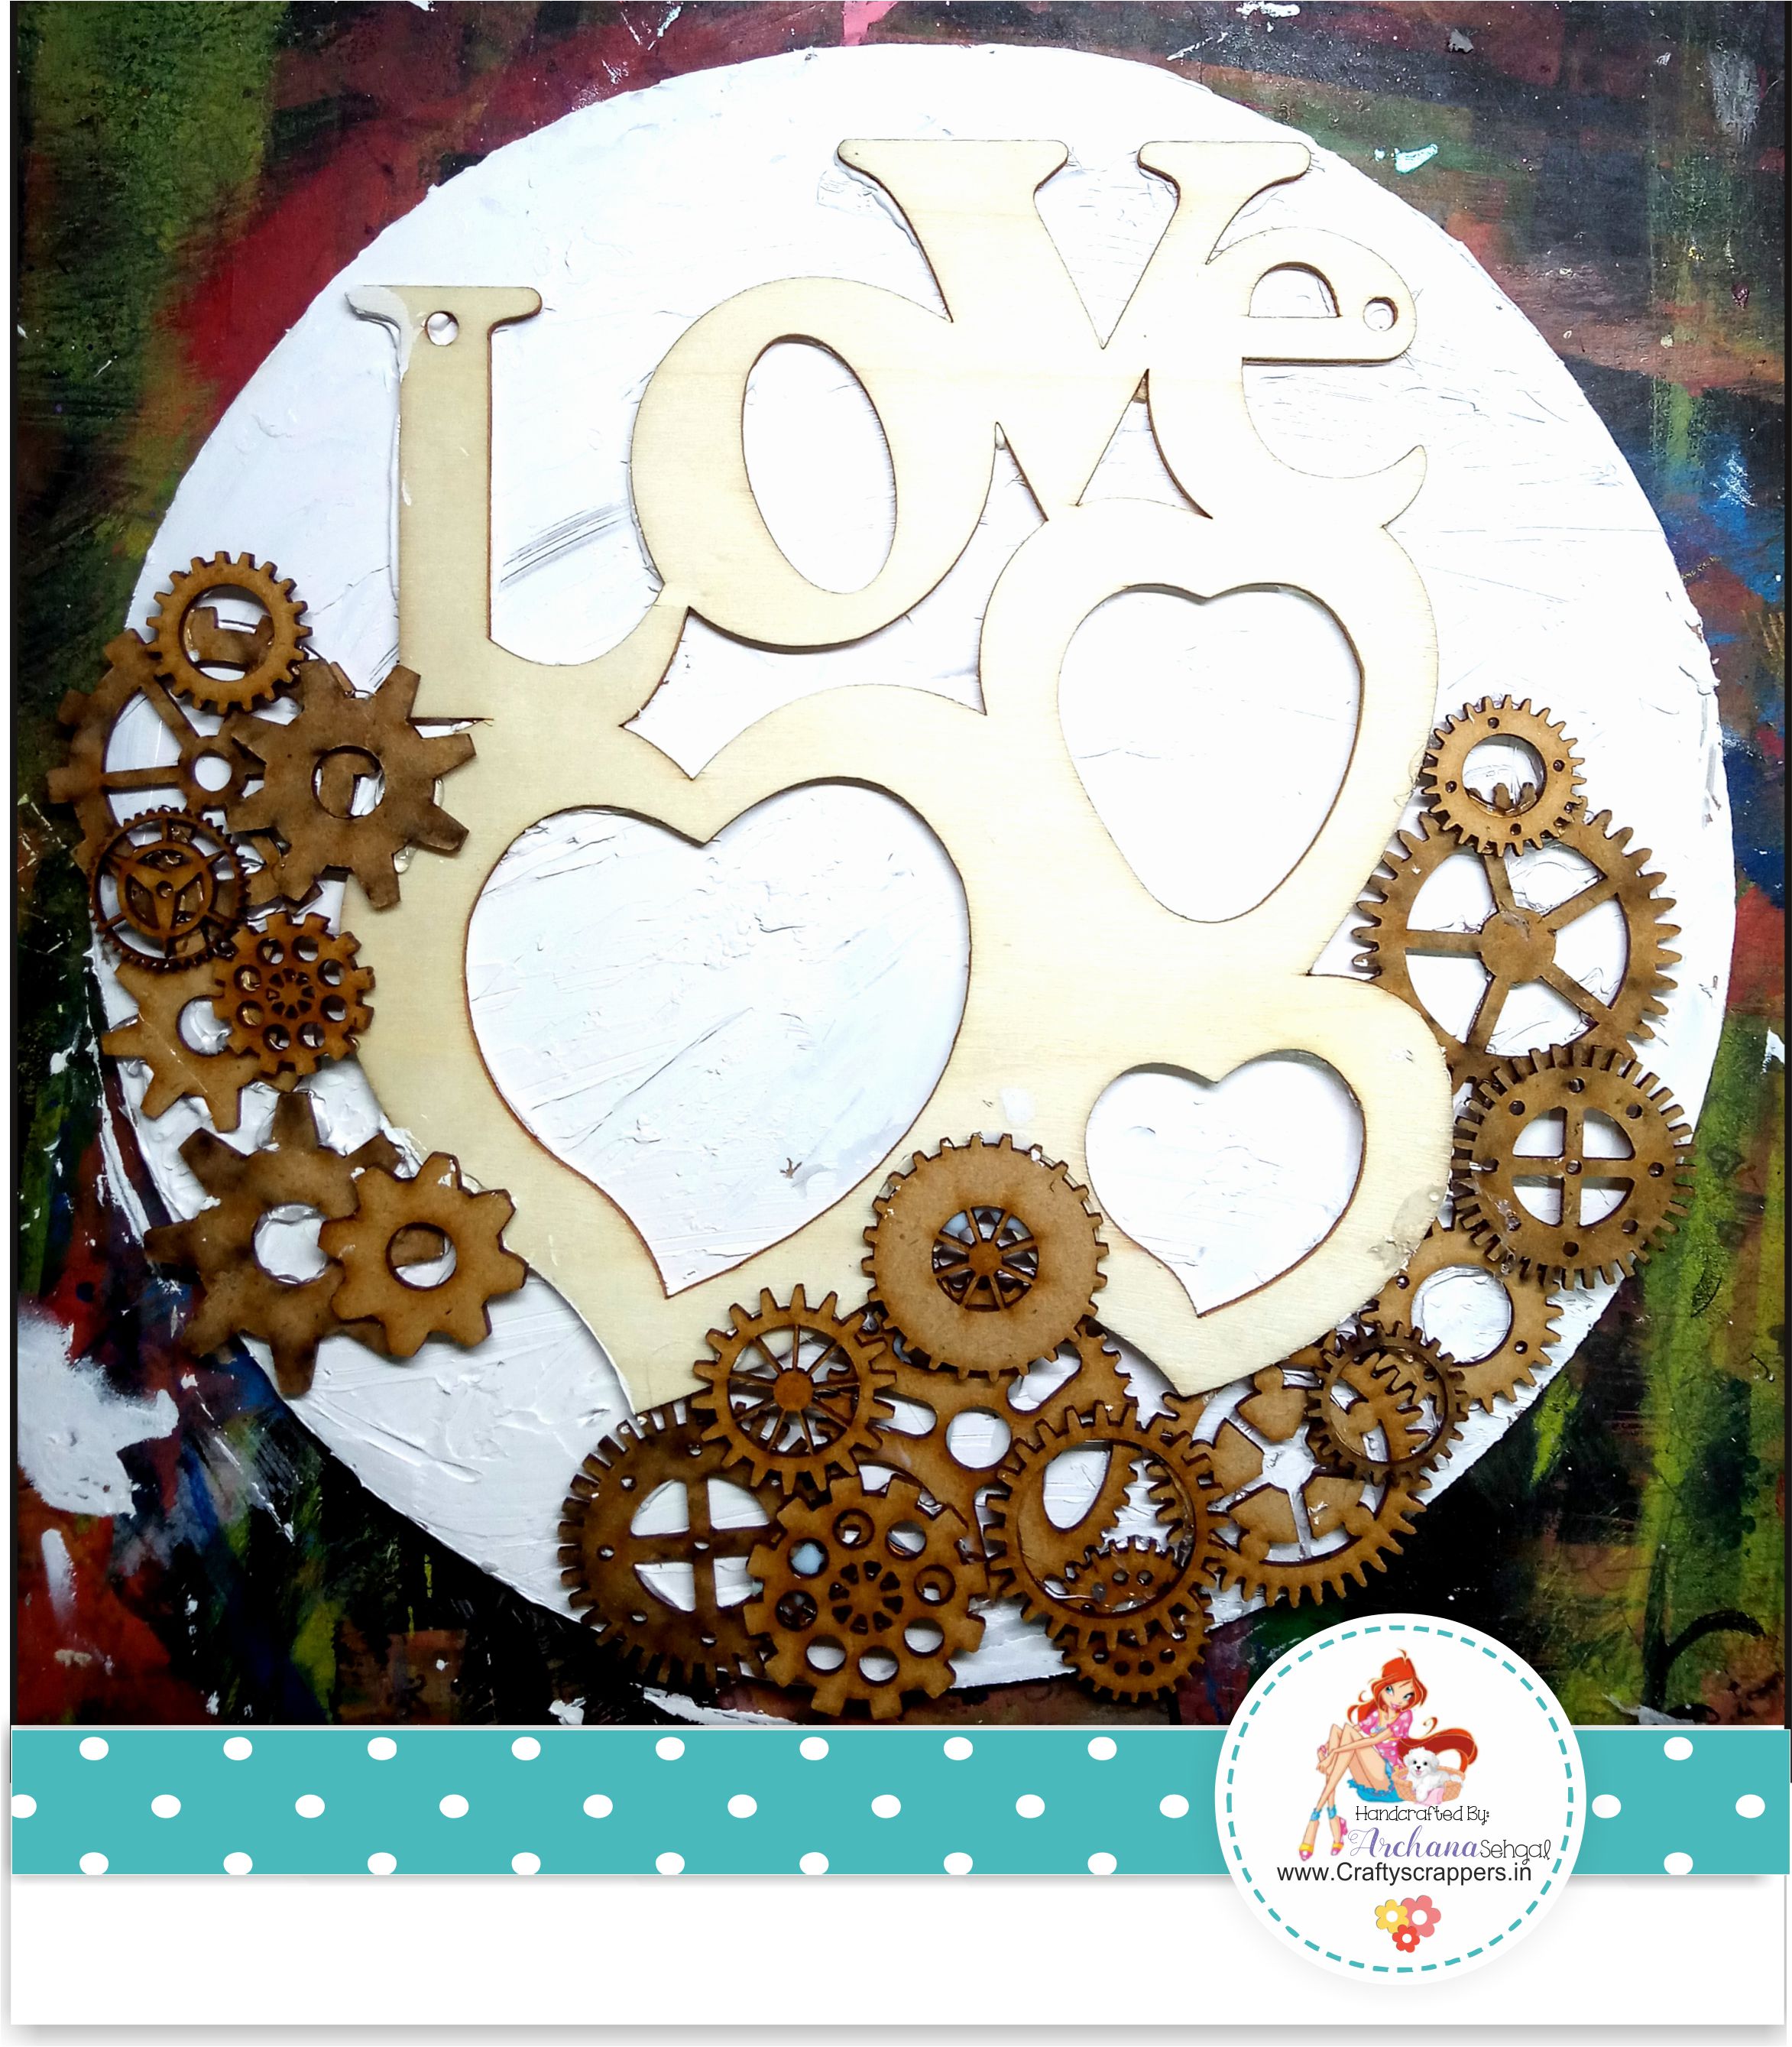
PROJECT#1: Mixed Media altered MDF board


I took 10 inch circle shaped MDF board, and prime it using gesso, but instead of using brush, i used palate knife to apply gesso, this way i have texture on the surface, it is the best way to create texture on any surface easily, this is how it looks :

I used MDF photo frame with word LOVE and steampunk gears of different shapes & sizes, which are easily available online or any local craft store, and then glue them to form a random composition.

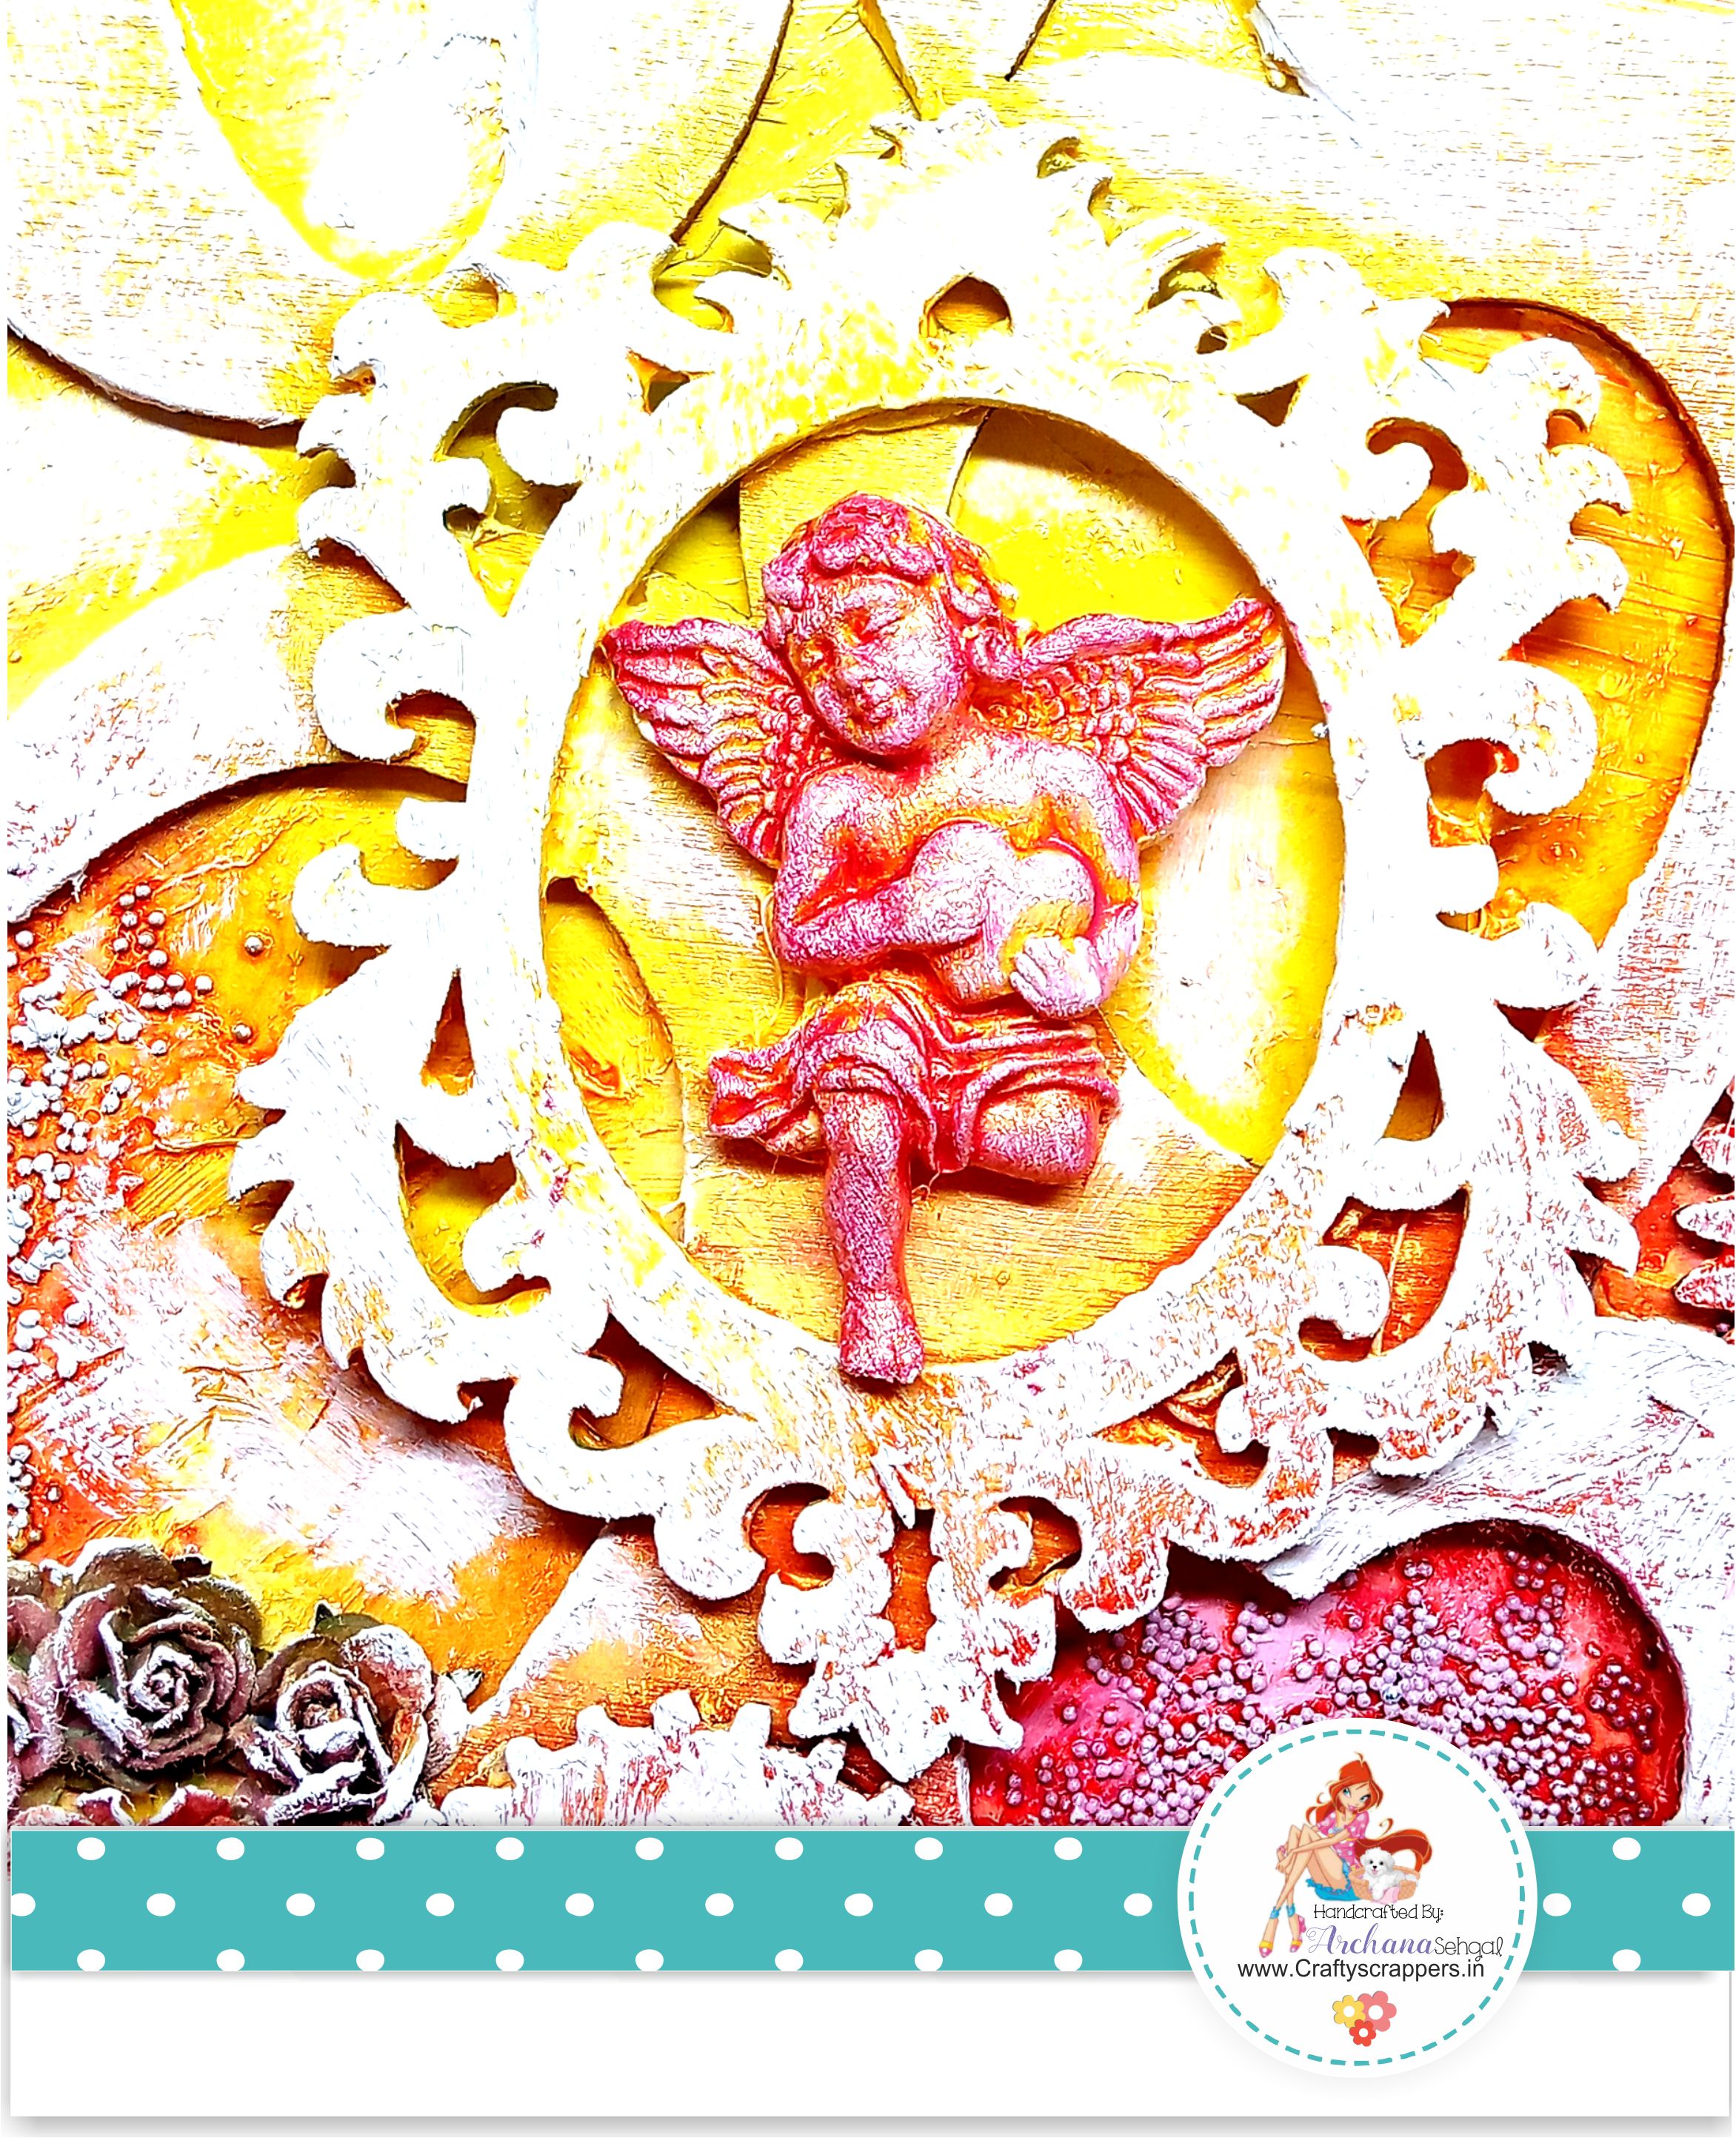
After everything dries completely, i added resin Victorian frame and cute little angel cupid, i also added paper flowers, (don’t worry about the embellishment colors), at the end we are going to cover everything with gesso.. and as i always says use whatever you have in your stash, okay so moving on to rest tutorial.. 🙂
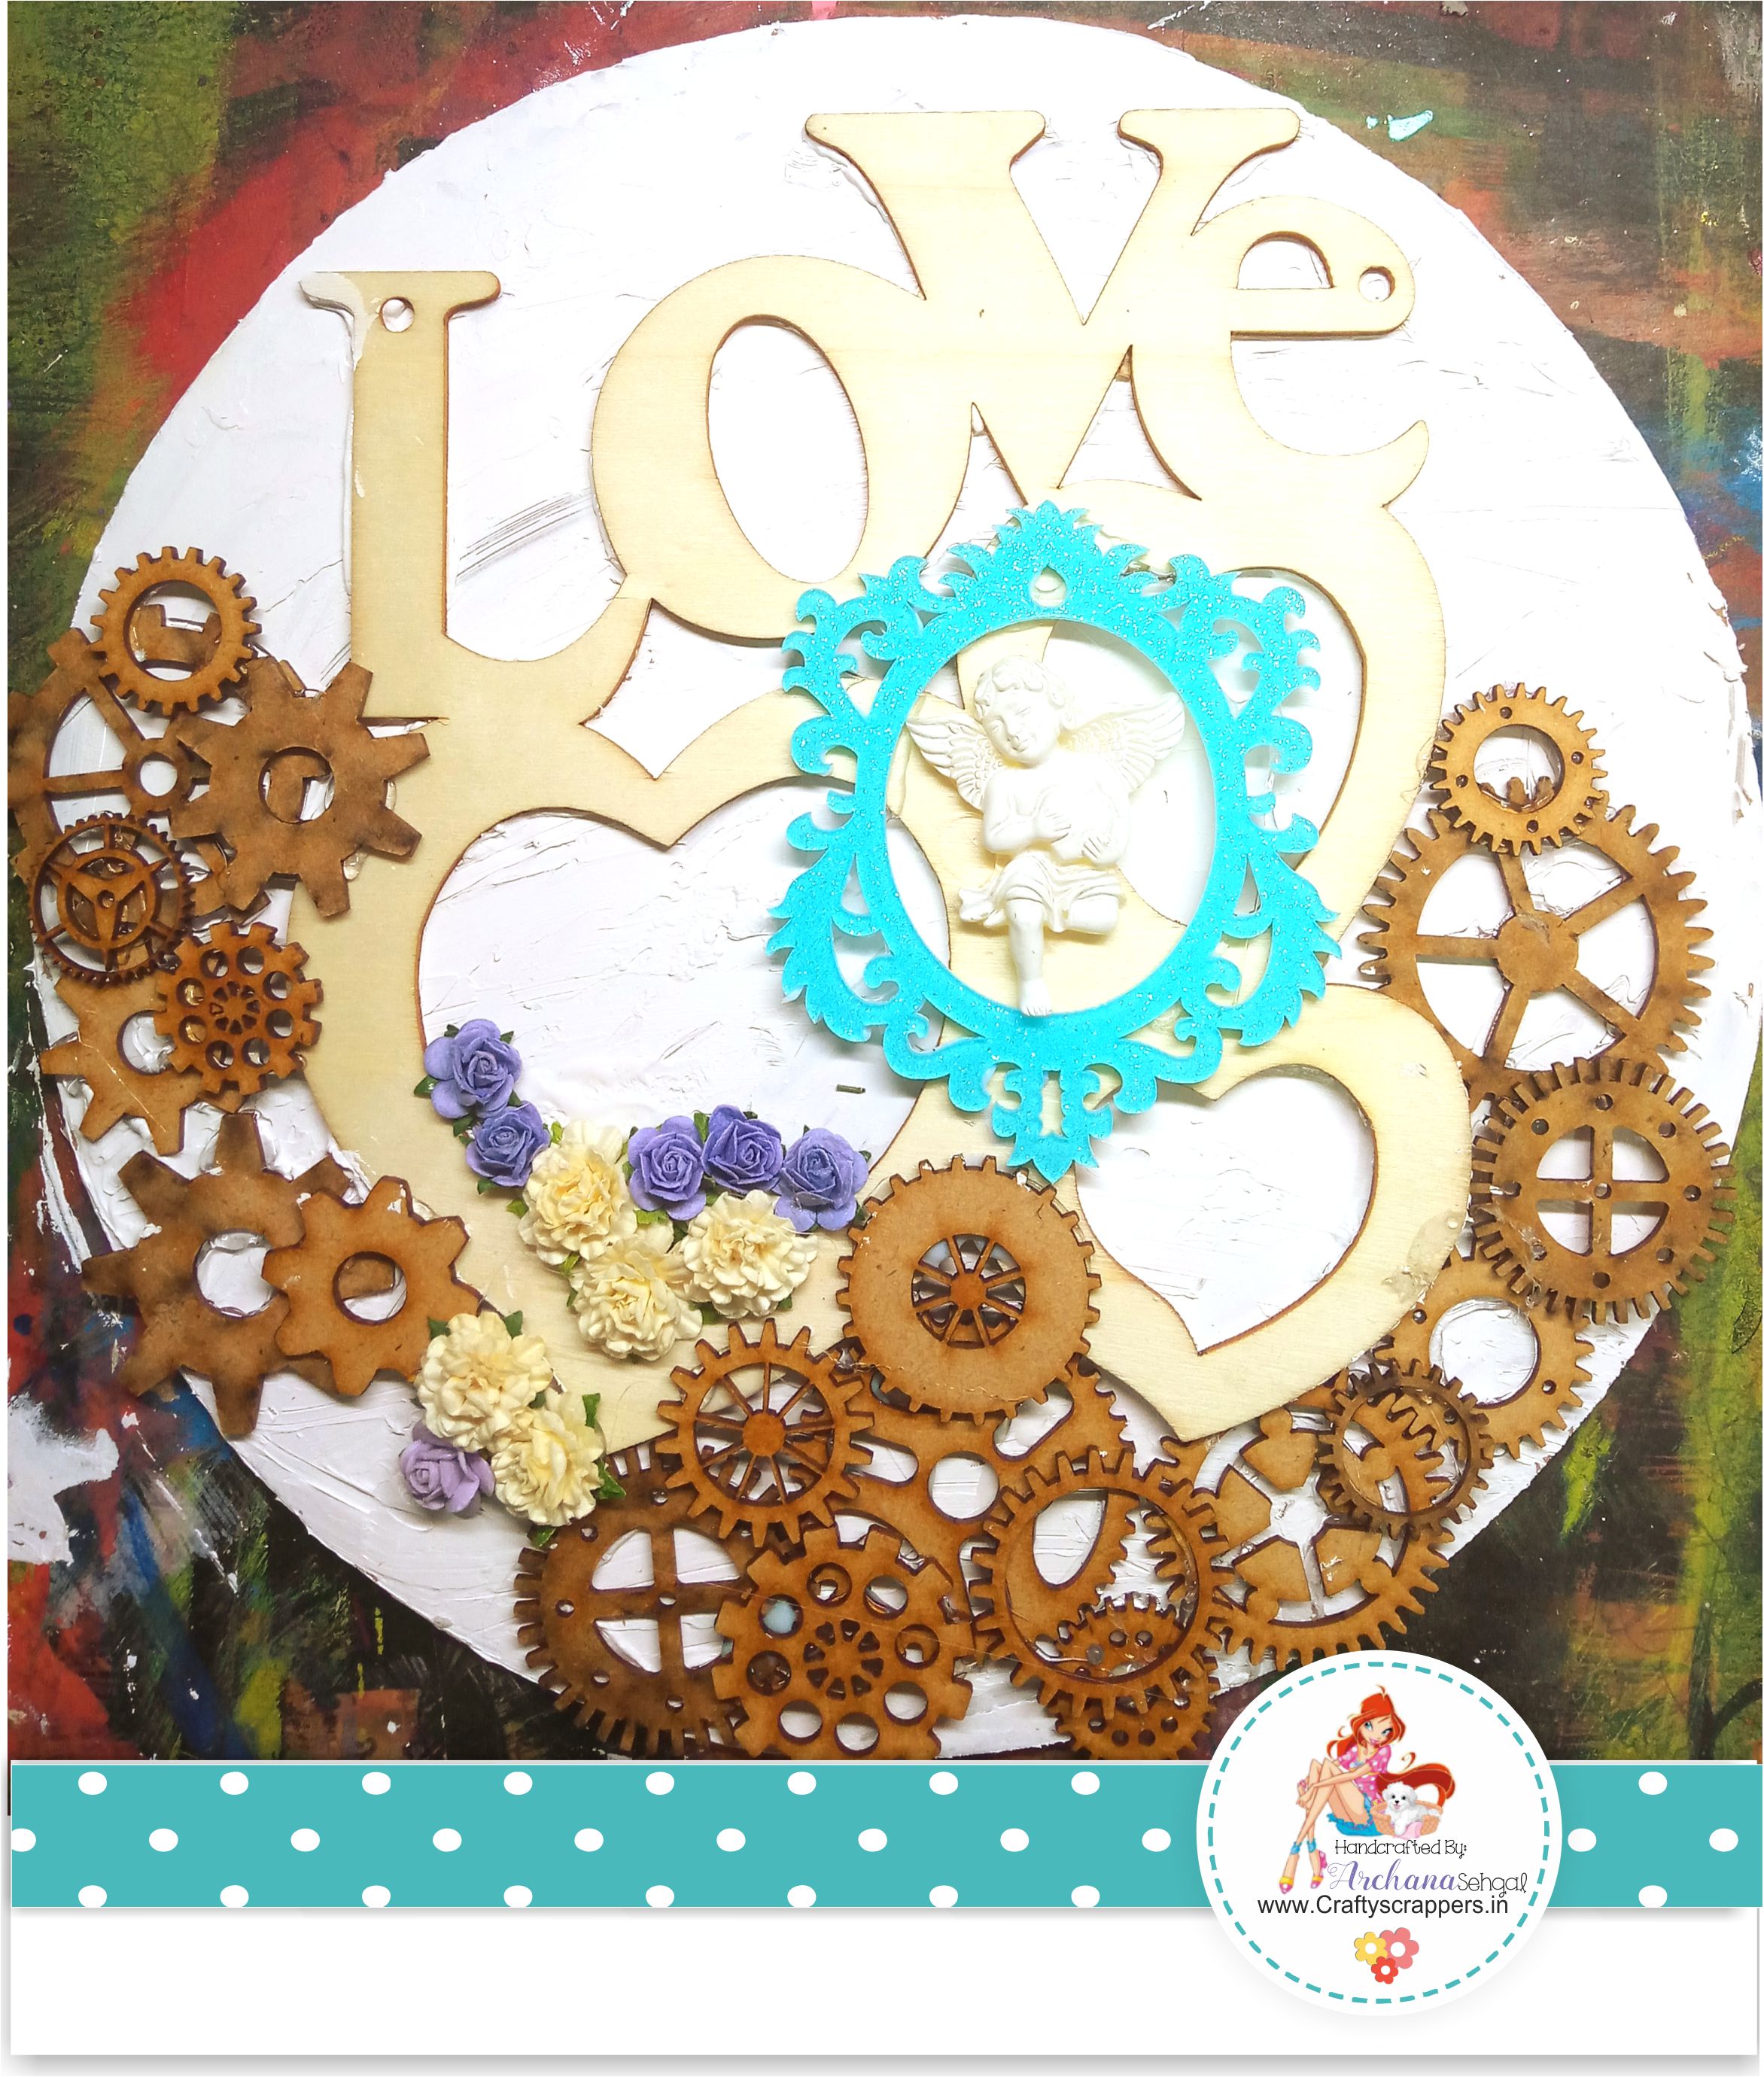

Added micro beads, this is one of my favorite thing to add to any mixed media project, and later cover entire project with gesso.
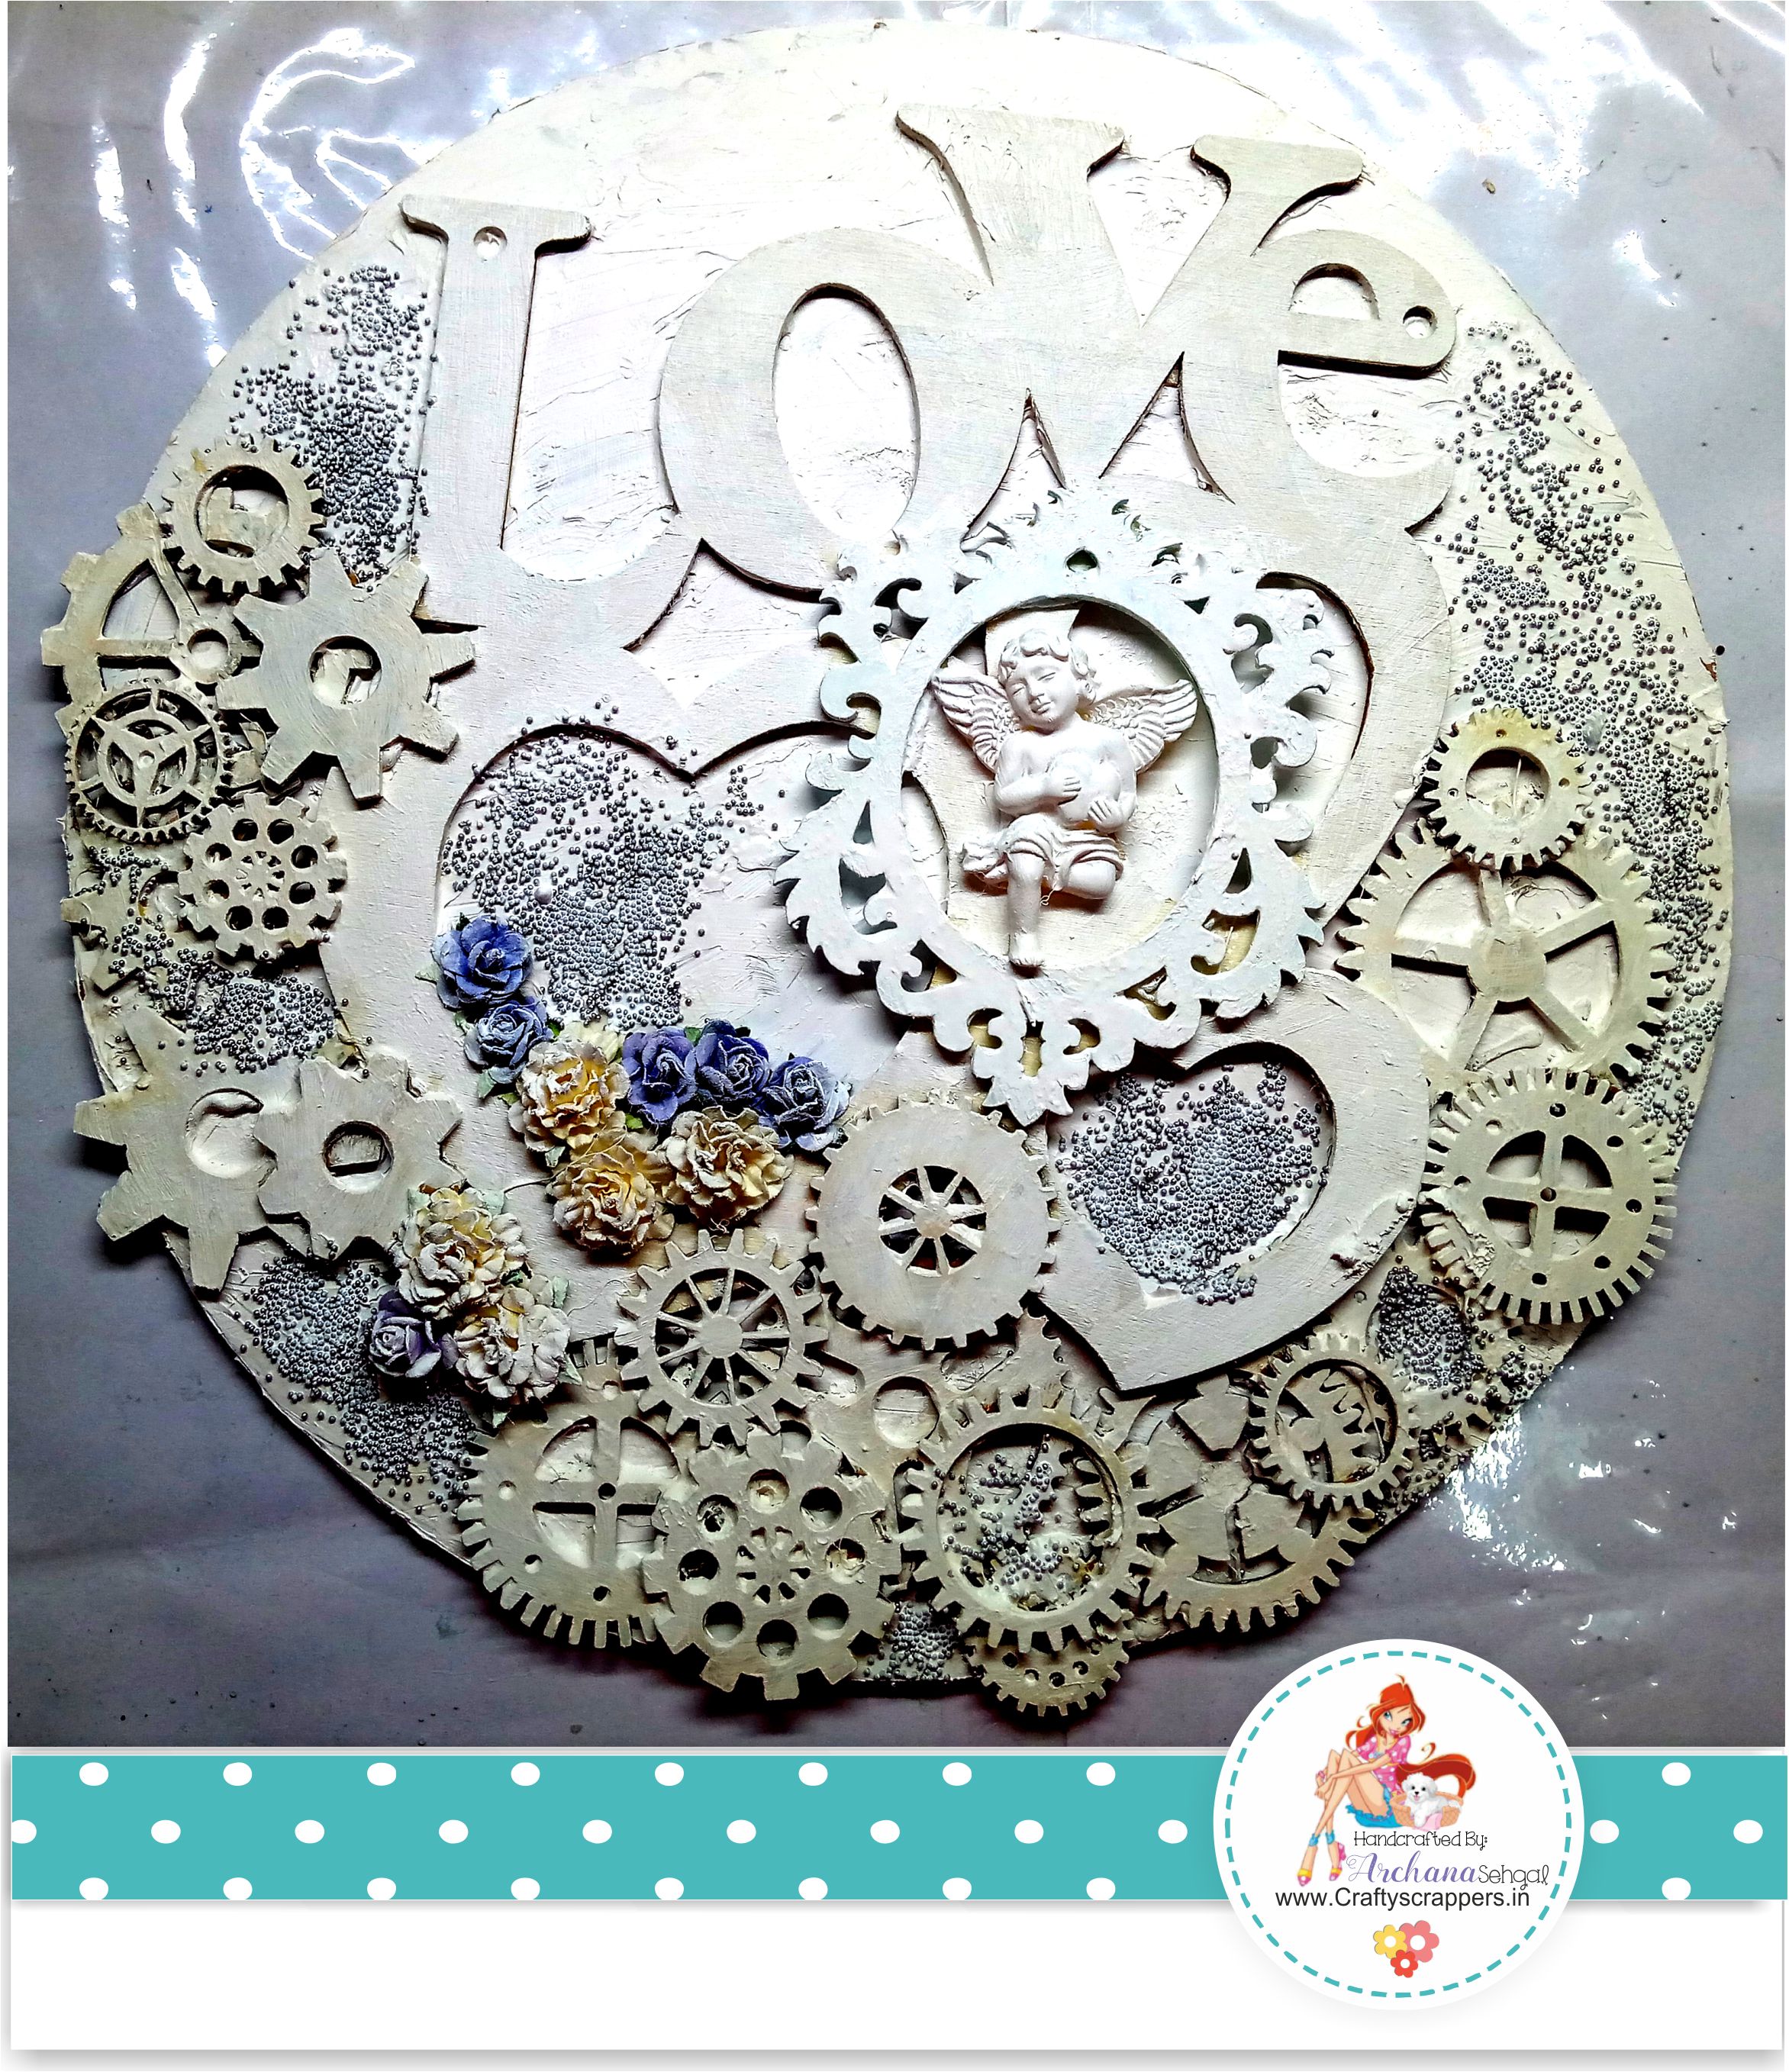
This seems all confusing and hard but trust me guys once you start building layers and embellishment you will find it easier than ever.

I started coloring using Craftyscrappers “Shimmer sprays” named Juicy watermelon and Sweet sunshine, after you finish the spraying before it gets dried just tilt the project little bit so this way both the color will flow & blend together..
these sprays are so amazing that it goes on any surface as you can see here,
Craftyscrappers Shimmer Sprays are available in 16 gorgeous colors to chose from.
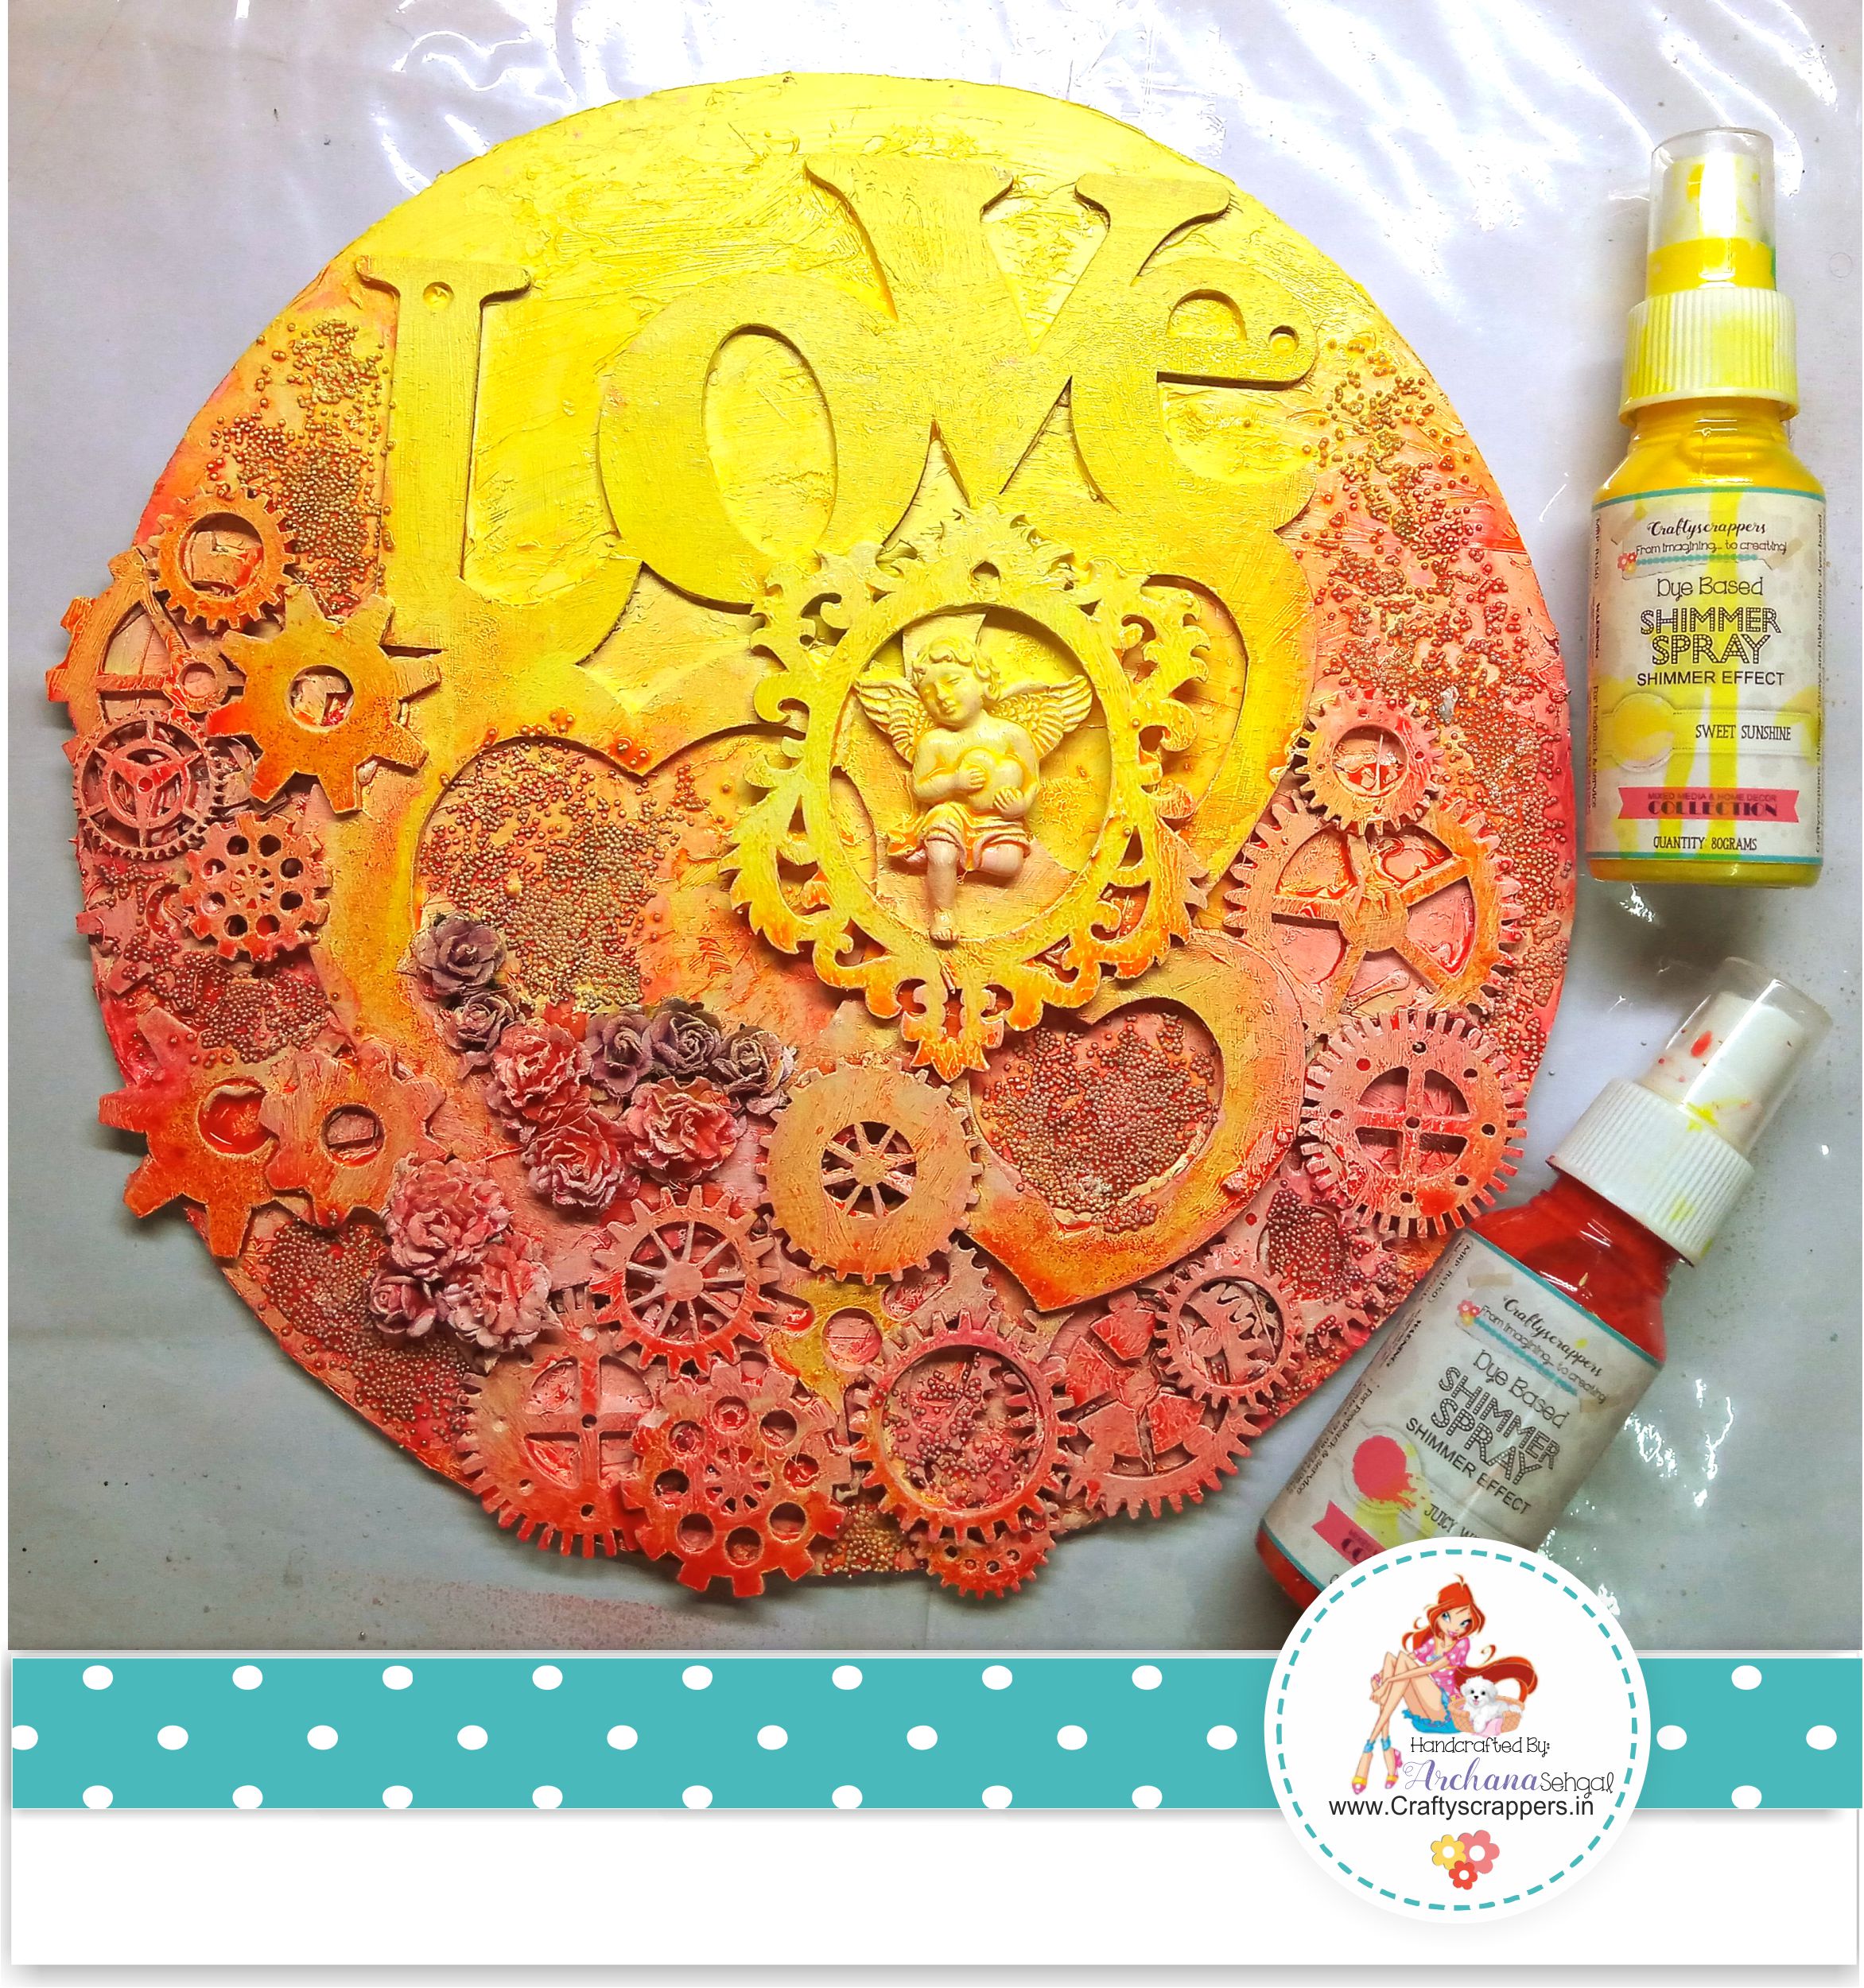
after it dried completely i used “fixative spray” to seal that shine n color,
as these shimmer sprays are water based.

Next I used gesso to highlight the texture and elements using dry brush technique,
here the base coat colors does not scattered because i have sealed the colors using fixative, as you can see here, how beautiful finish i got in this project…
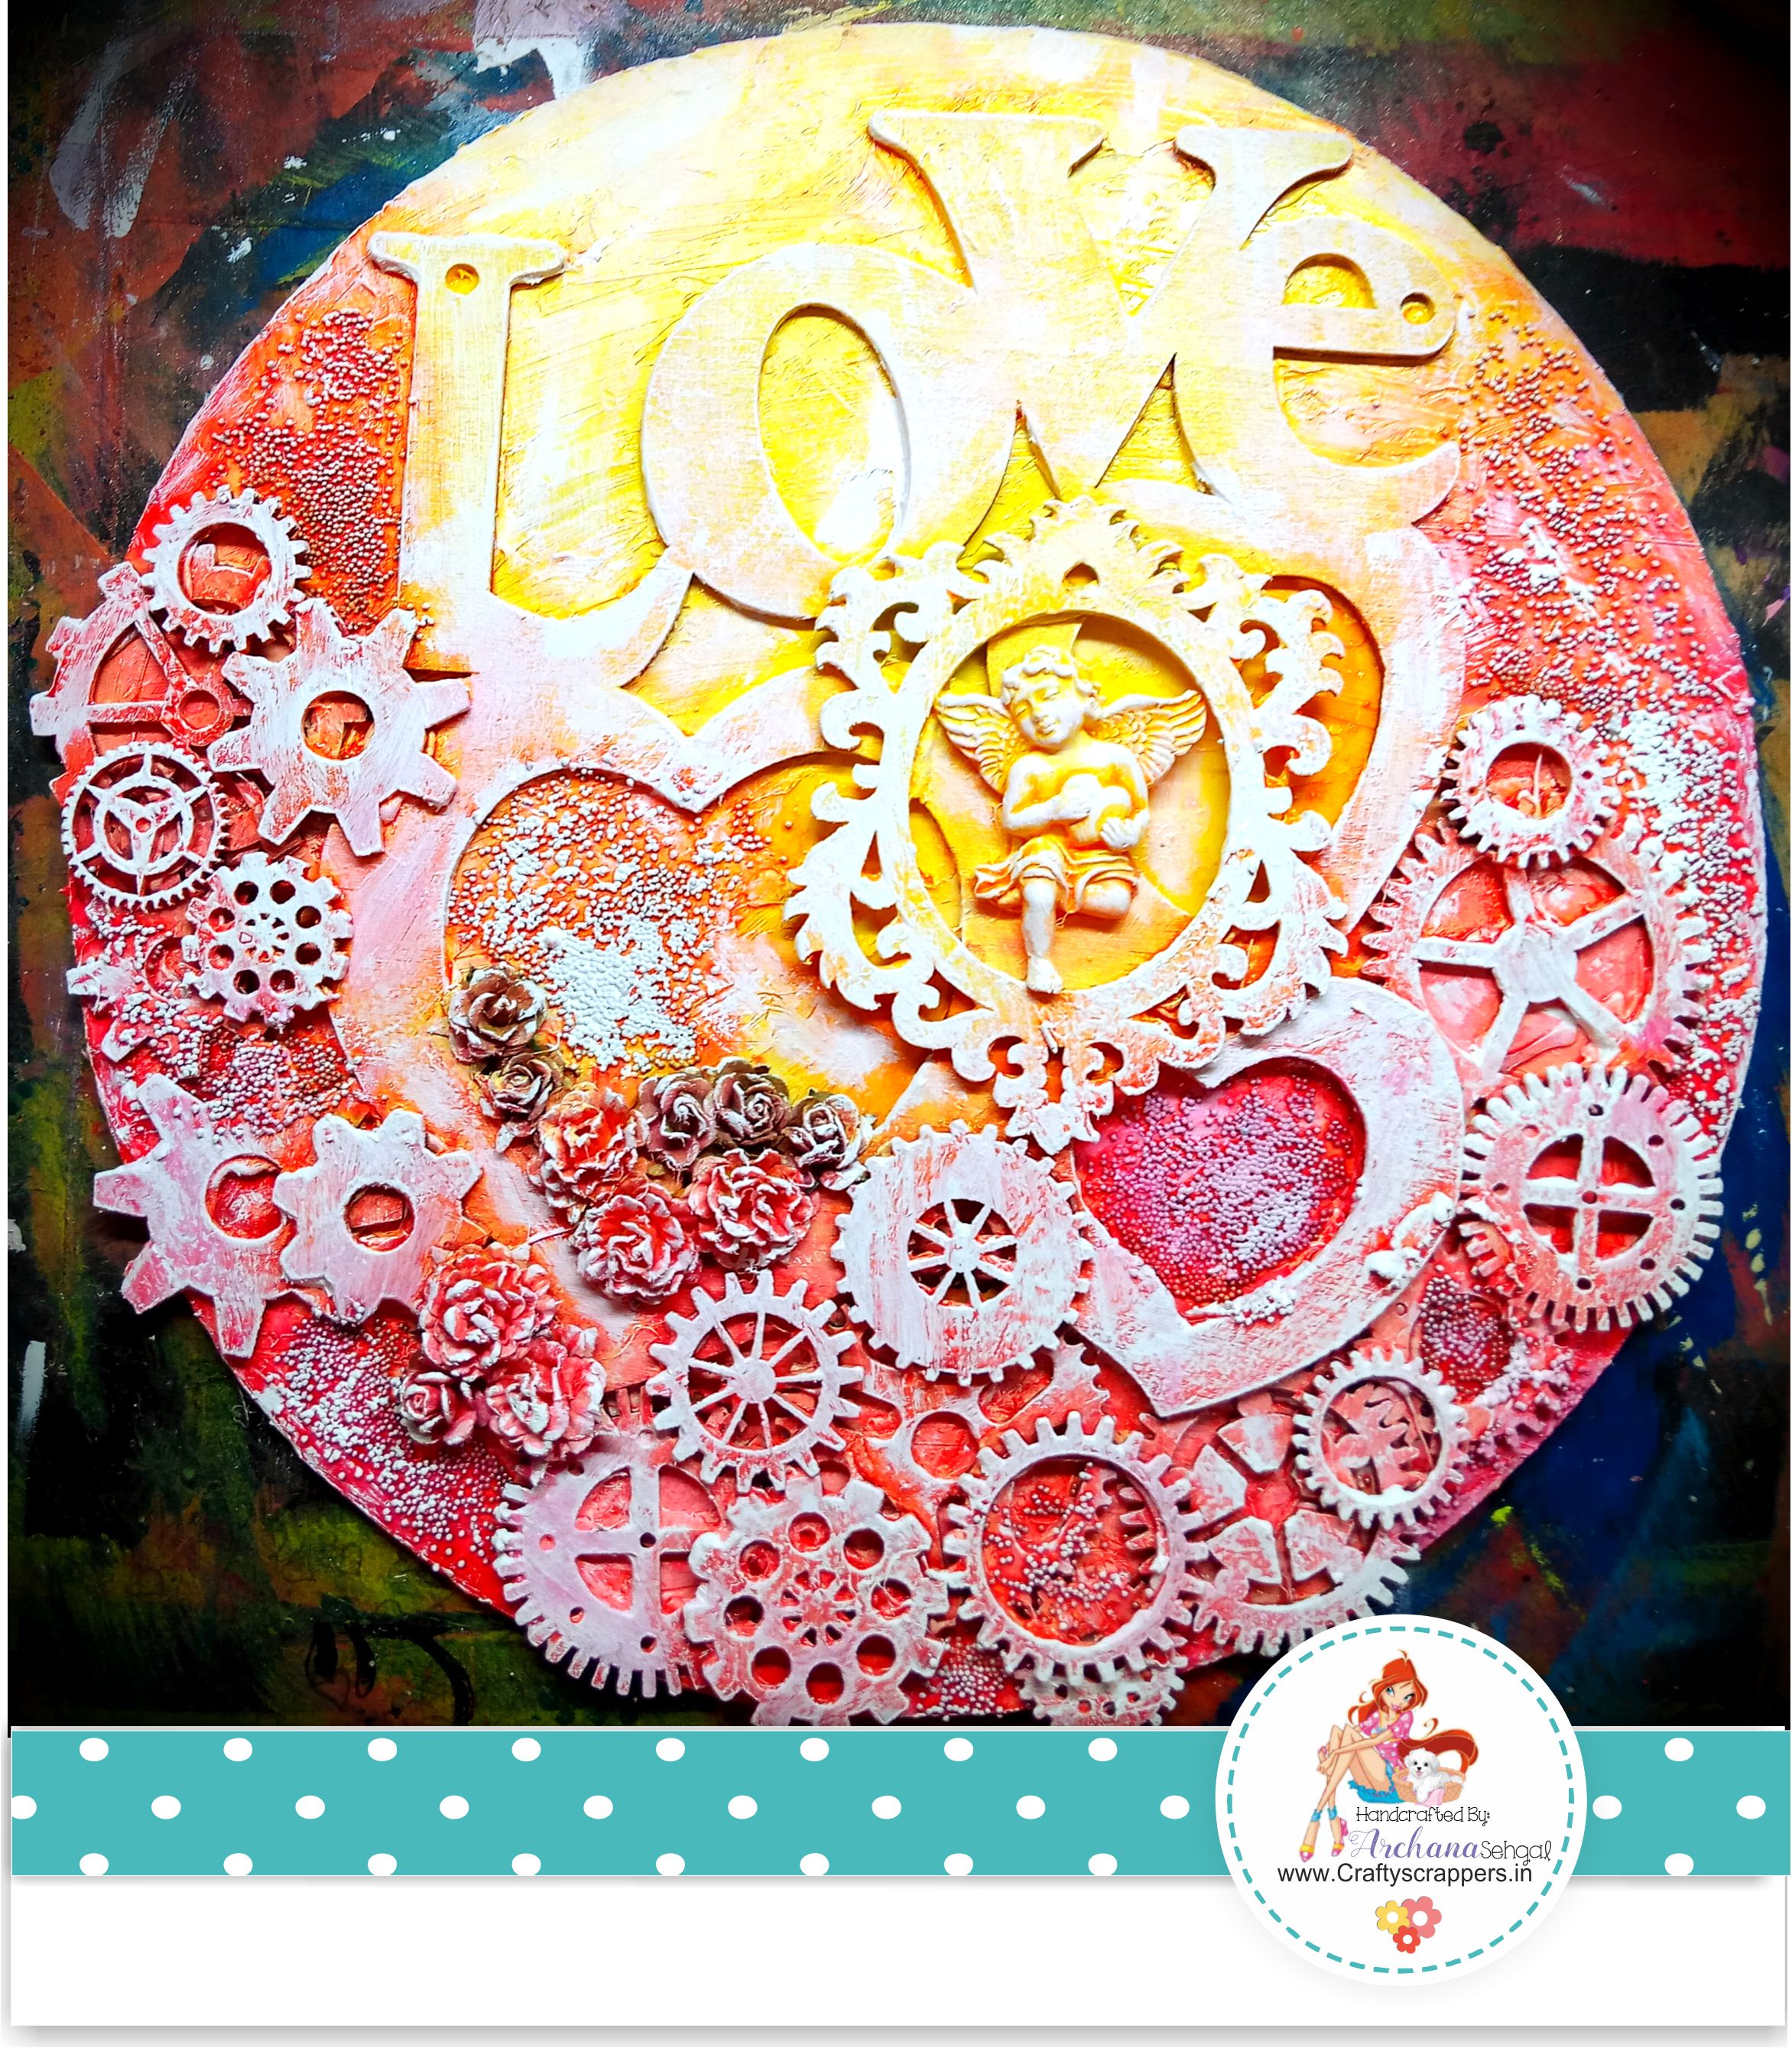

I painted the letter LOVE and cupid using Craftyscrappers (pearl finish) SHIMMER PAINTS– Dreamy Daffodils and (gold touch)SHIMMER PAINTS- Tasty Cranberries and used black paint to give depth to the project.
HERE’S A CLOSER LOOK AT THE SHIMMER PAINTS AND THEIR EFFECT:
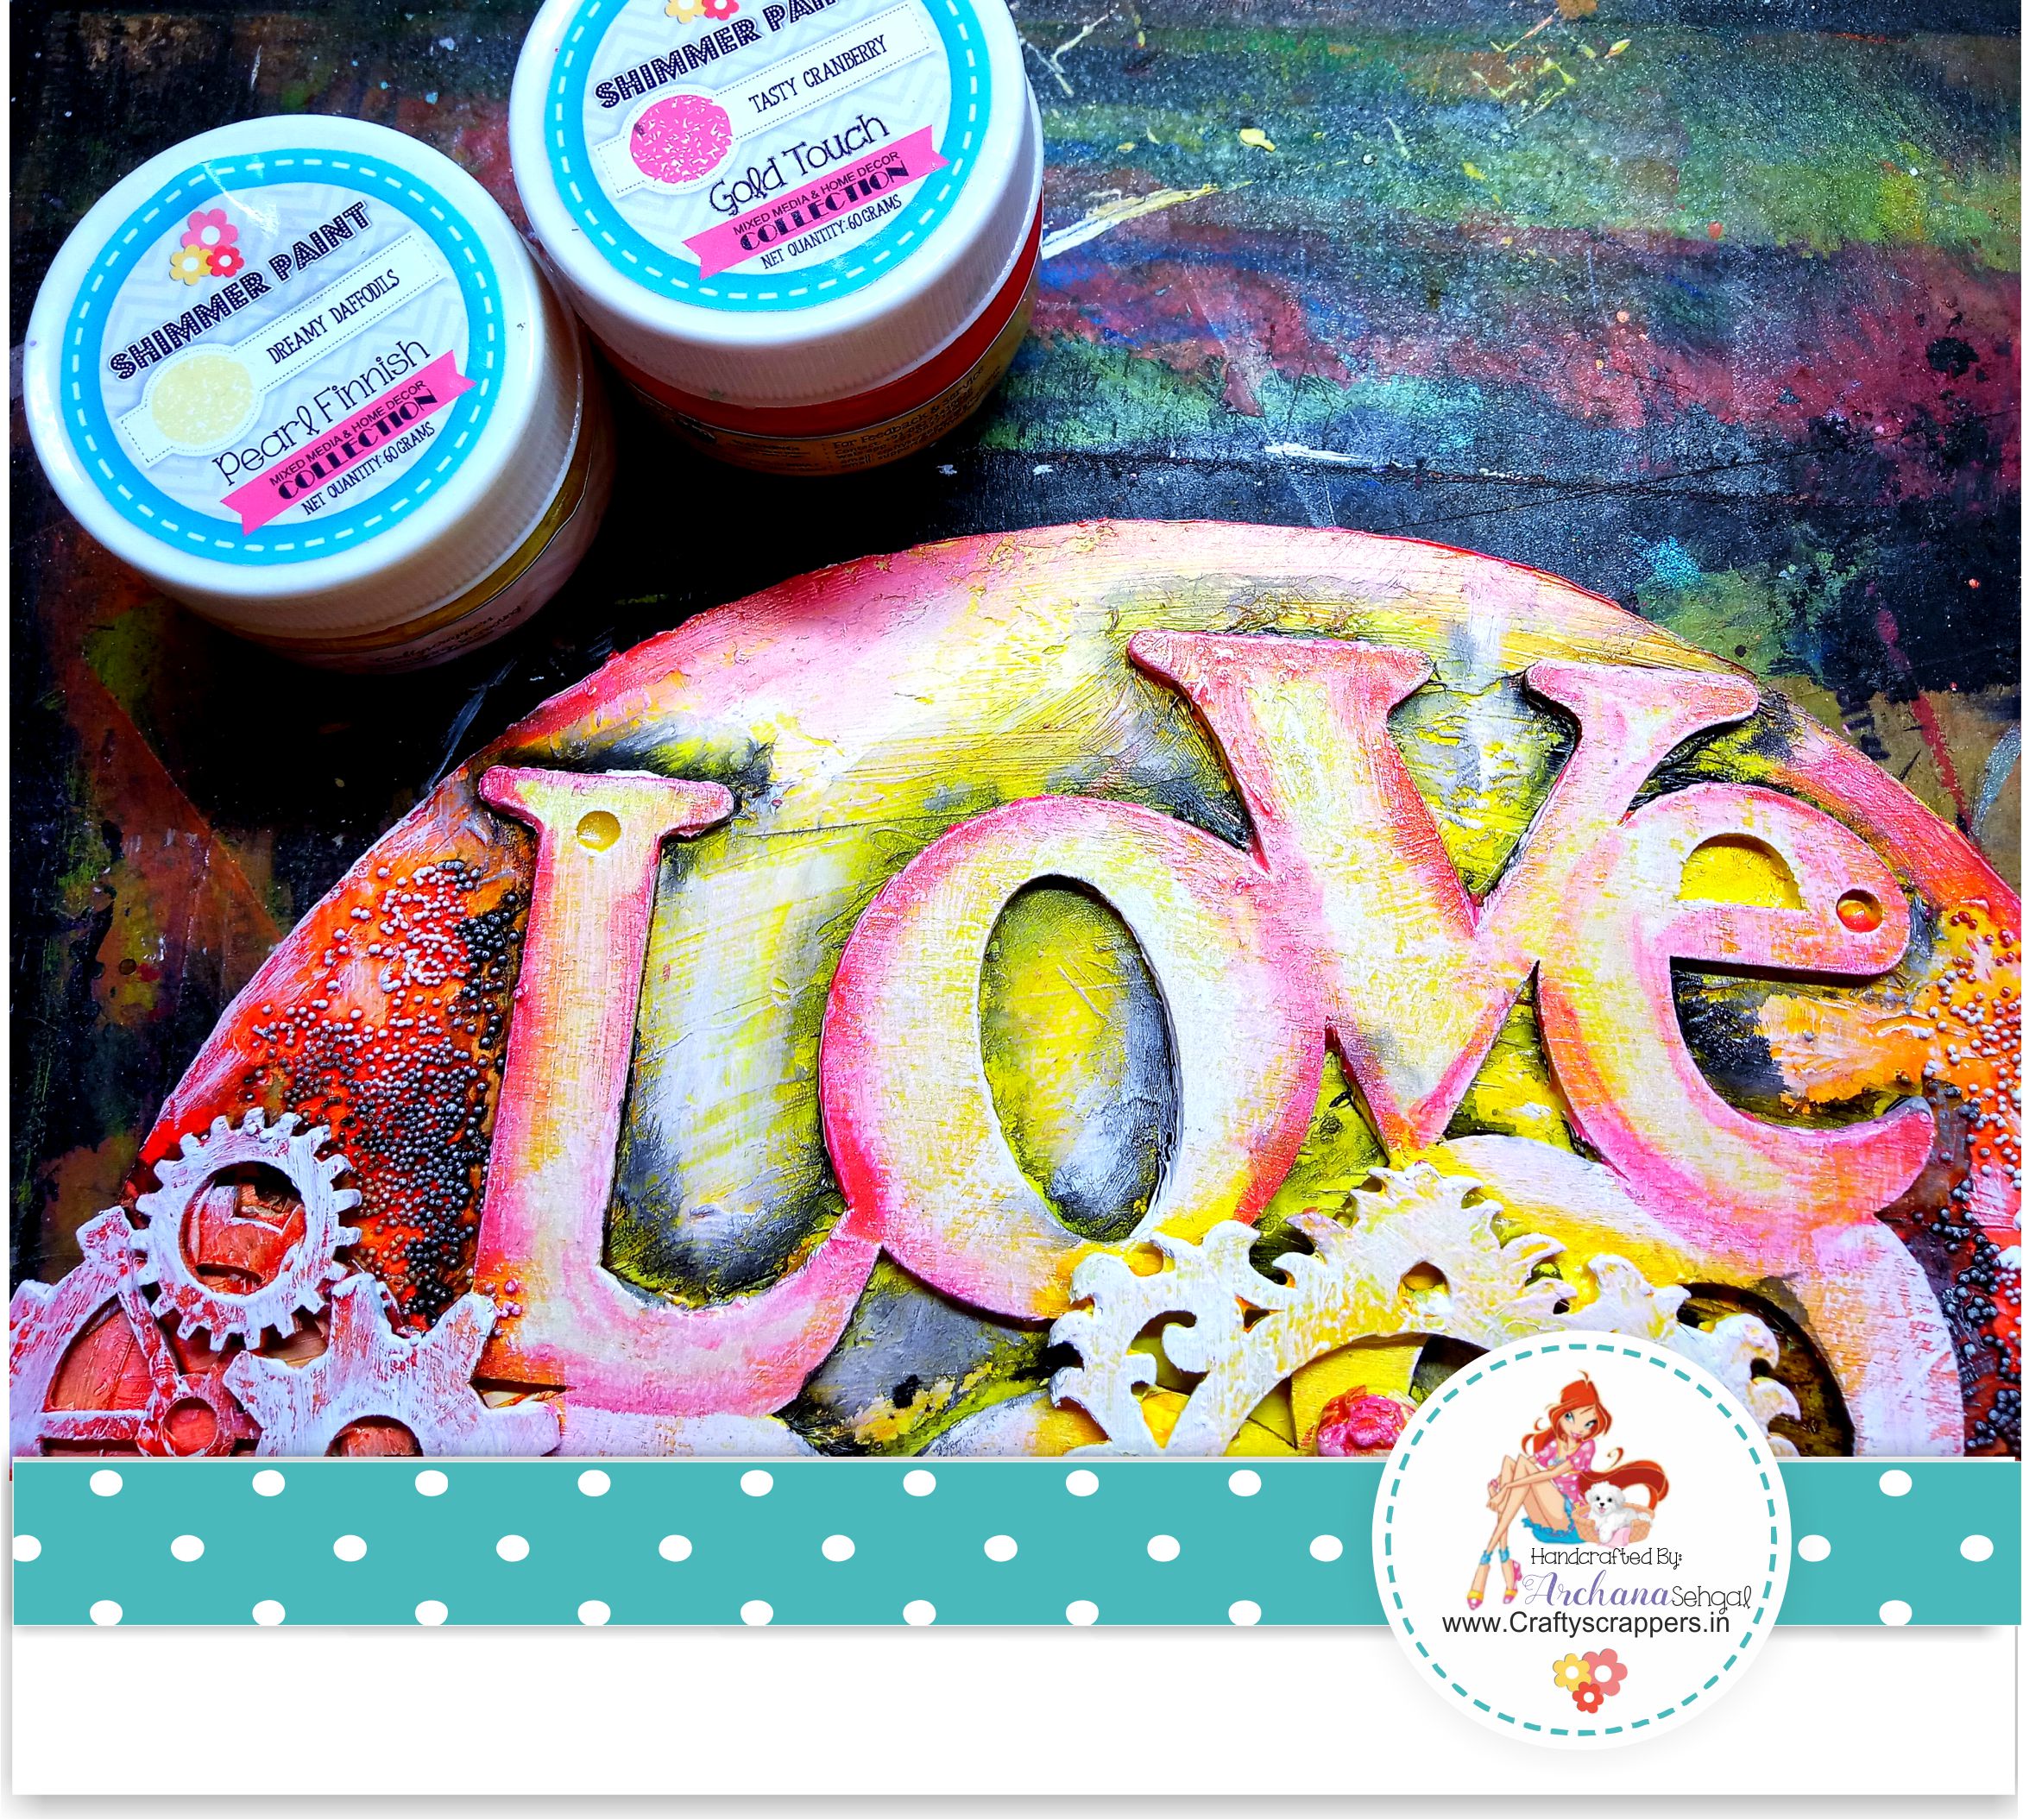

Added pearls and painted them using Craftyscrappers (gold touch) shimmer paint-
“ Tasty cranberries” , also splattered this color a bit, and voila!!
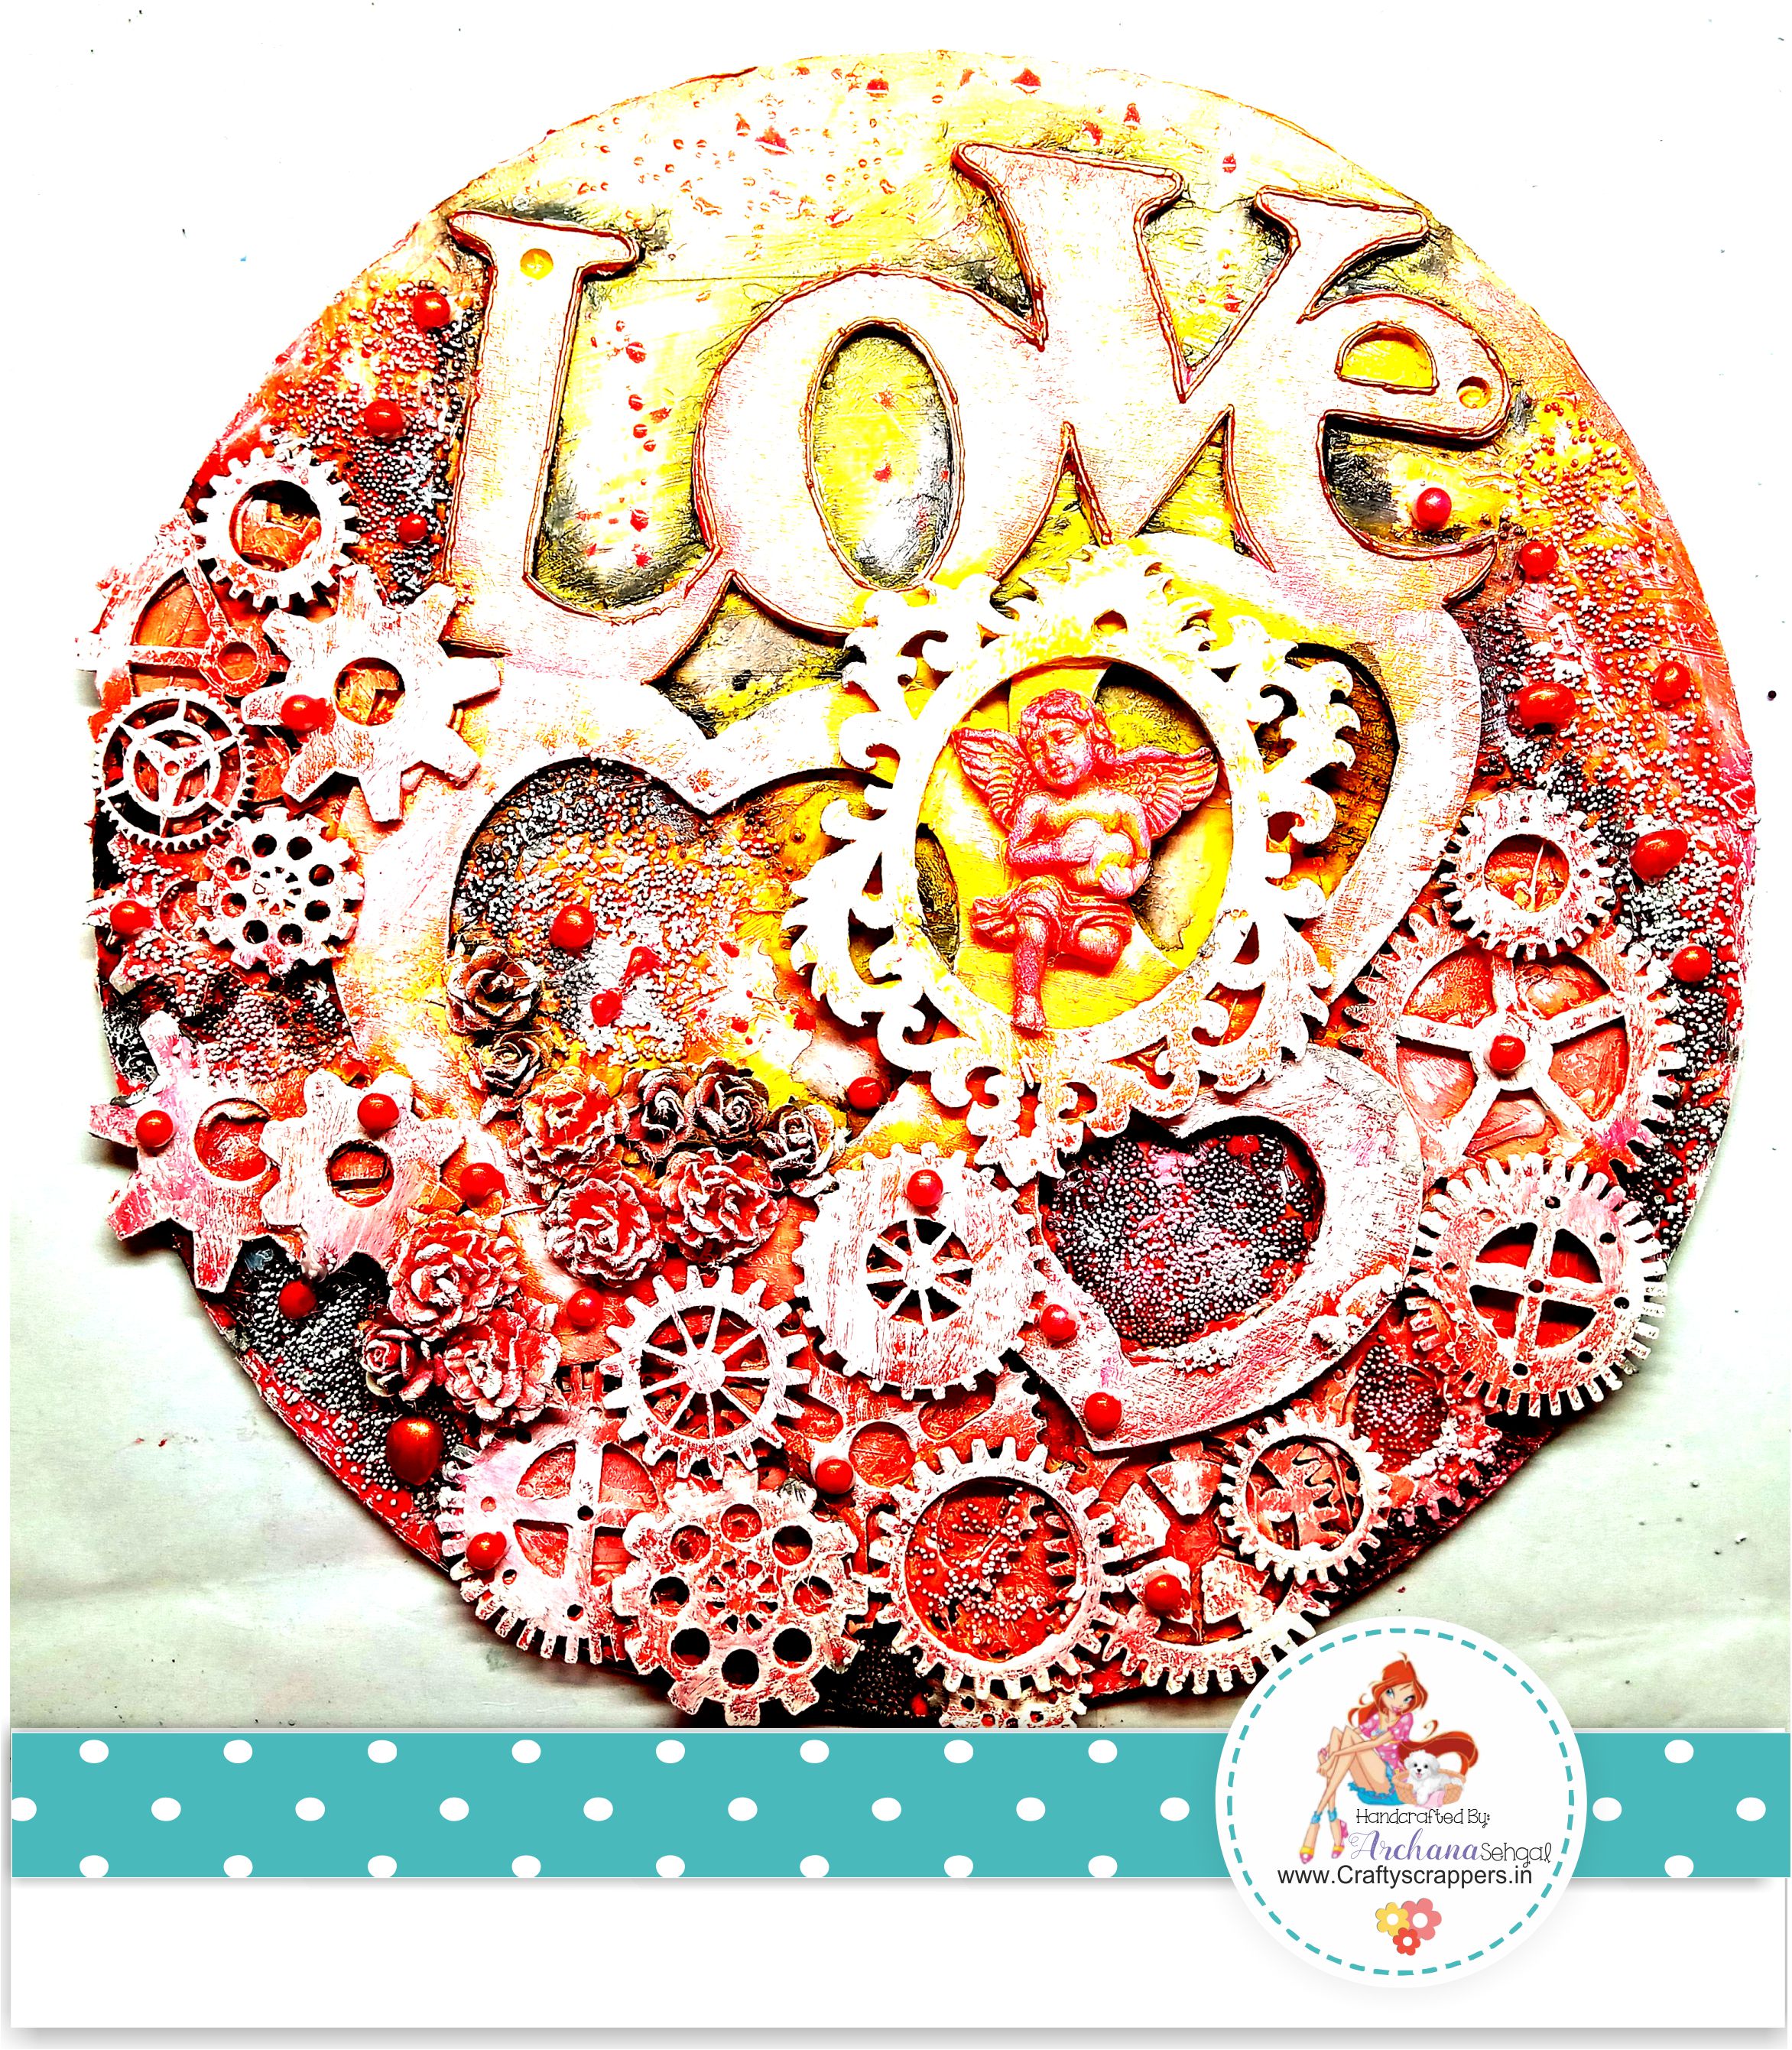
this is final & glorious look of the finished Project.
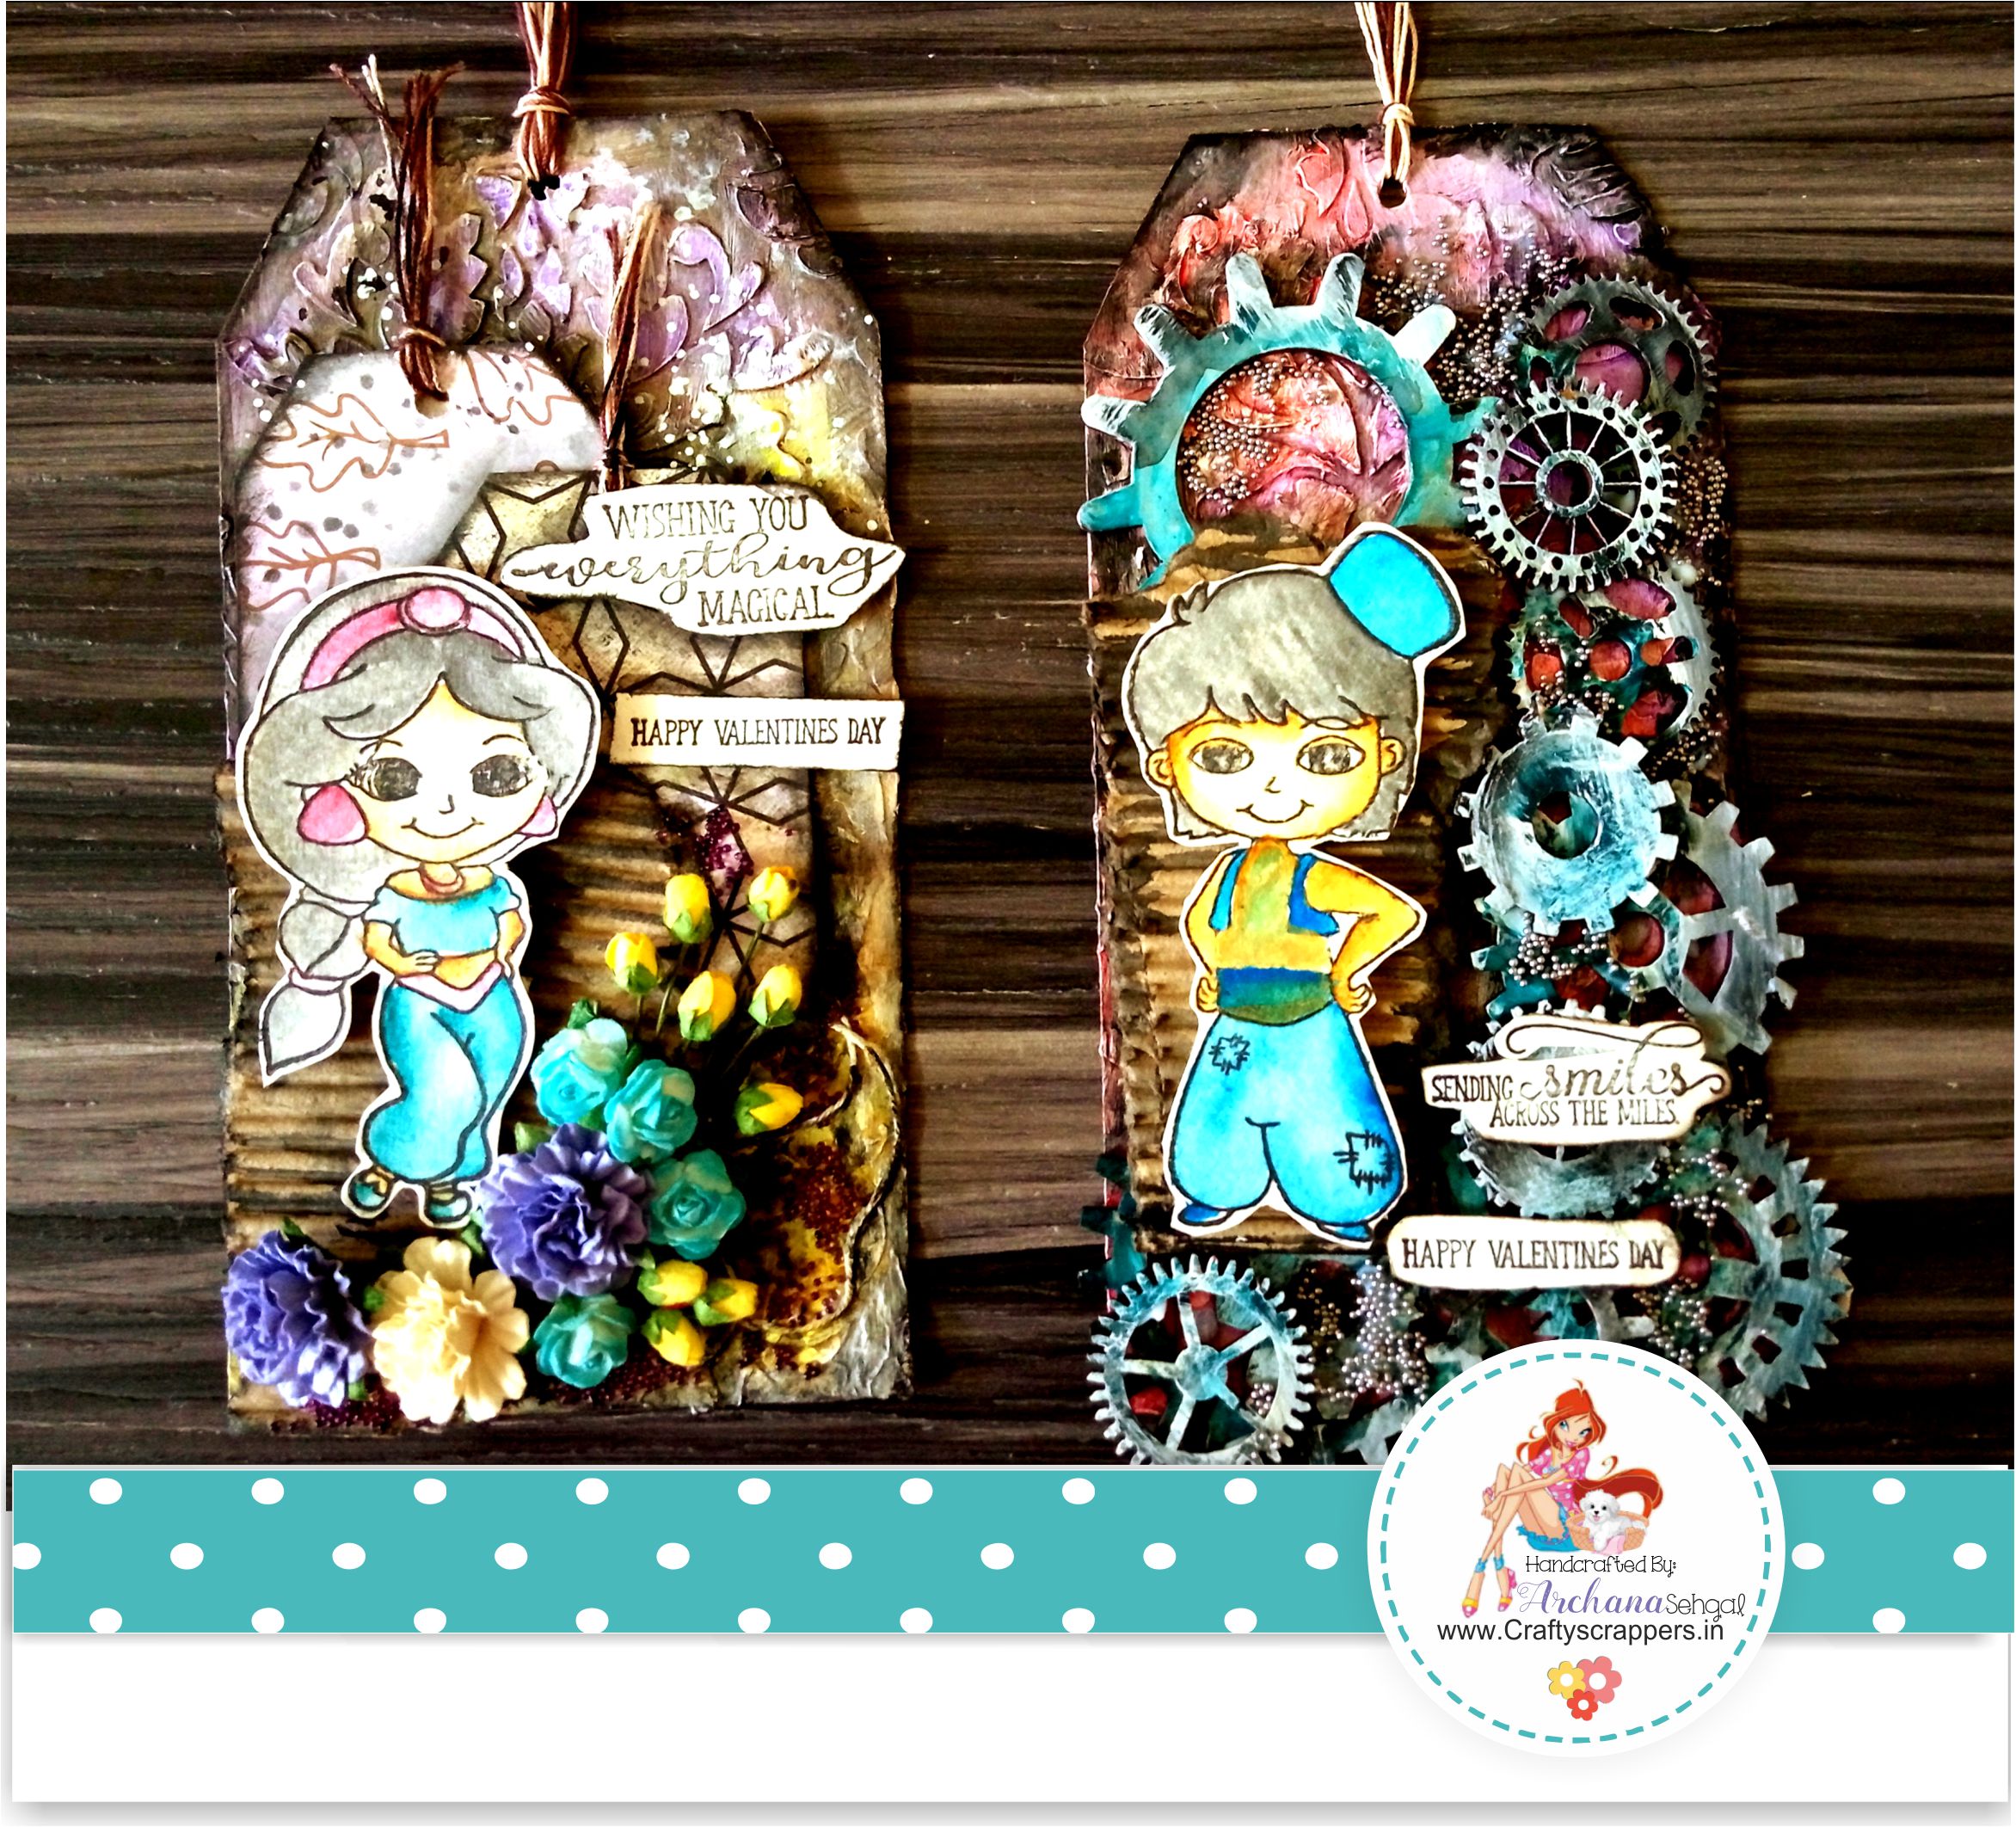
PROJECT#2: Mixed Media TAGS
A BRIEF TUTORIAL
- I took two white cardstock tags 6 inches x 3 inches and using Craftyscrappers Damask stencil & texture paste created texture on both the tags..
This way i made background on both the tags. - Colored 1st tag using Craftyscrappers Shimmer Sprays- juicy watermelon and lushy orchid and 2nd tag using Craftyscrappers Shimmer Sprays- sweet sunshine and lushy orchid, while color is wet tilt both the tag little bit to run the color from texture I created earlier.
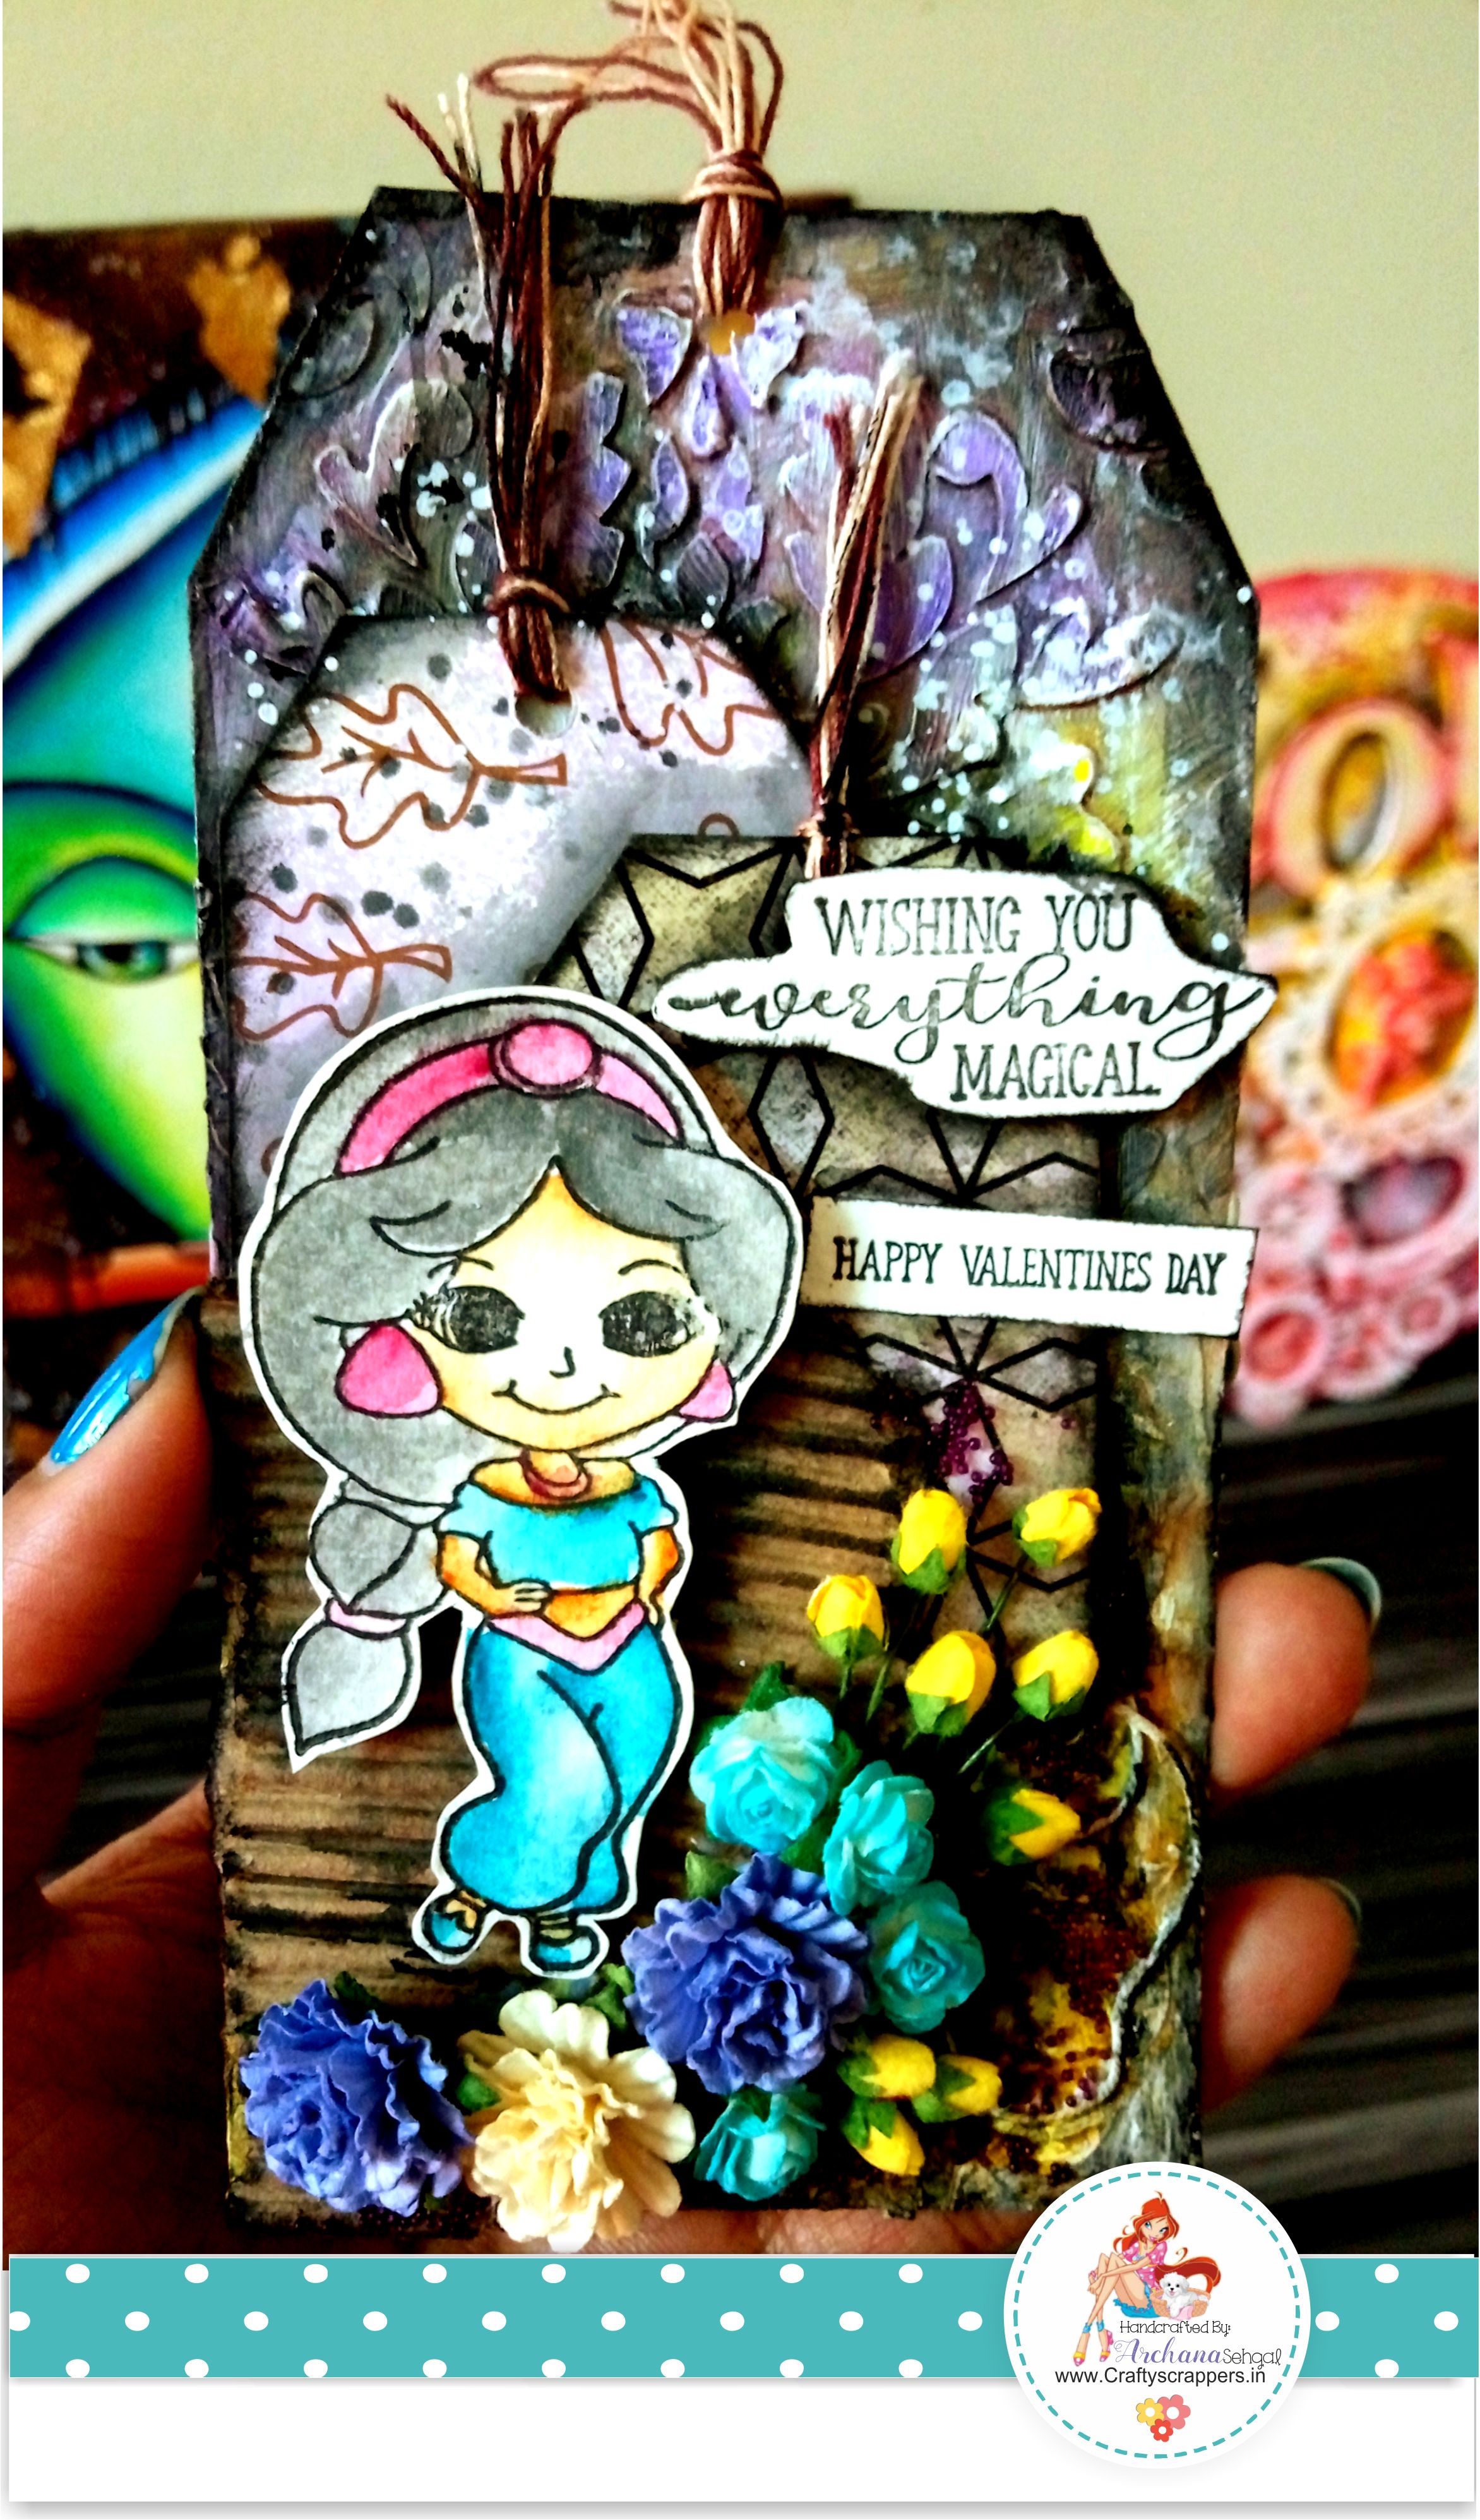
TAG#1
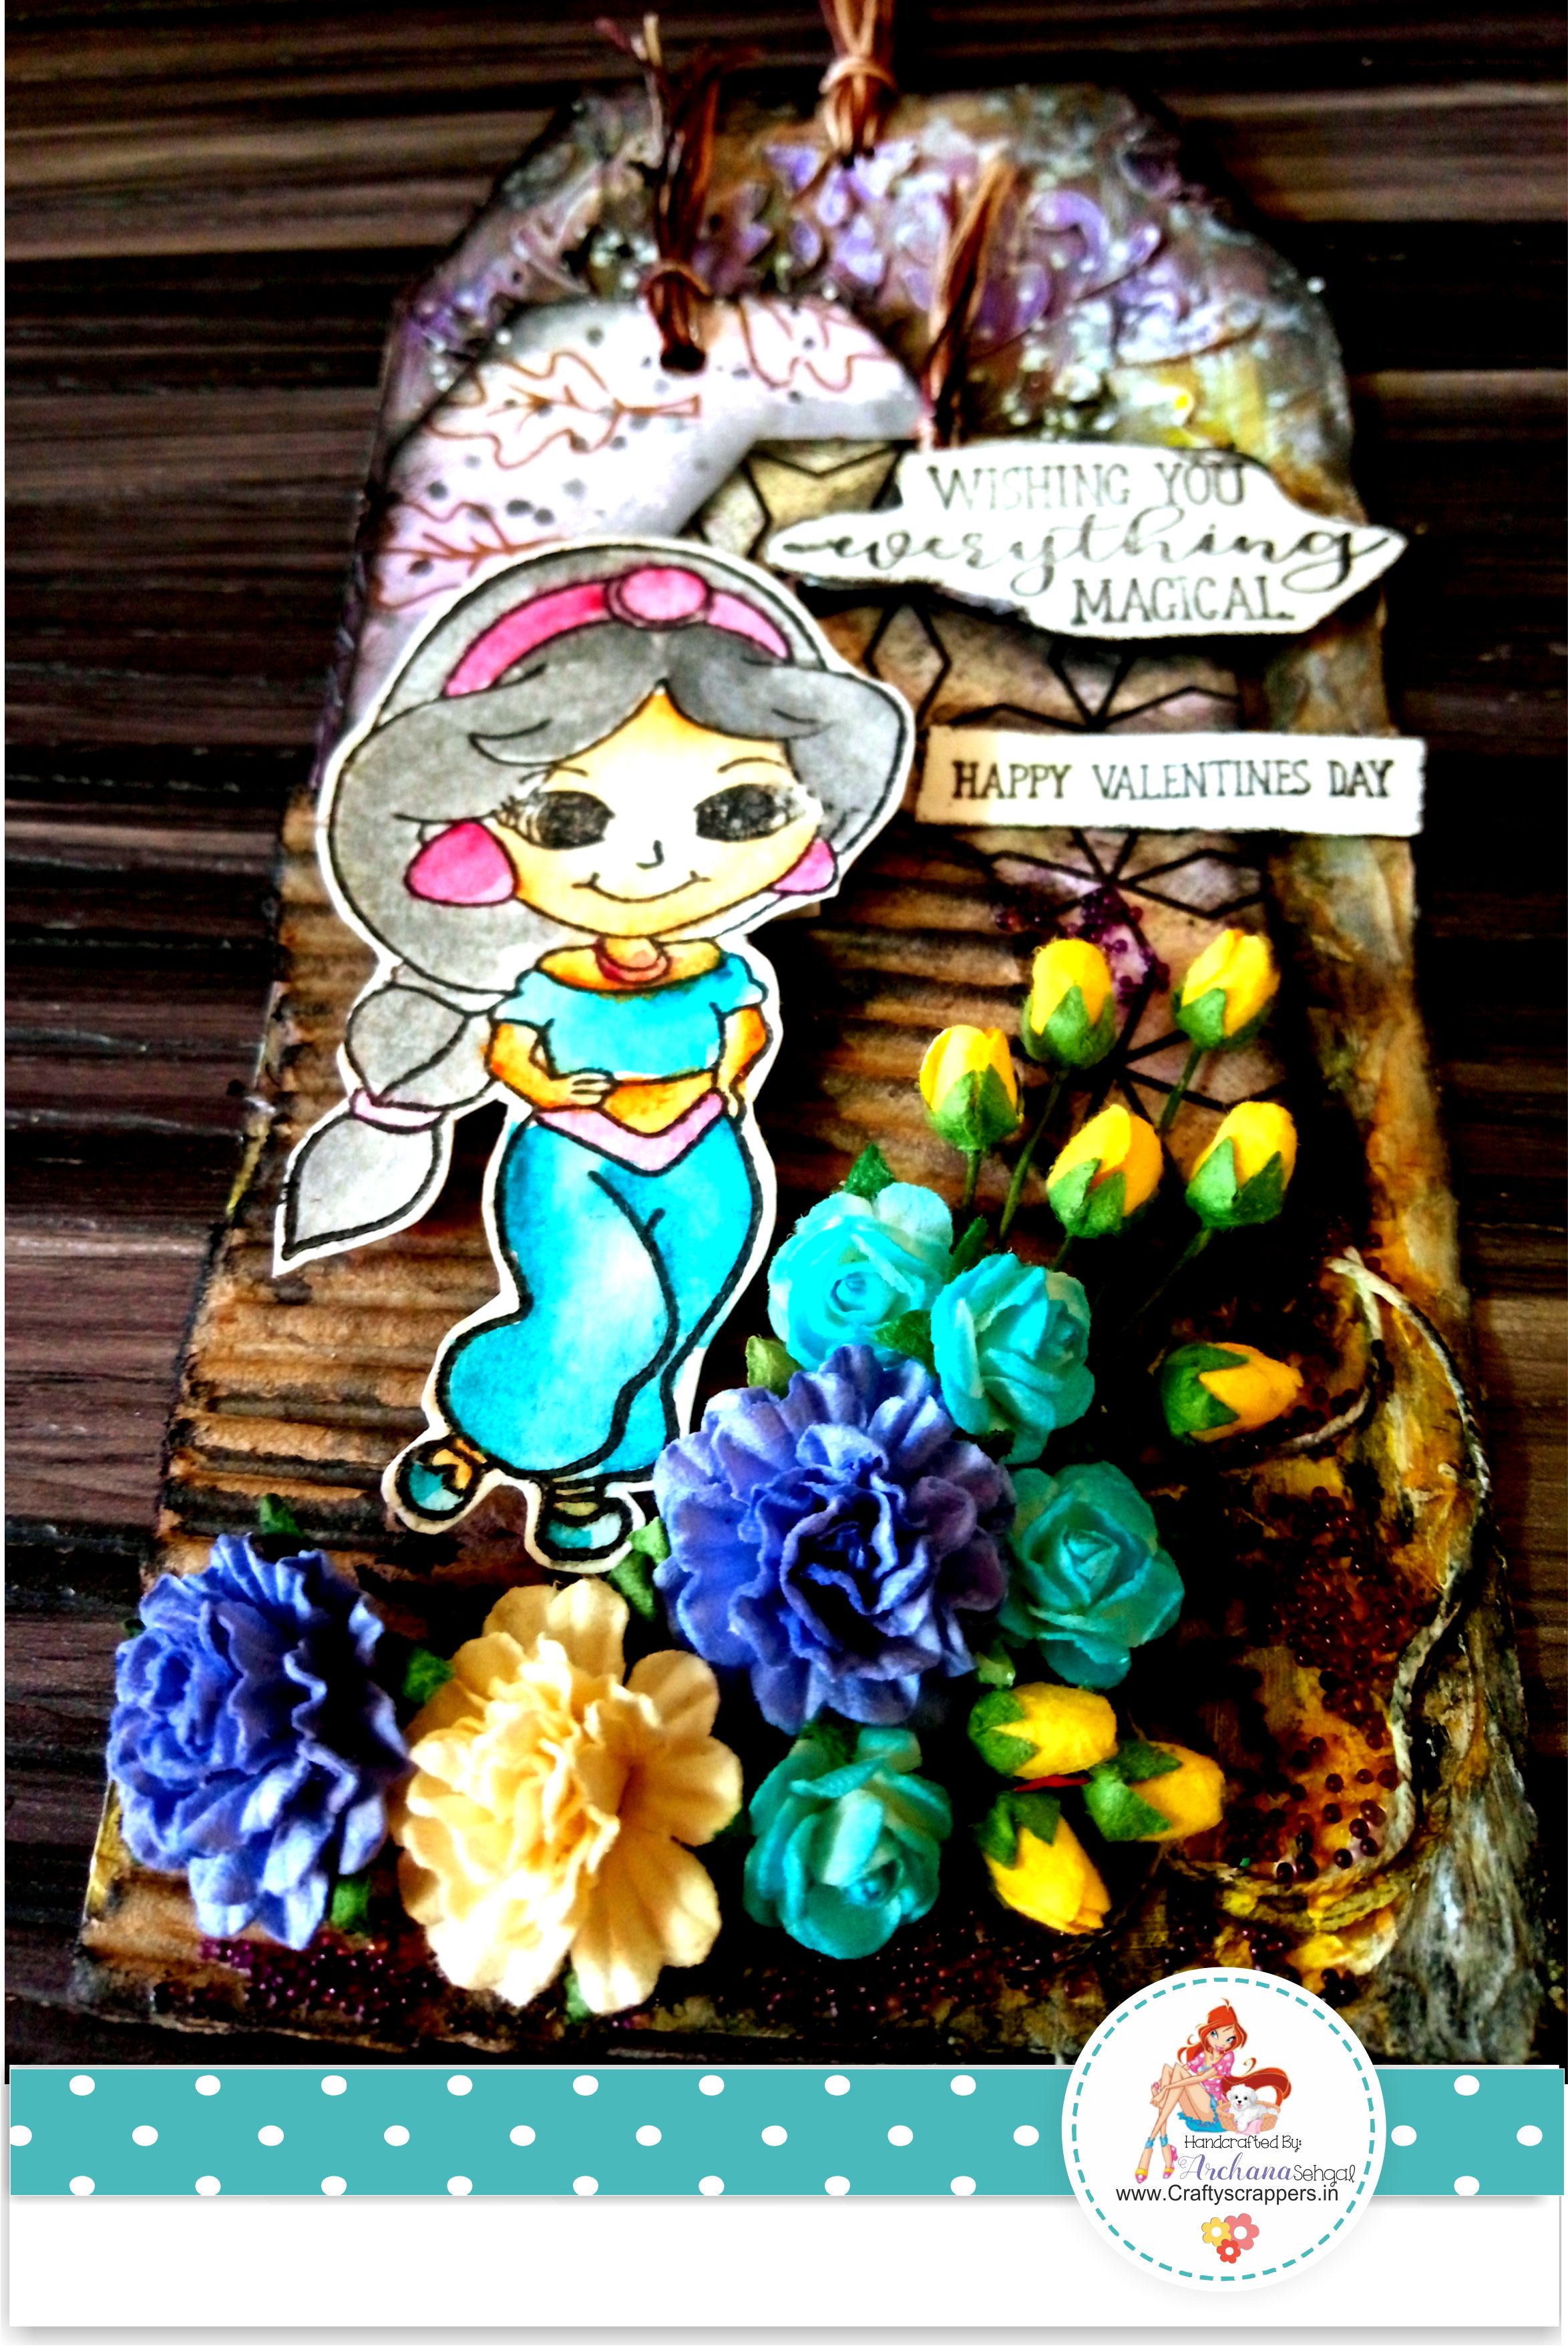
- Moving to 1st tag, i Stamped the image and sentiments from Craftyscrappers Everything magical stamp set and colored them
- I took 2 smaller tags around 2.5 inches x 1 inch and place them randomly.
- I also took corrugated cardboard to adhere behind stamped image,
(you can clearly see this step in the finished tag.) - After fuzzy cutting the image I adhere image on corrugated cardboard using double sided foam tape, and place different size n color paper flowers.
- Once everything dries completely, used black watercolor to gave depth & after placing the sentiment I added maroon micro beads around the flower and distress the edges of tag using black ink pad… here we finished our first tag.
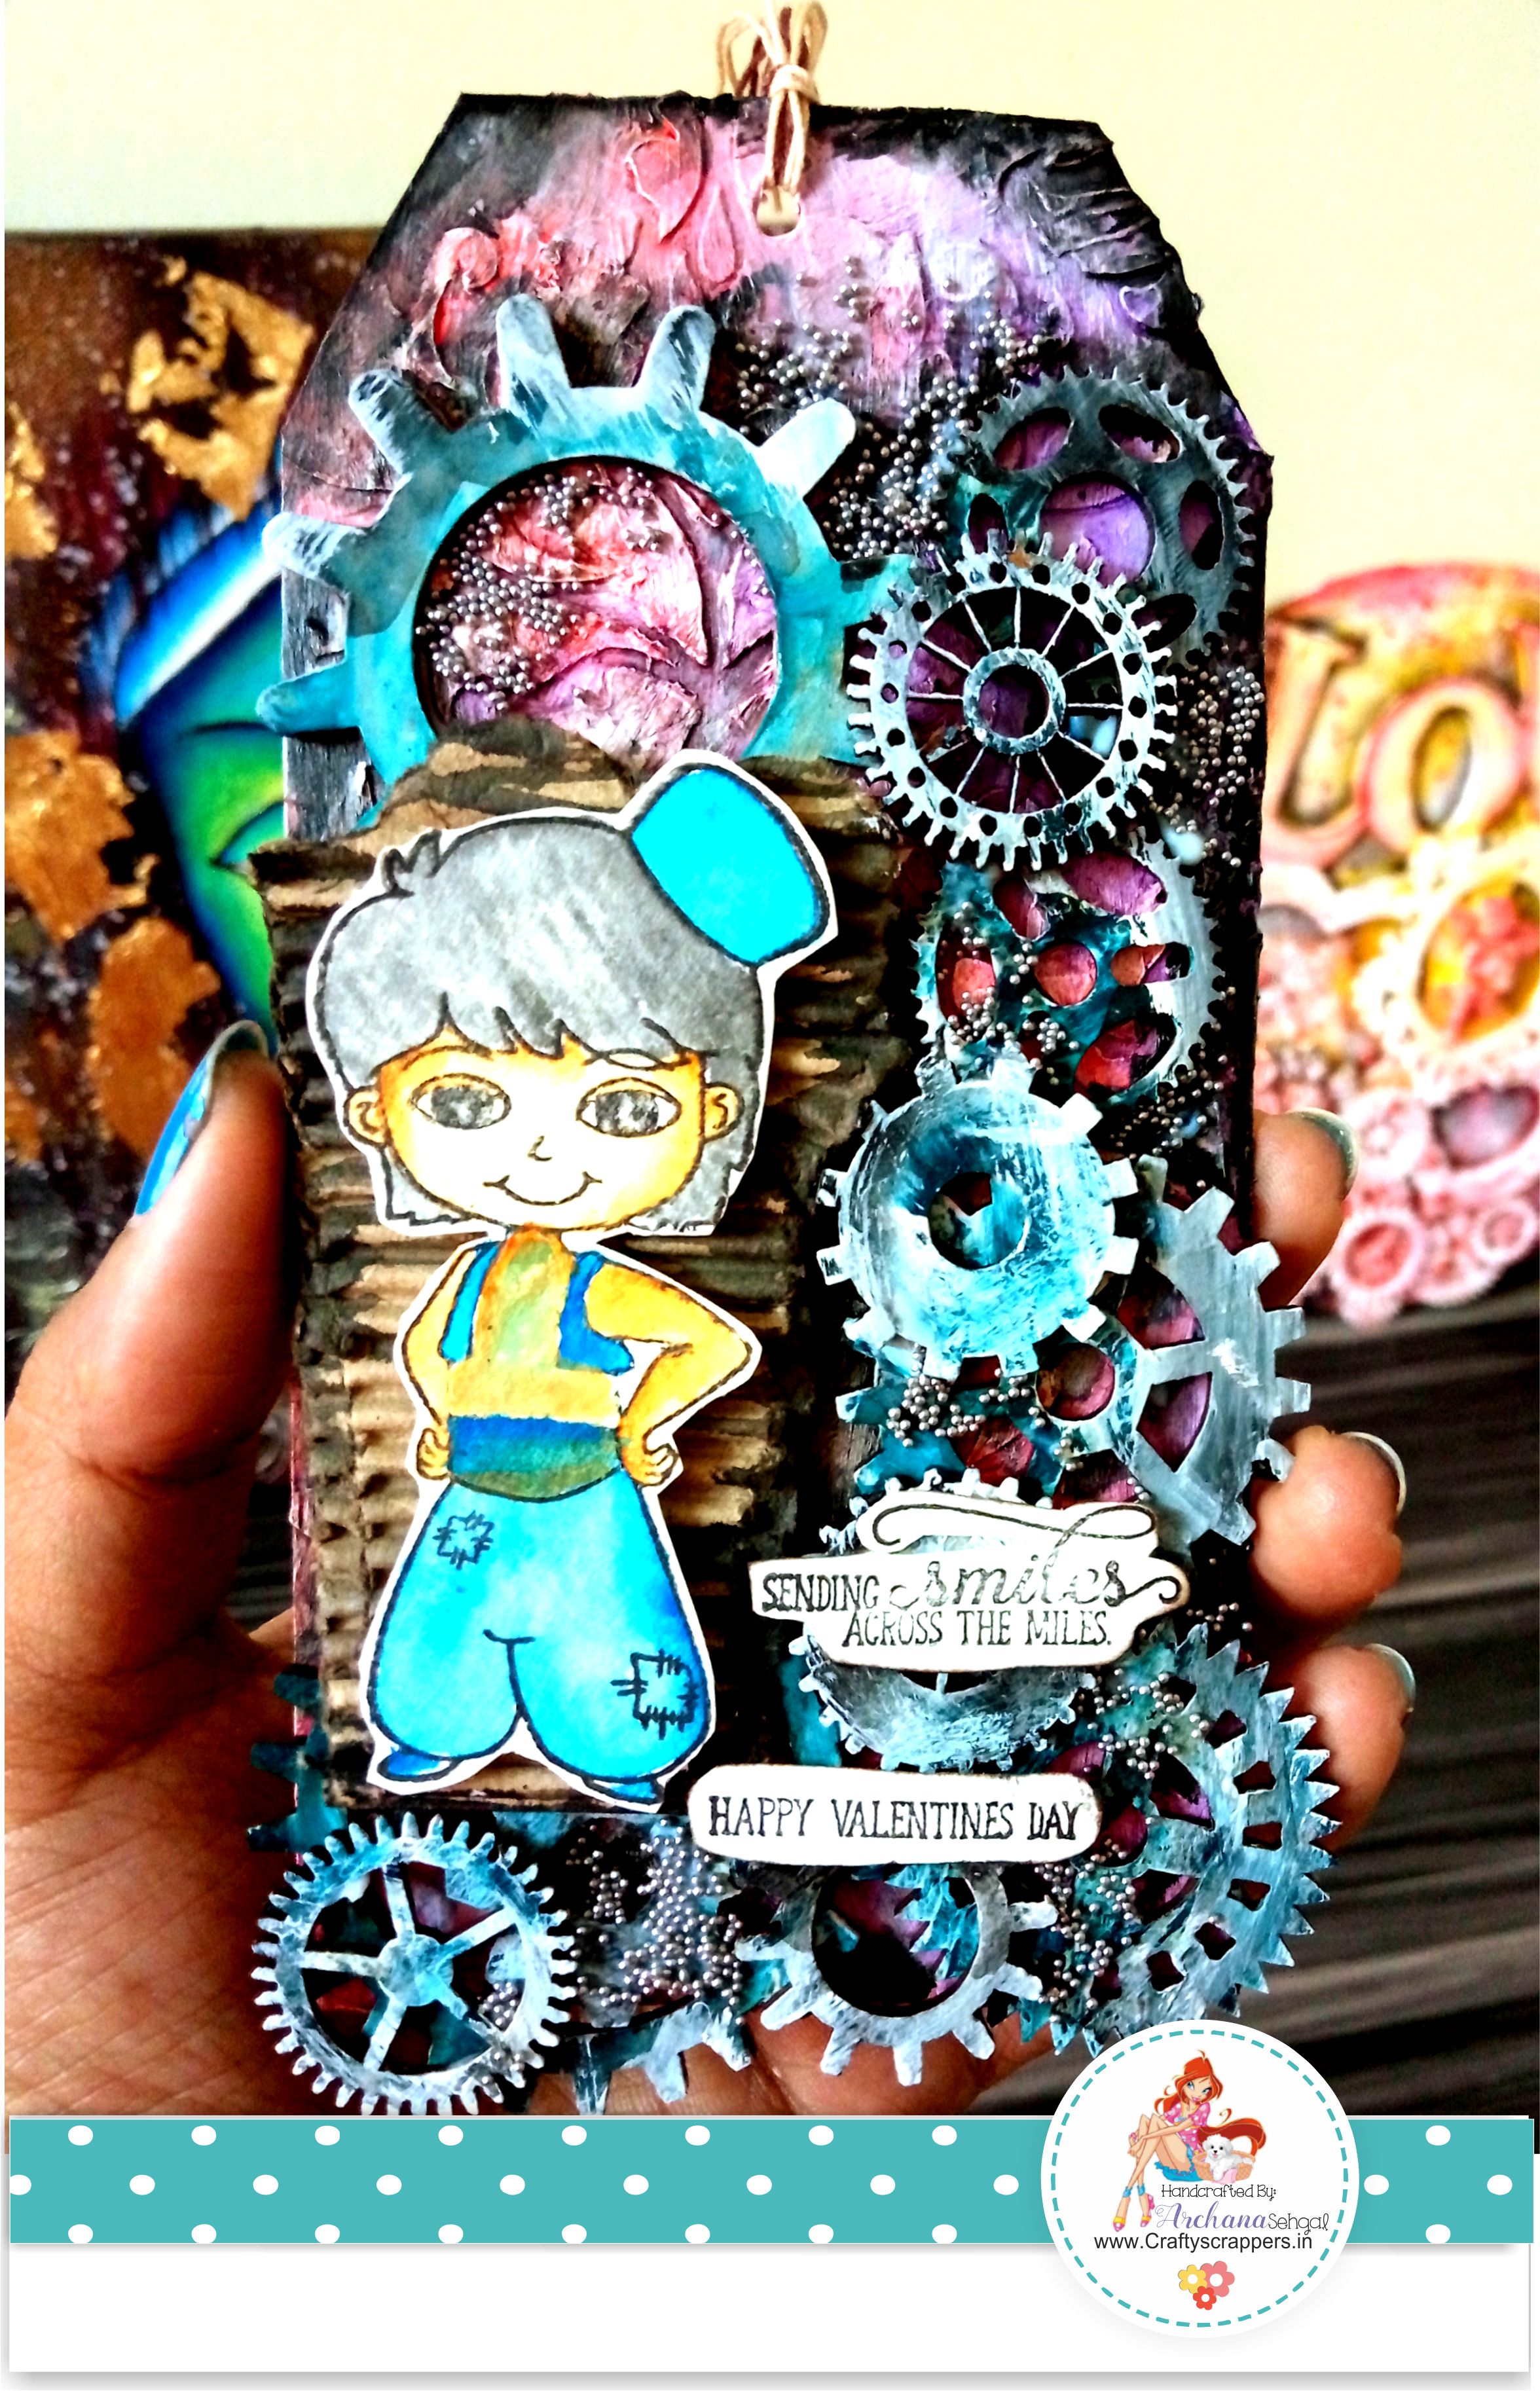
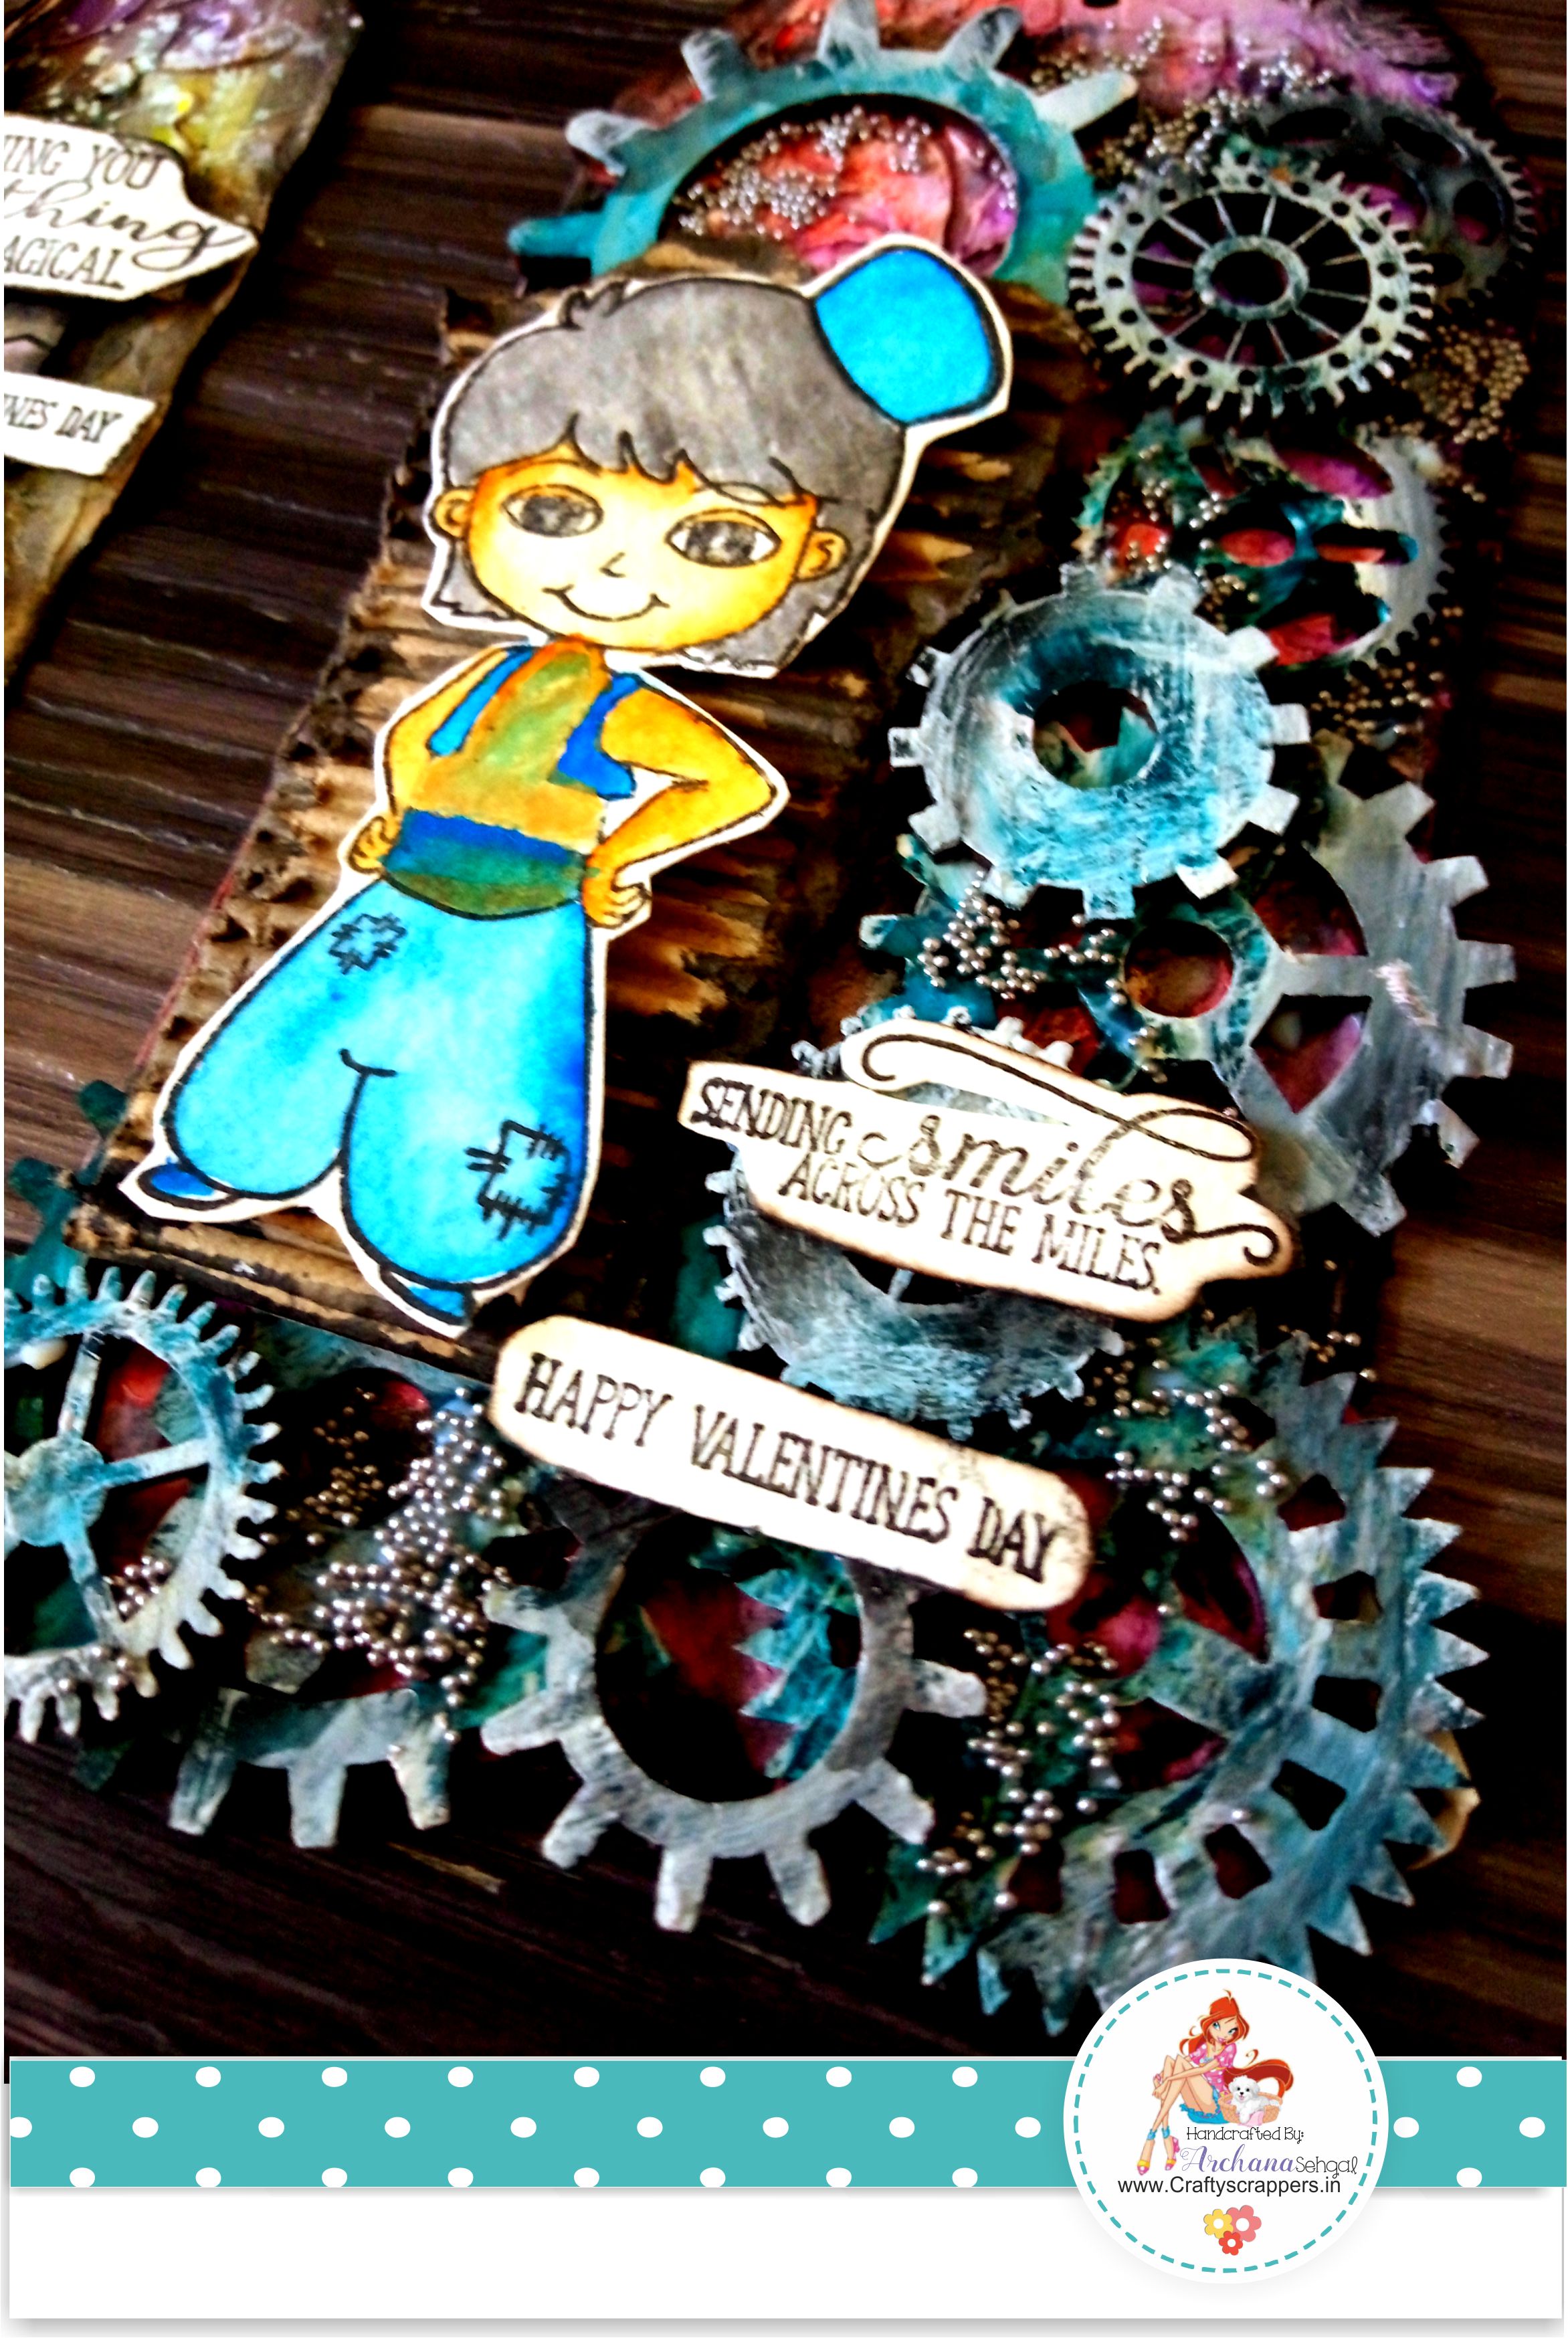
TAG#2
- For 2nd tag I used image from the Everything magical and sentiment from Adventure Awaits stamp set.
- Took gears and colored them using turquoise blue acrylic paint and after it dries highlight them using craftyscrappers chalk paint “Zesty lilac”.
- Placed them randomly to form a composition leaving one side of tag empty for corrugated cardboard.
- I colored the stamped image and distress the edges of corrugated cardboard.
- Place stamped image on corrugated cardboard using double side foam tape.
- Added sentiment and silver micro beads in empty spaces.
- I also distress the edges of tag little bit using black watercolor and this is how I finish 2nd tag as well.
SOME CLOSE UPS:
Hope you guys have enjoyed both the MIXED MEDIA tutorials,
I will be back soon with some new inspirational project and art techniques.
Do leave some love and feedback below and I will be back soon for more inspirations!
Don’t forget to join in our craft challenges,(details at the beginning of the post!)
You can participate via mr.linky (at the end of the challenge post)or via facebook,Instagram and even via email.
(While sharing your creation post over the social media, ie
Facebook/twitter/instagram
please use #Craftyscrappers challenge20 to qualify for submission,
failing to do so, the entry would be disqualified.)
Have a nice day & Happy crafting!
