Hello crafty people!
I hope you all are doing well.
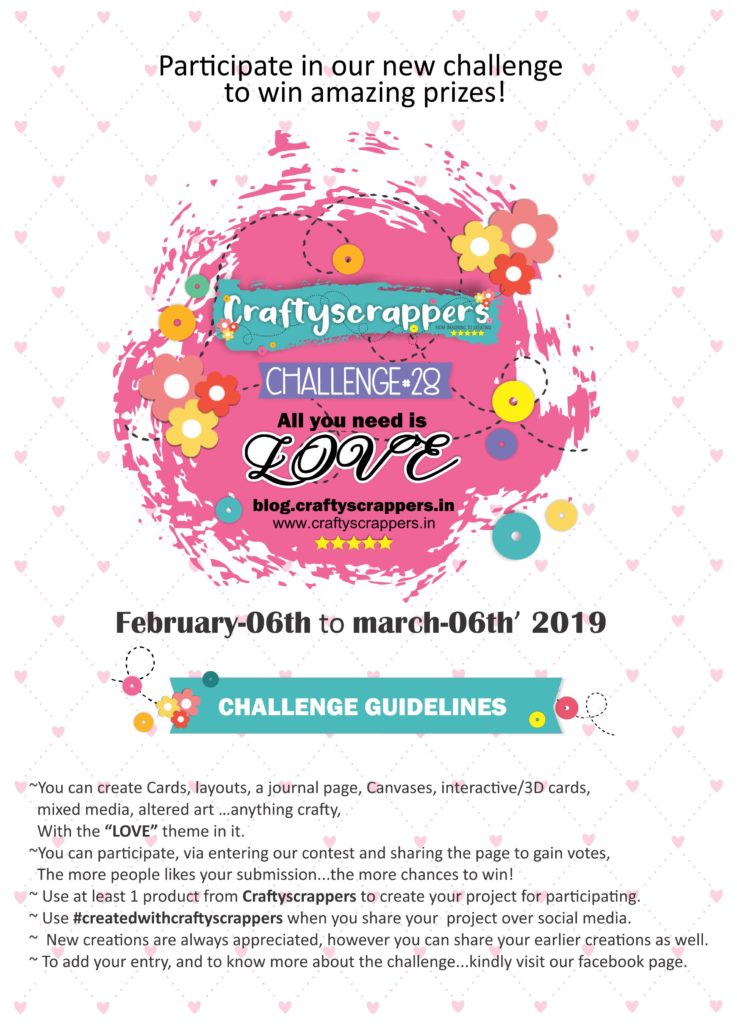
This is Meenakshi, Creative Designer at craftyscrappers and Today I am here to share a cute & fun project with you all.But before I begin with it I want to let you all know about our monthly craft challenge.
check out the challenge here
CHALLENGE #28 ALL YOU NEED IS – LOVE
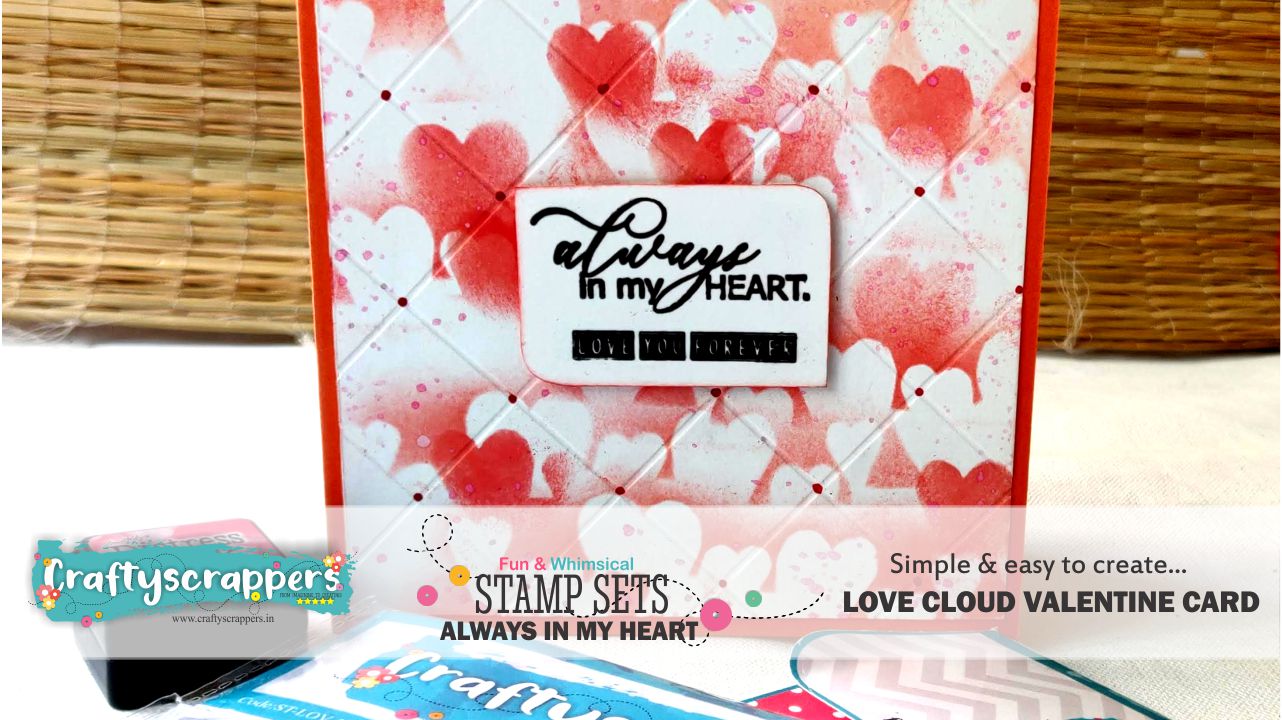
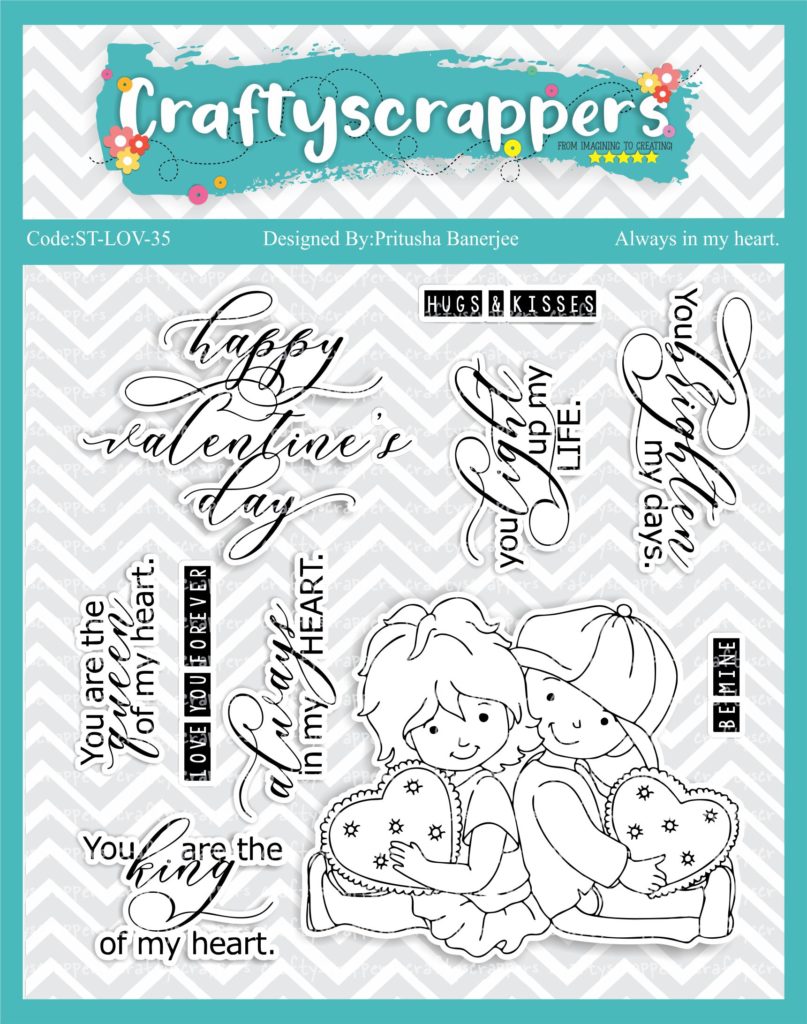
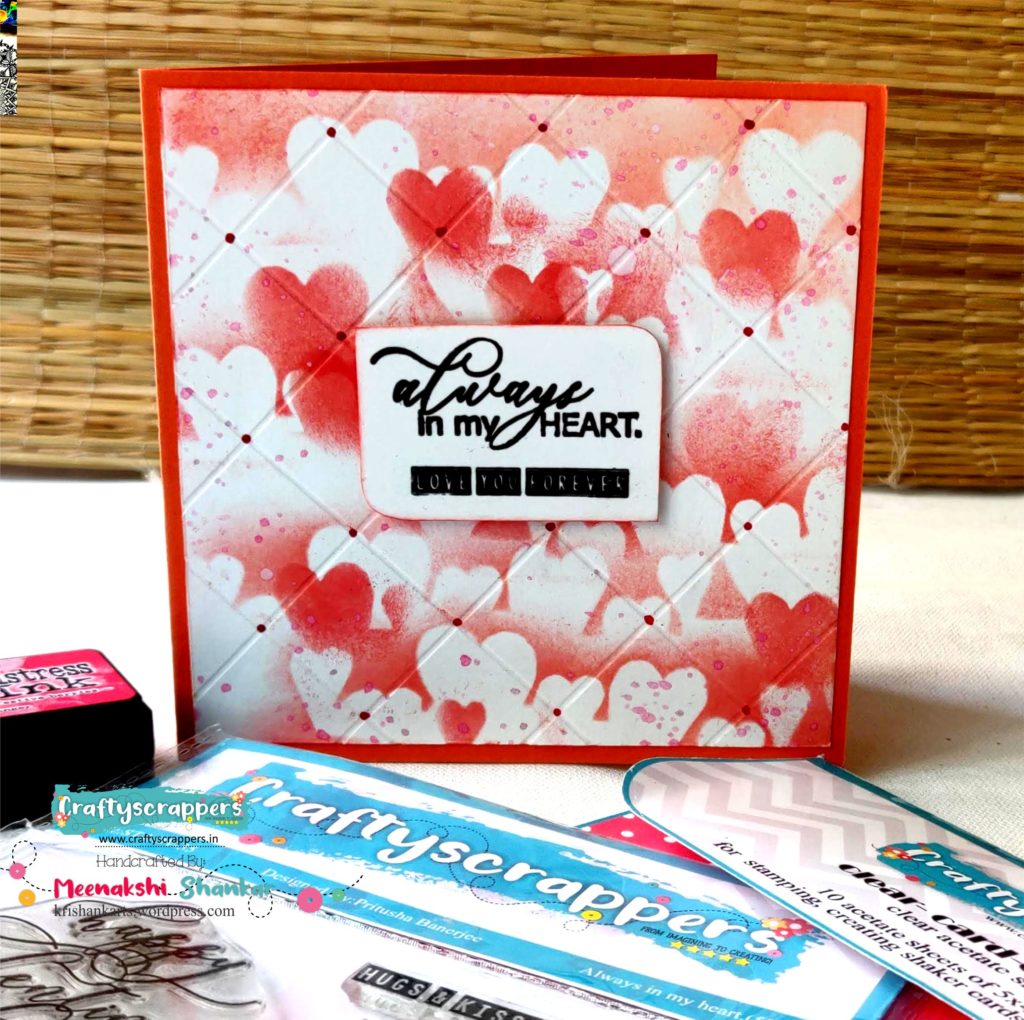
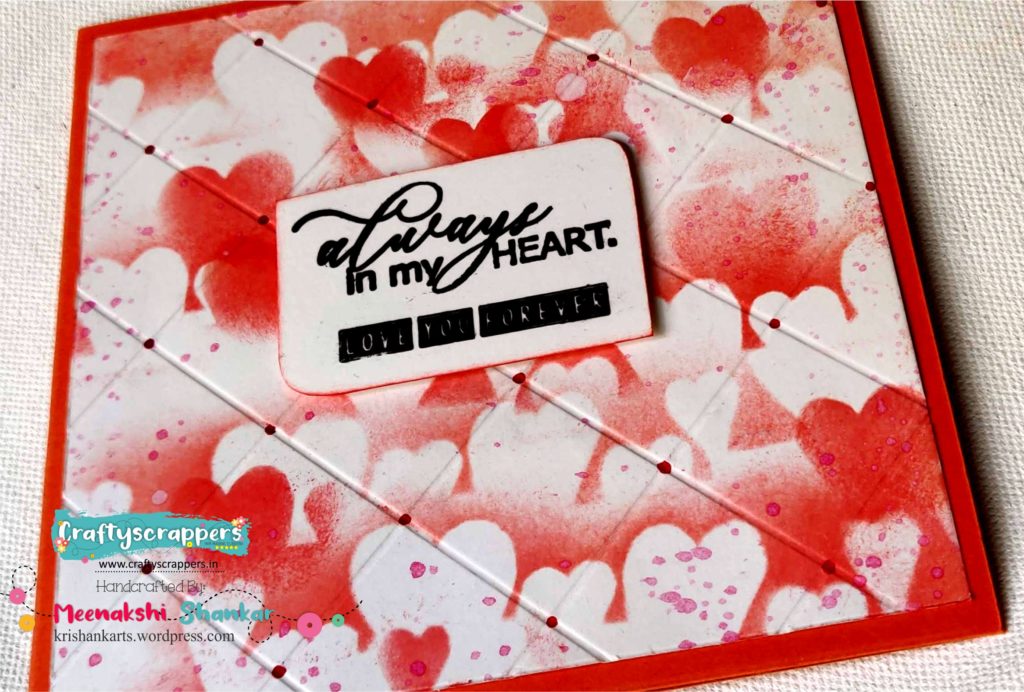
now getting back to the projectTo create the same I have used craftyscrappers stamps ALWAYS IN MY HEART
And here’s what I created with this stamp set.
A BRIEF TUTORIAL
1. Take a white Card stock measuring 5″*5″ as the card base. Next take a white CS measuring 4.75″*4.75″ which will be working panel for the card. Make a small cut out of desired shape separately for the sentiment.
2. Using the Clear card element from Craftyscrappers create the hearts cut out which shall be used in the project as a stencil for creating the background. Also keep the negative of the cut out which will be used for negative stenciling.
3. Use distress ink of your choice (I’ve used Festive Berries) to create the background. Place the clear card element as desired and adhere it with a masking tape to secure its position. Use a sponge dauber and create the stenciled background.
4. Use the negative of the cut out and place it the desired area (white spaces) and move the ink dauber to create stenciled images which shall seen as opaque images.
5. After creating the background panel, place the panel on the scoreboard such that is diagonal to the board, and make score lines at every inch. On completing one set, rotate the card and repeat the same procedure such that you’ll set diamond shapes getting formed on the background. The background is perfectly ready for the card.
5. Take the small cut out (mentioned in step #1) and distress the edges with the distress ink and stamp the sentiment from the stamp set ‘Always in my Heart’ using Versafine Onyx Black and an acrylic block.
6. Adhere the sentiment cut out to the worked panel using a foam adhesive.
7. Finally adhere the worked panel to coordinating CS card base using a strong adhesive and your card is ready!!!!!
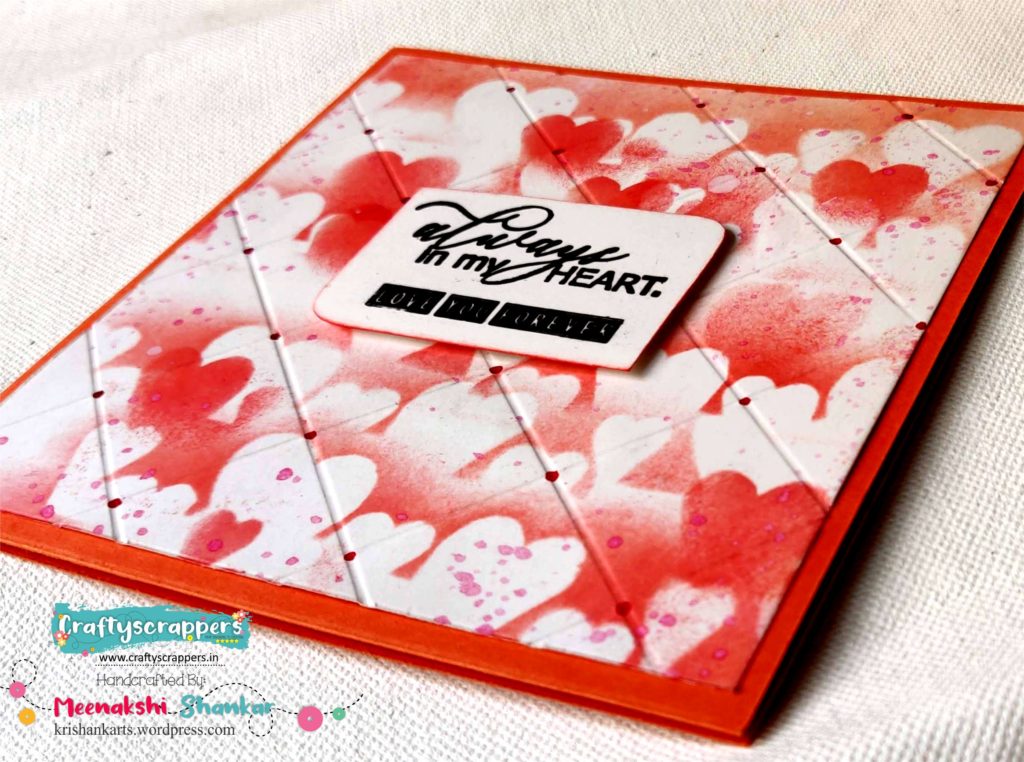
SOME CLOSE-UPS
This is all from my side.
I hope you liked this project.
Do let me know how you like this project in the comments below.Until then Happy Crafting 🙂Don’t forget to join in our craft challenges
(details at the beginning of the post)
You can participate via Facebook, Instagram and even via email.
(While sharing your creation post over the social media, ie
Facebook/twitter/Instagram
please use #Craftyscrapperschallenge28 to qualify for submission,
failing to do so, the entry would be disqualified.)Thanks for stopping by.
Have a crafty day ahead !
Thanks for stopping by.
Have a crafty day ahead !