

Hello friends,
Sweety here, Creative Designer @craftyscrappers with a tutorial for a cute slider card,
that doesn’t need a die or any special equipment.
Craftyscrappers has come out with really cute critters
stamps in the month of June and My favorite among them is the
“HAPPY SUMMER” stamp set
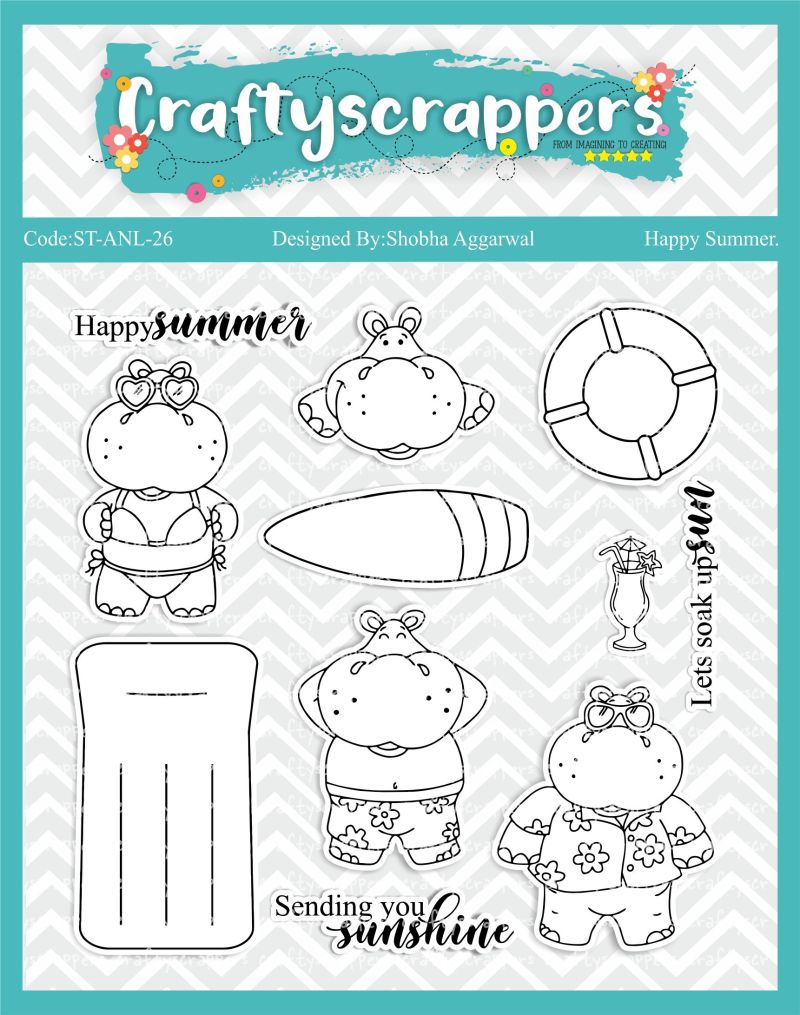
featuring really cute hippos in fun summery clothes.
if you have missed the previous post check it out here:
CHALLENGE#23:”MIRROR IMAGE STAMPING!”
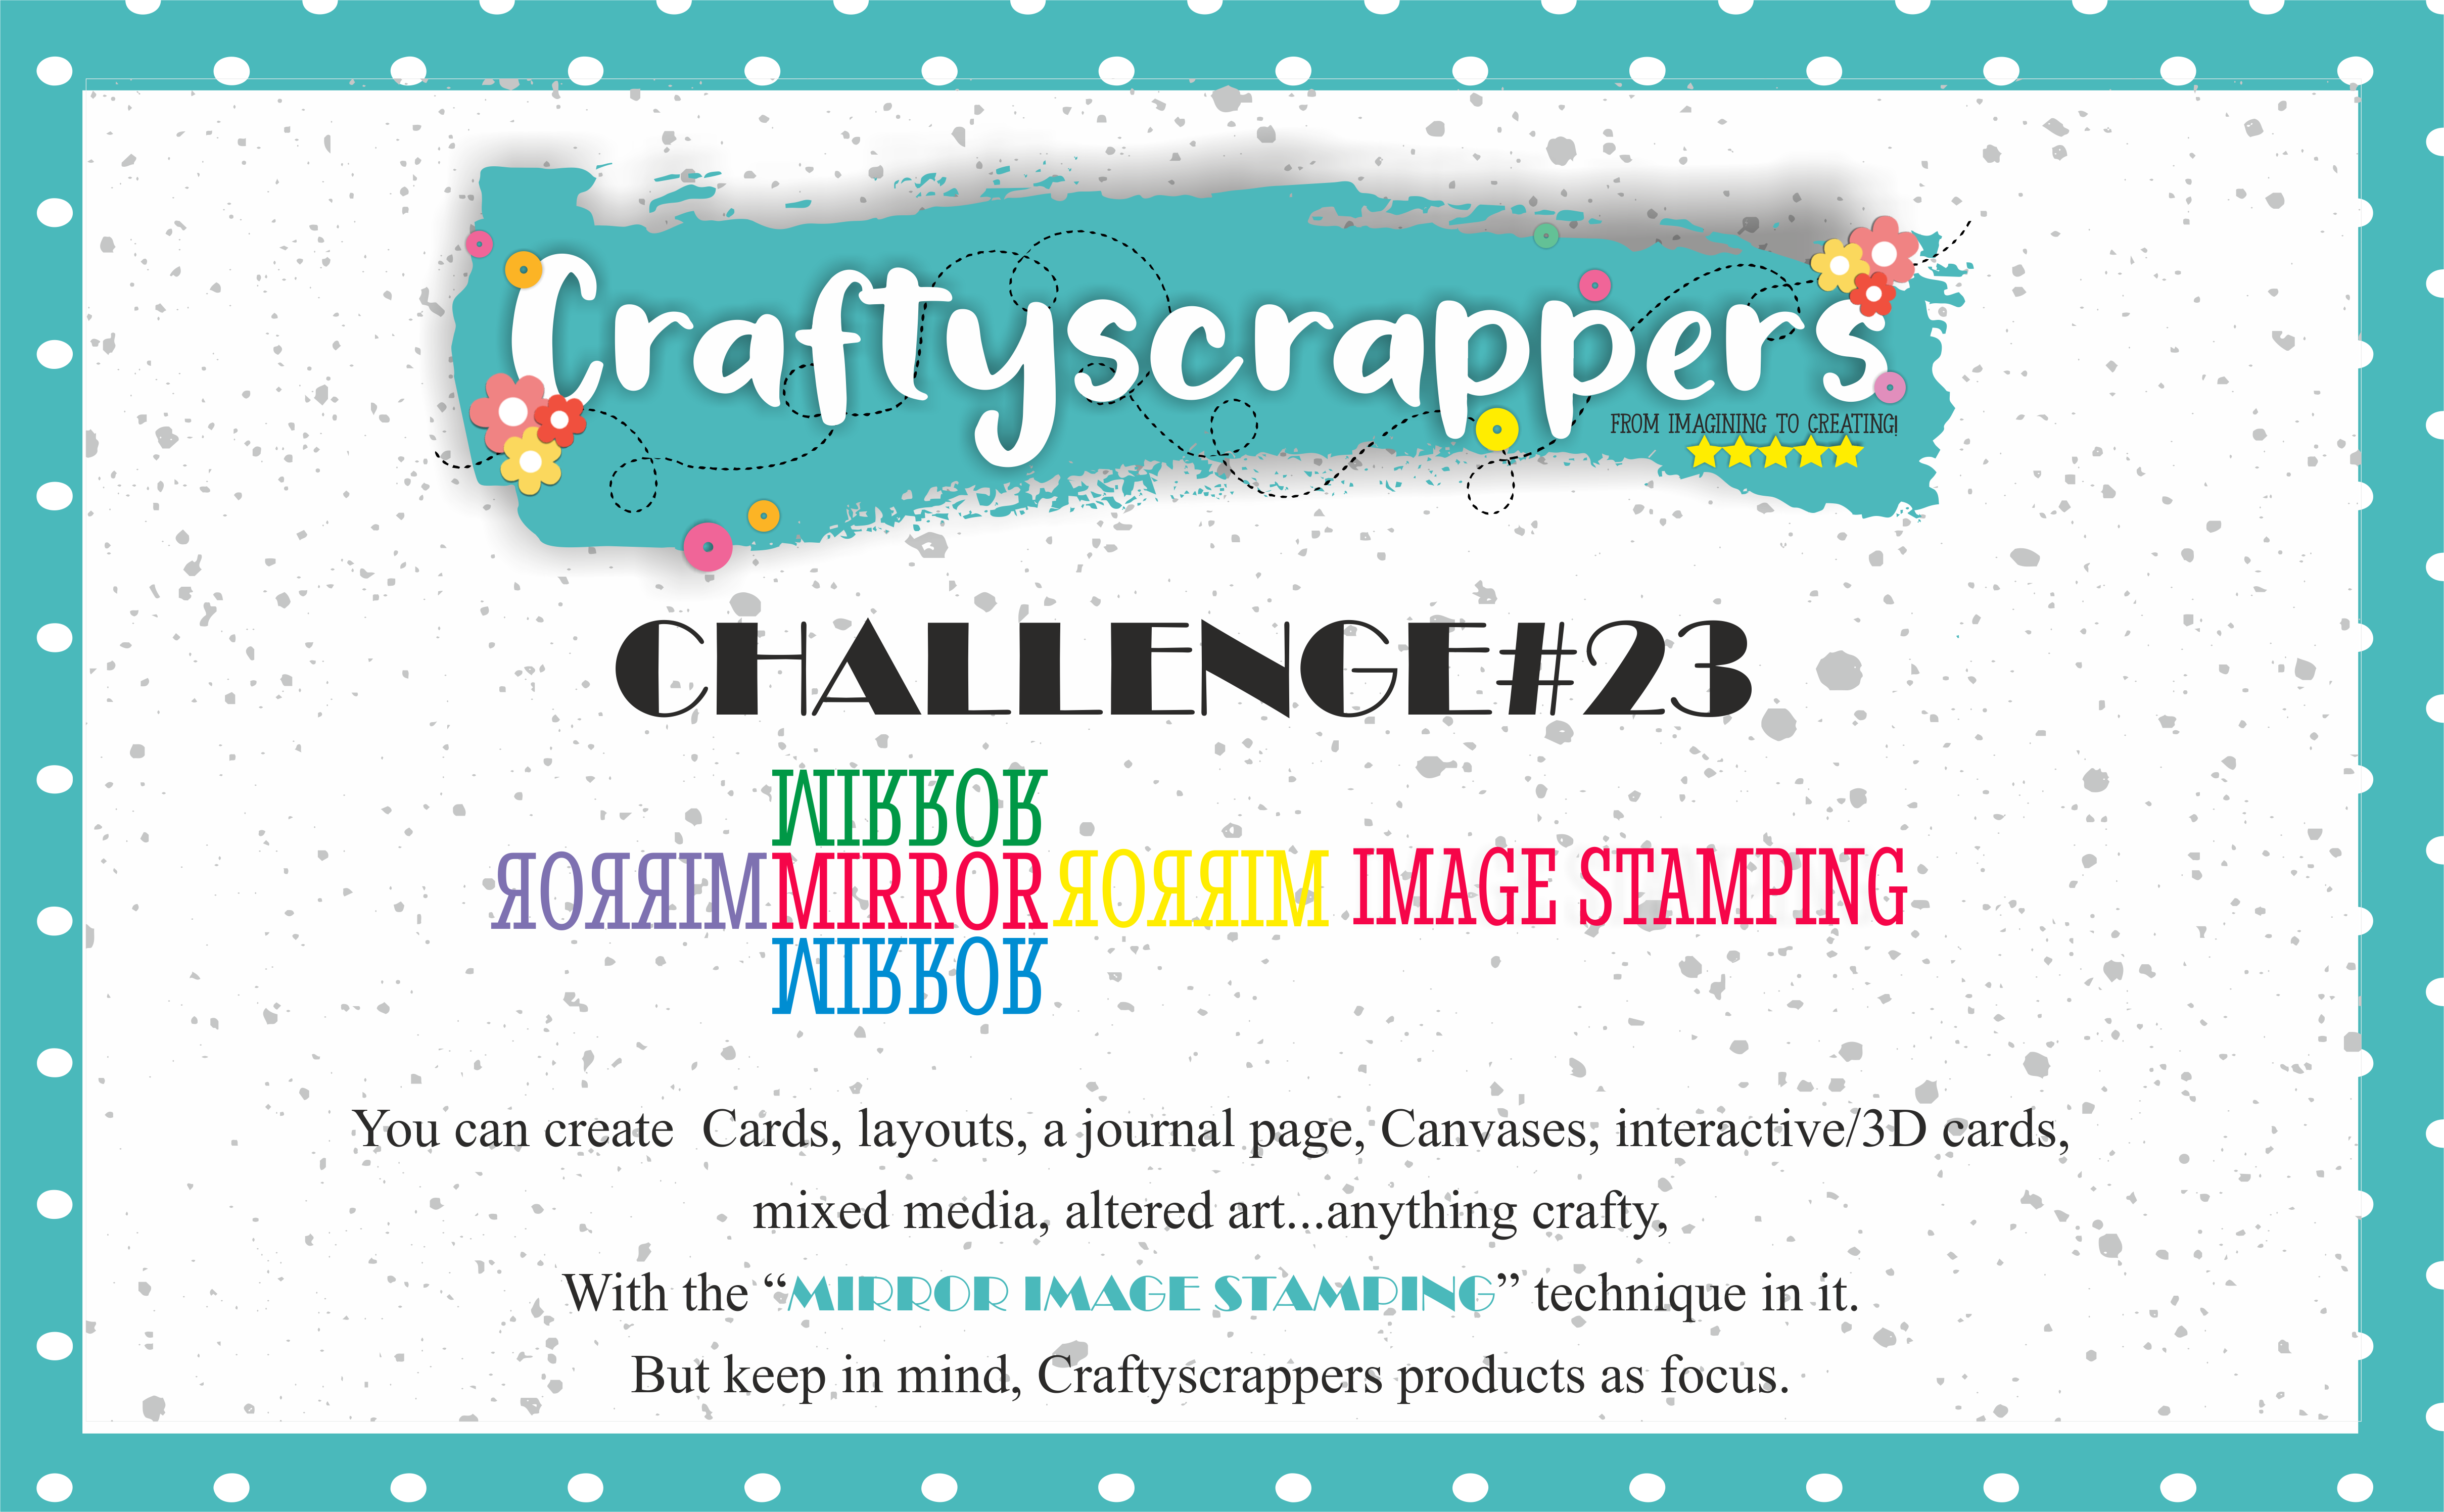
You can create Cards, layouts, a journal page, Canvases, interactive/3D cards,
mixed media, altered art…anything crafty,
With the MIRROR IMAGE STAMPING technique in it!
But keep in mind, Craftyscrappers products as focus.
- Last date of submission is 31ST JULY,2018

To win the amazing goodie bags !

Here’s the final look of the card I made using the stamp set:
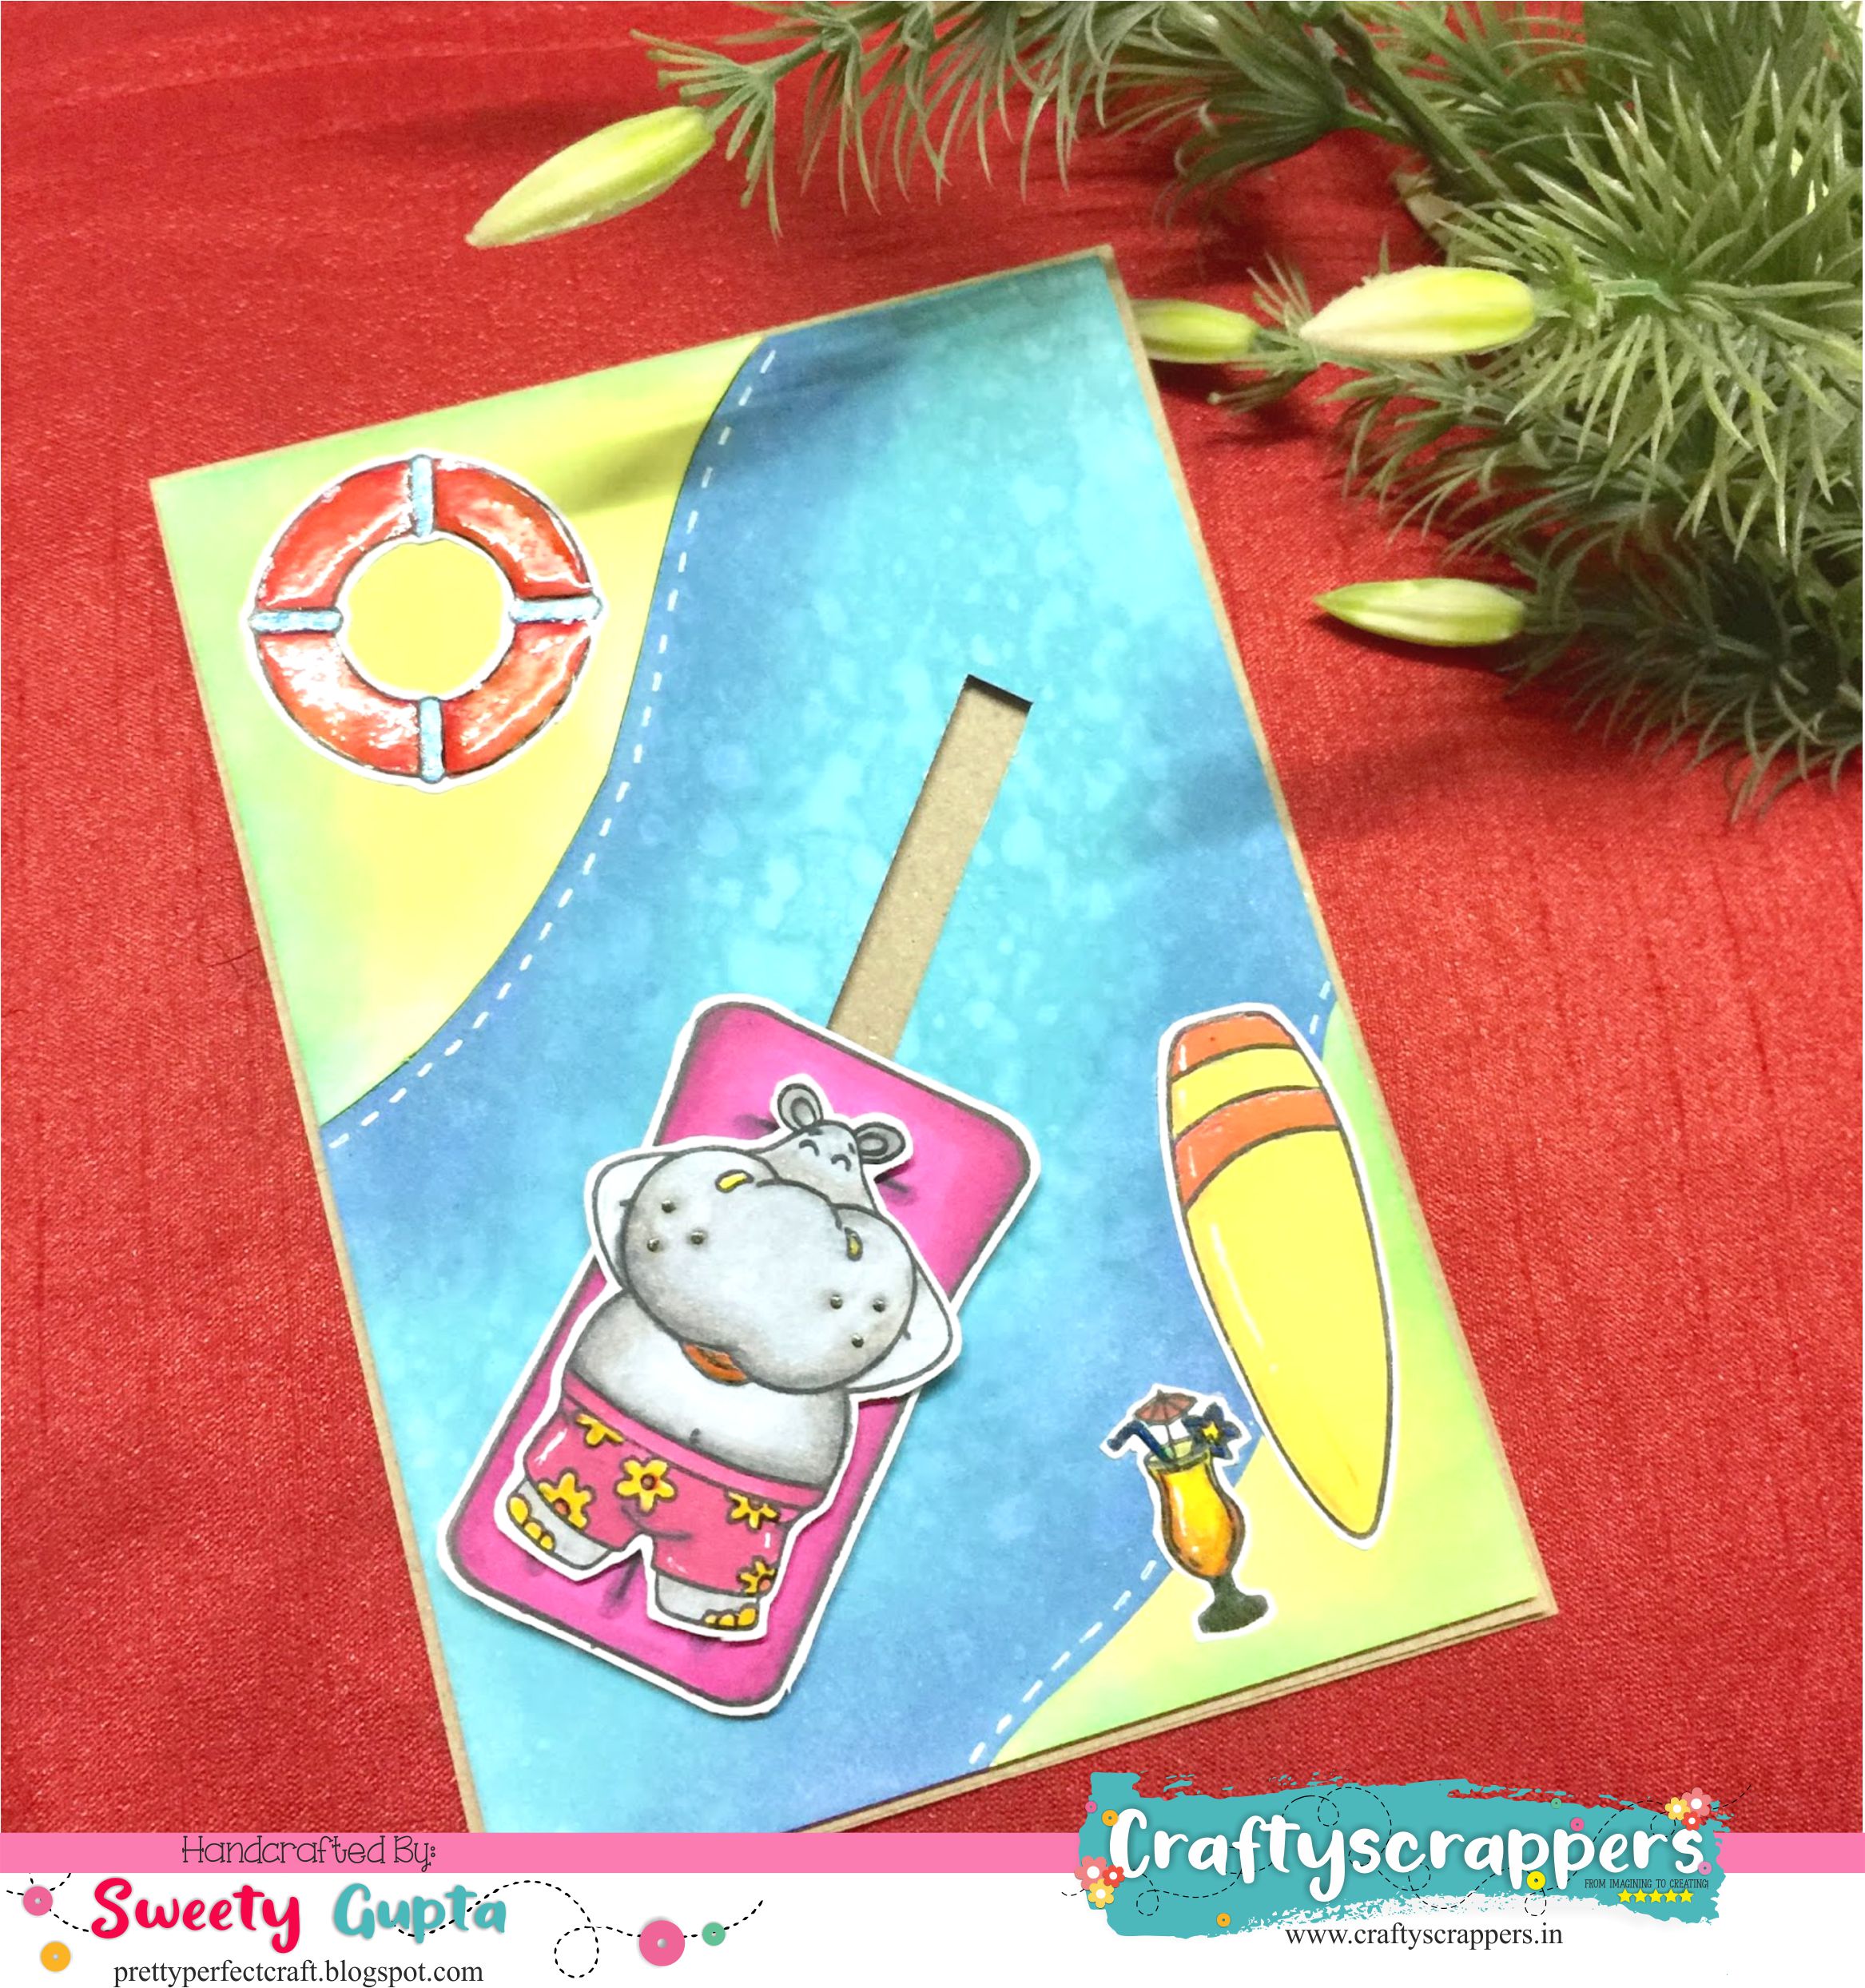


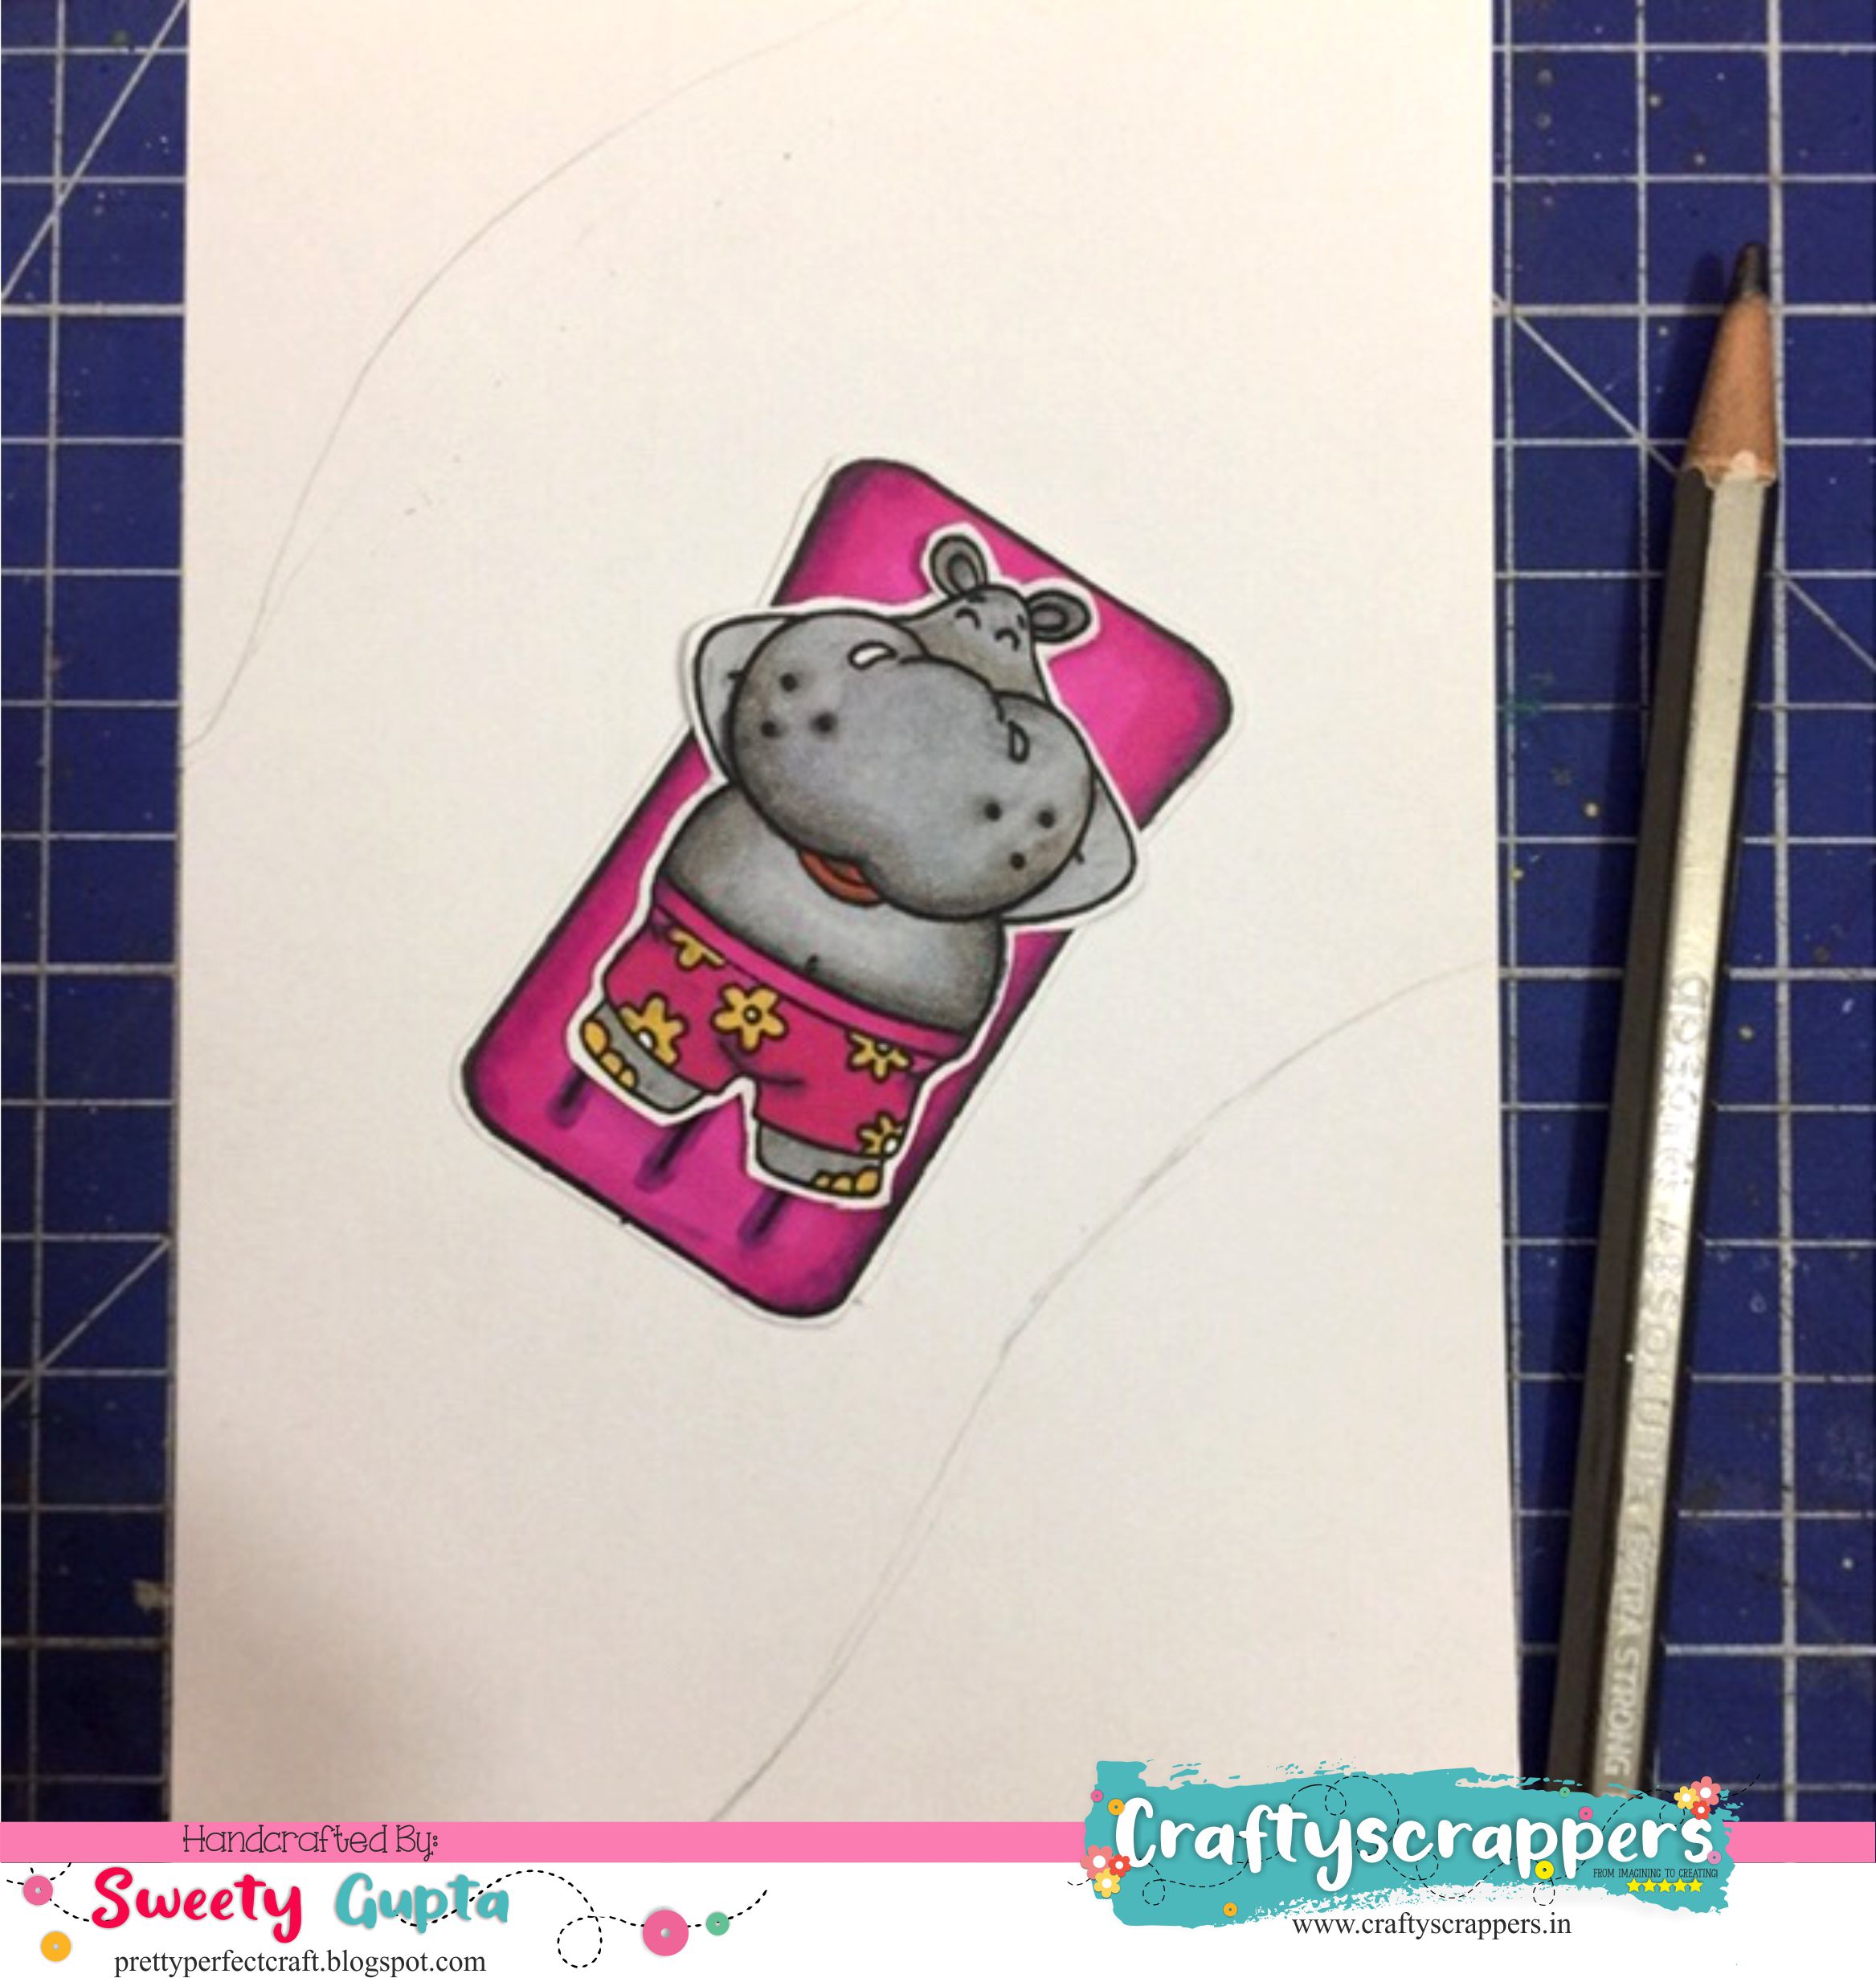
I started out with stamping images that I needed in black archival ink. This ink is permanent and does not smudge, so I can easily color the images using Touch New alcohol markers.
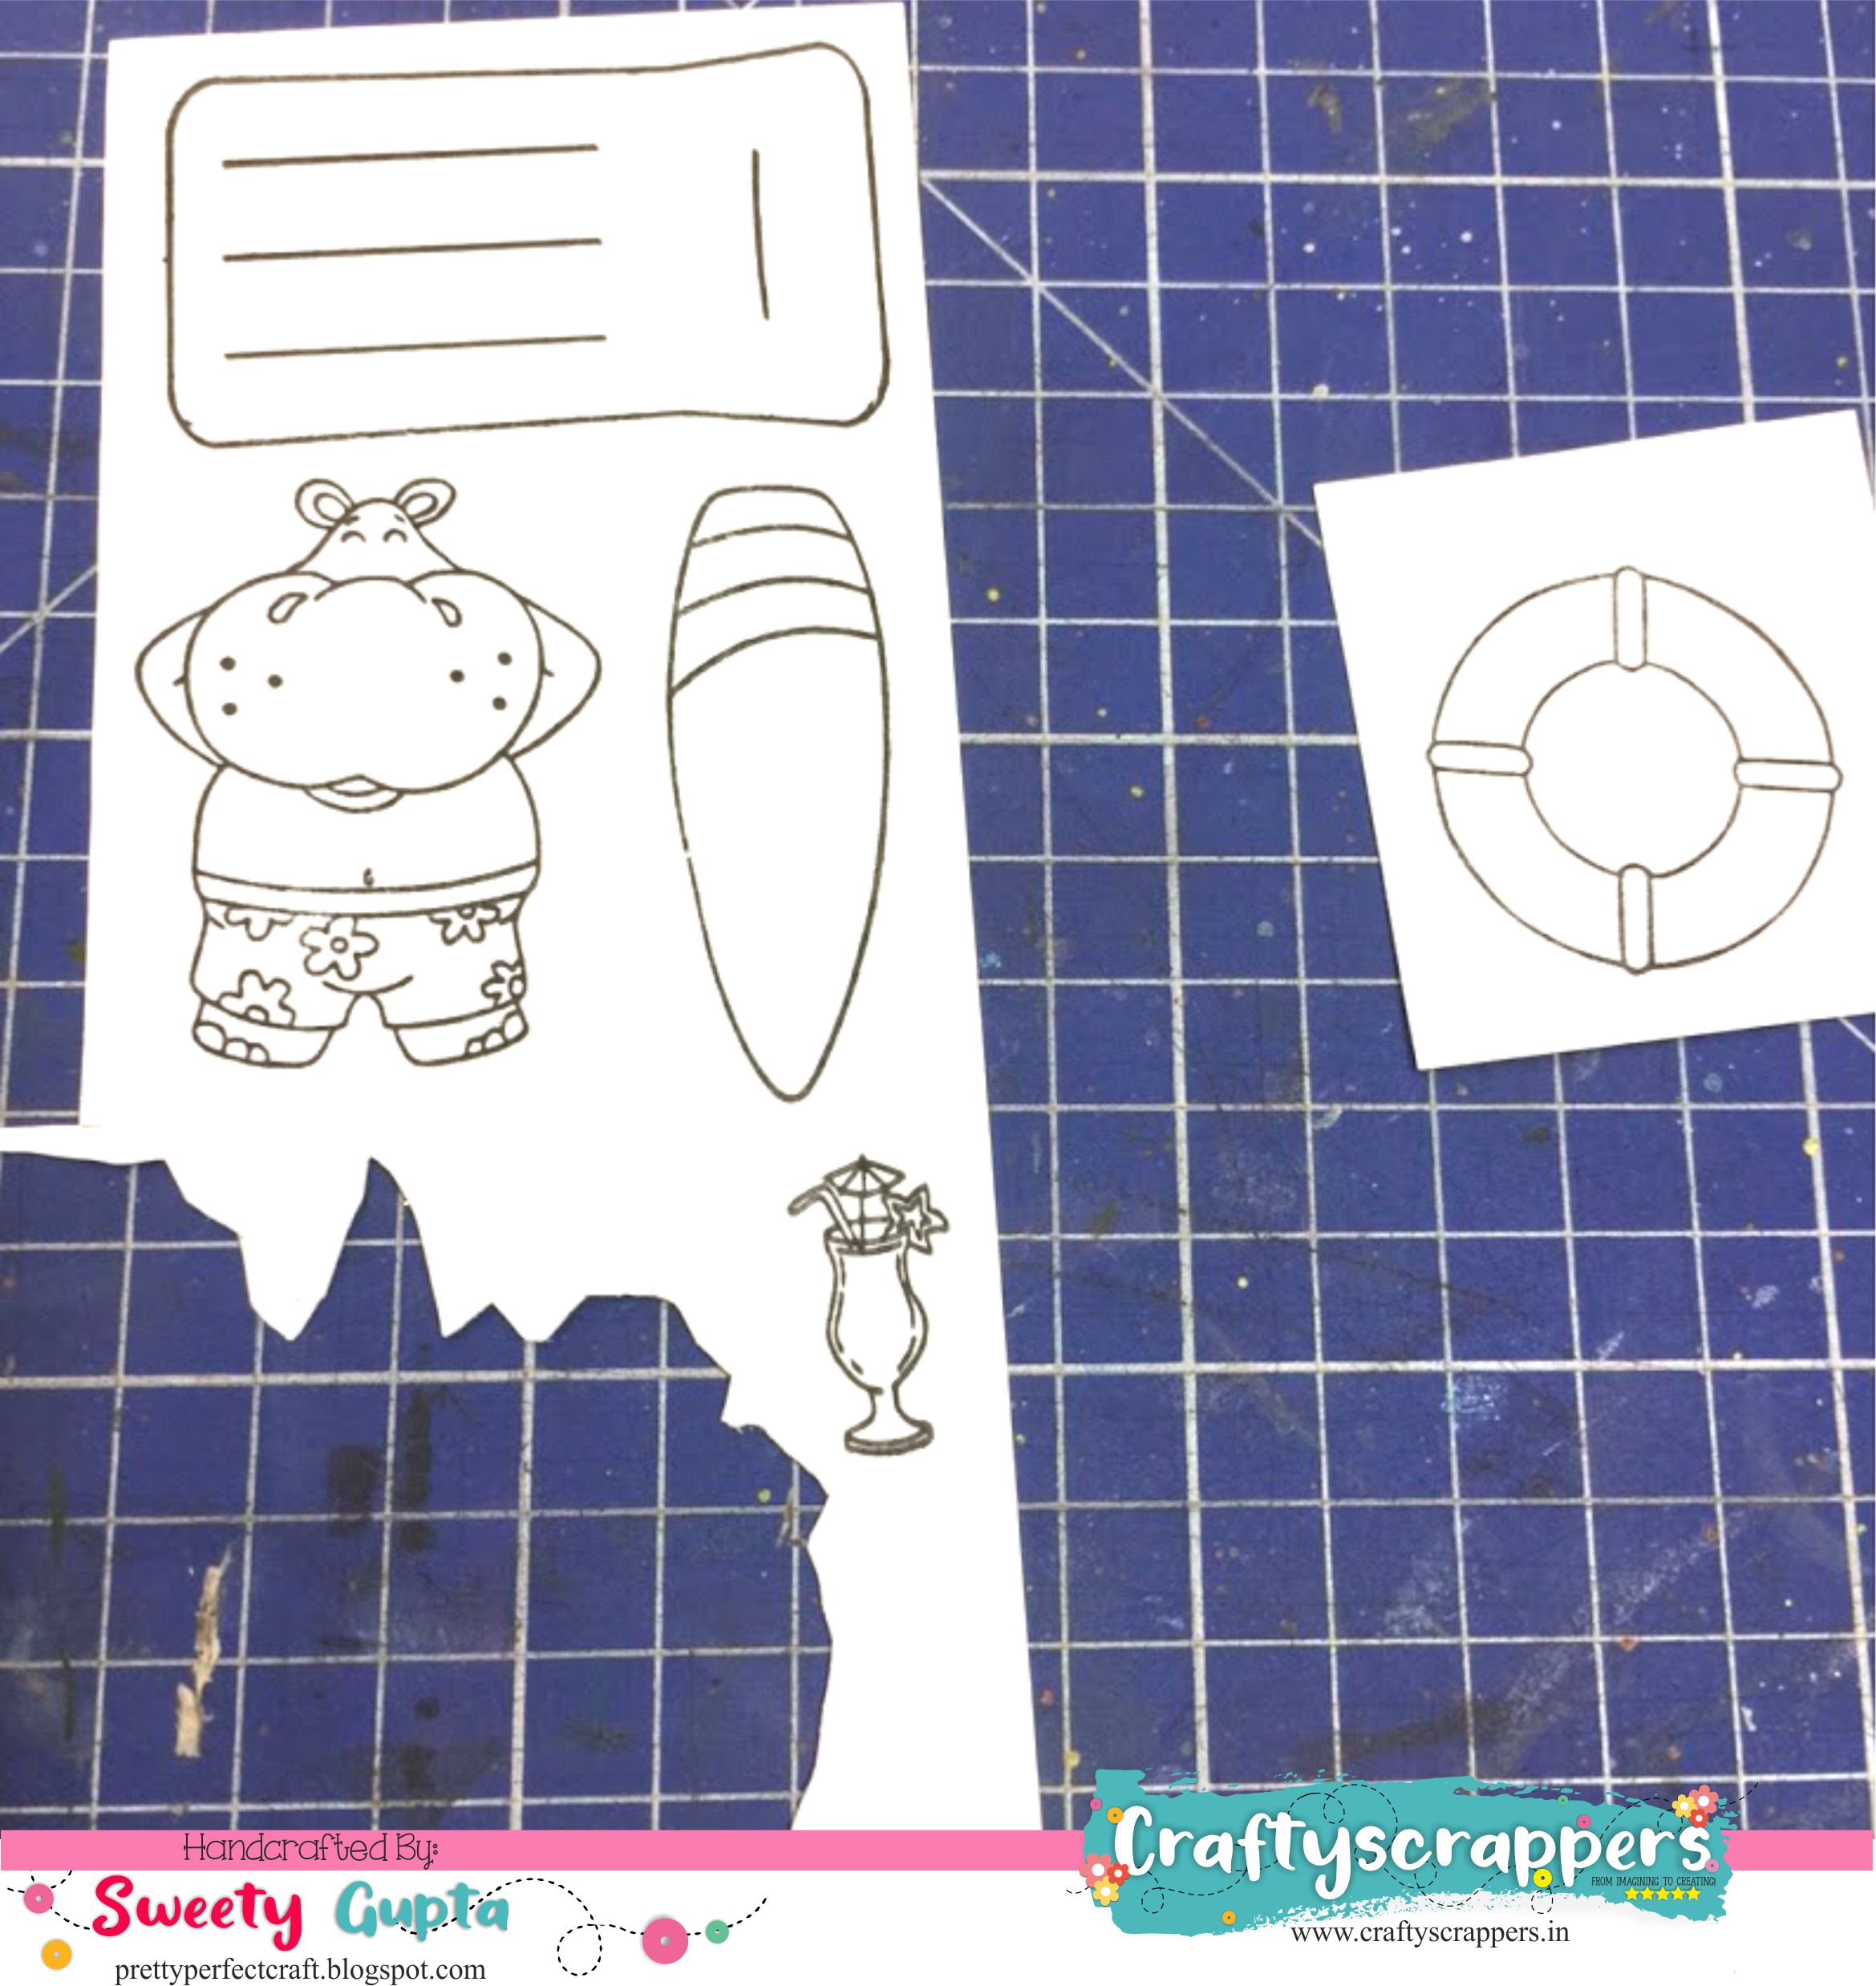

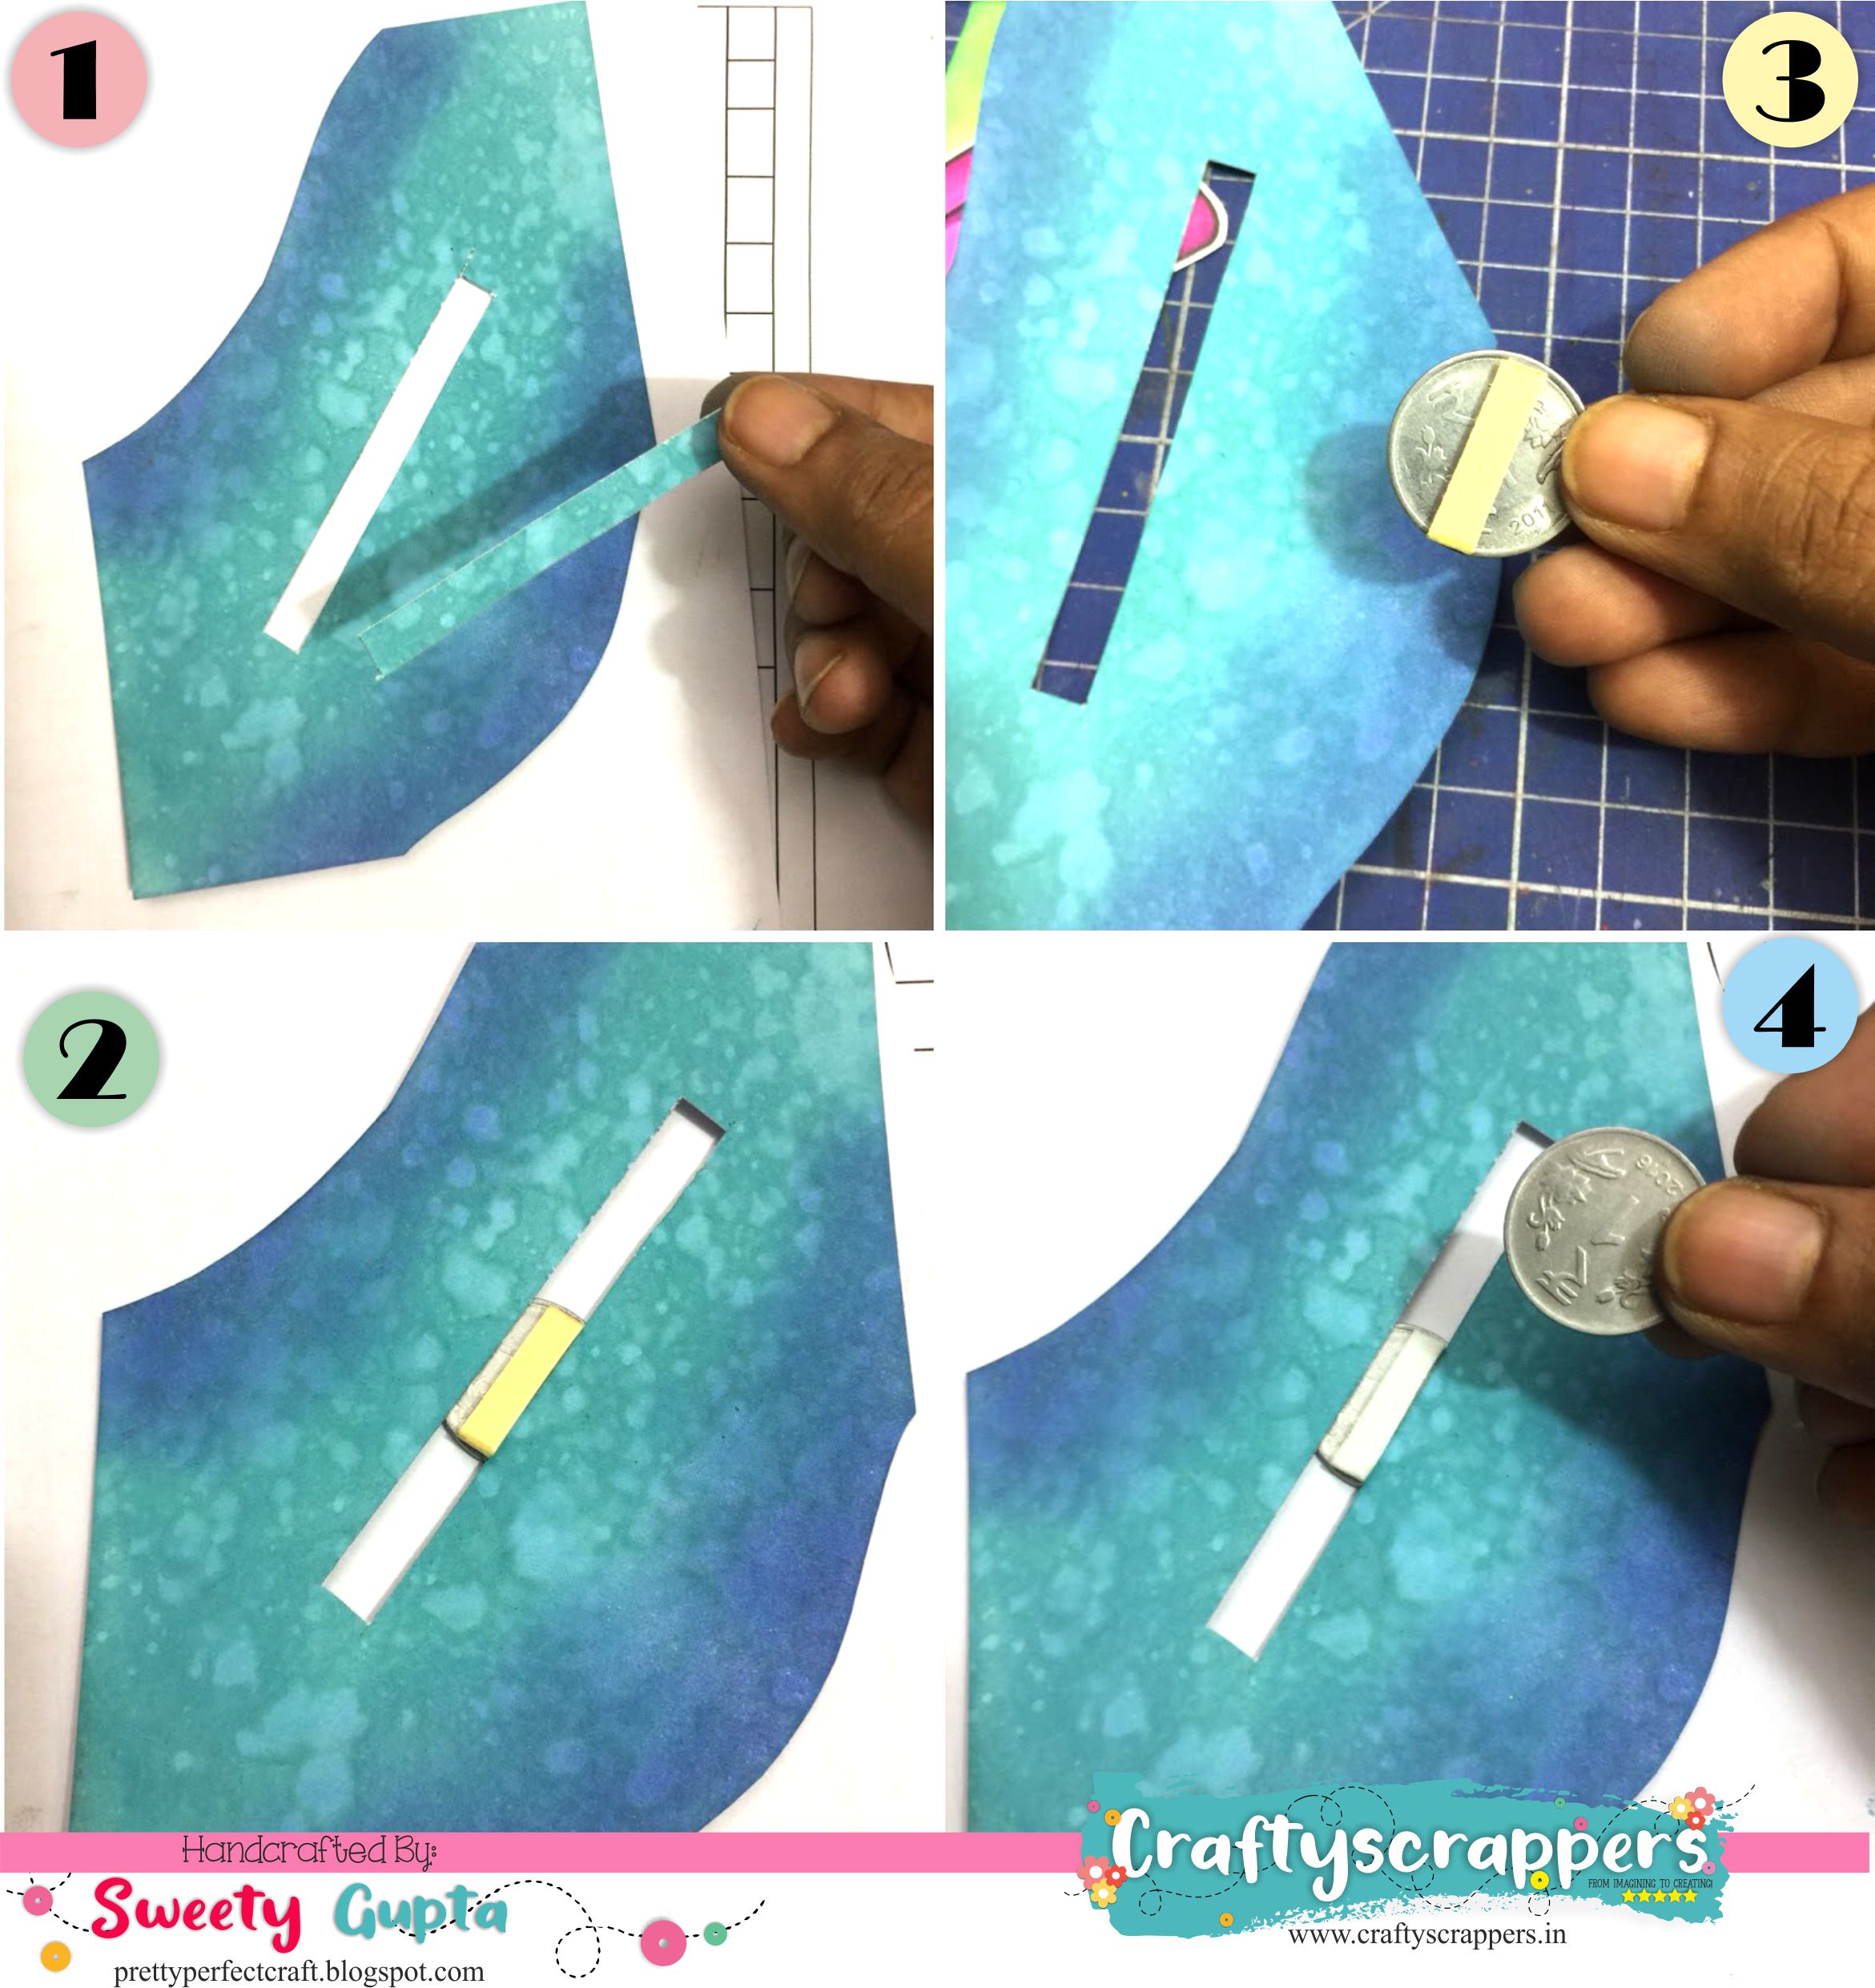
I fussy cut all the images. It’s easier to cut after coloring rather than the other way around. Do not forget to cut out the center of the swimming ring.


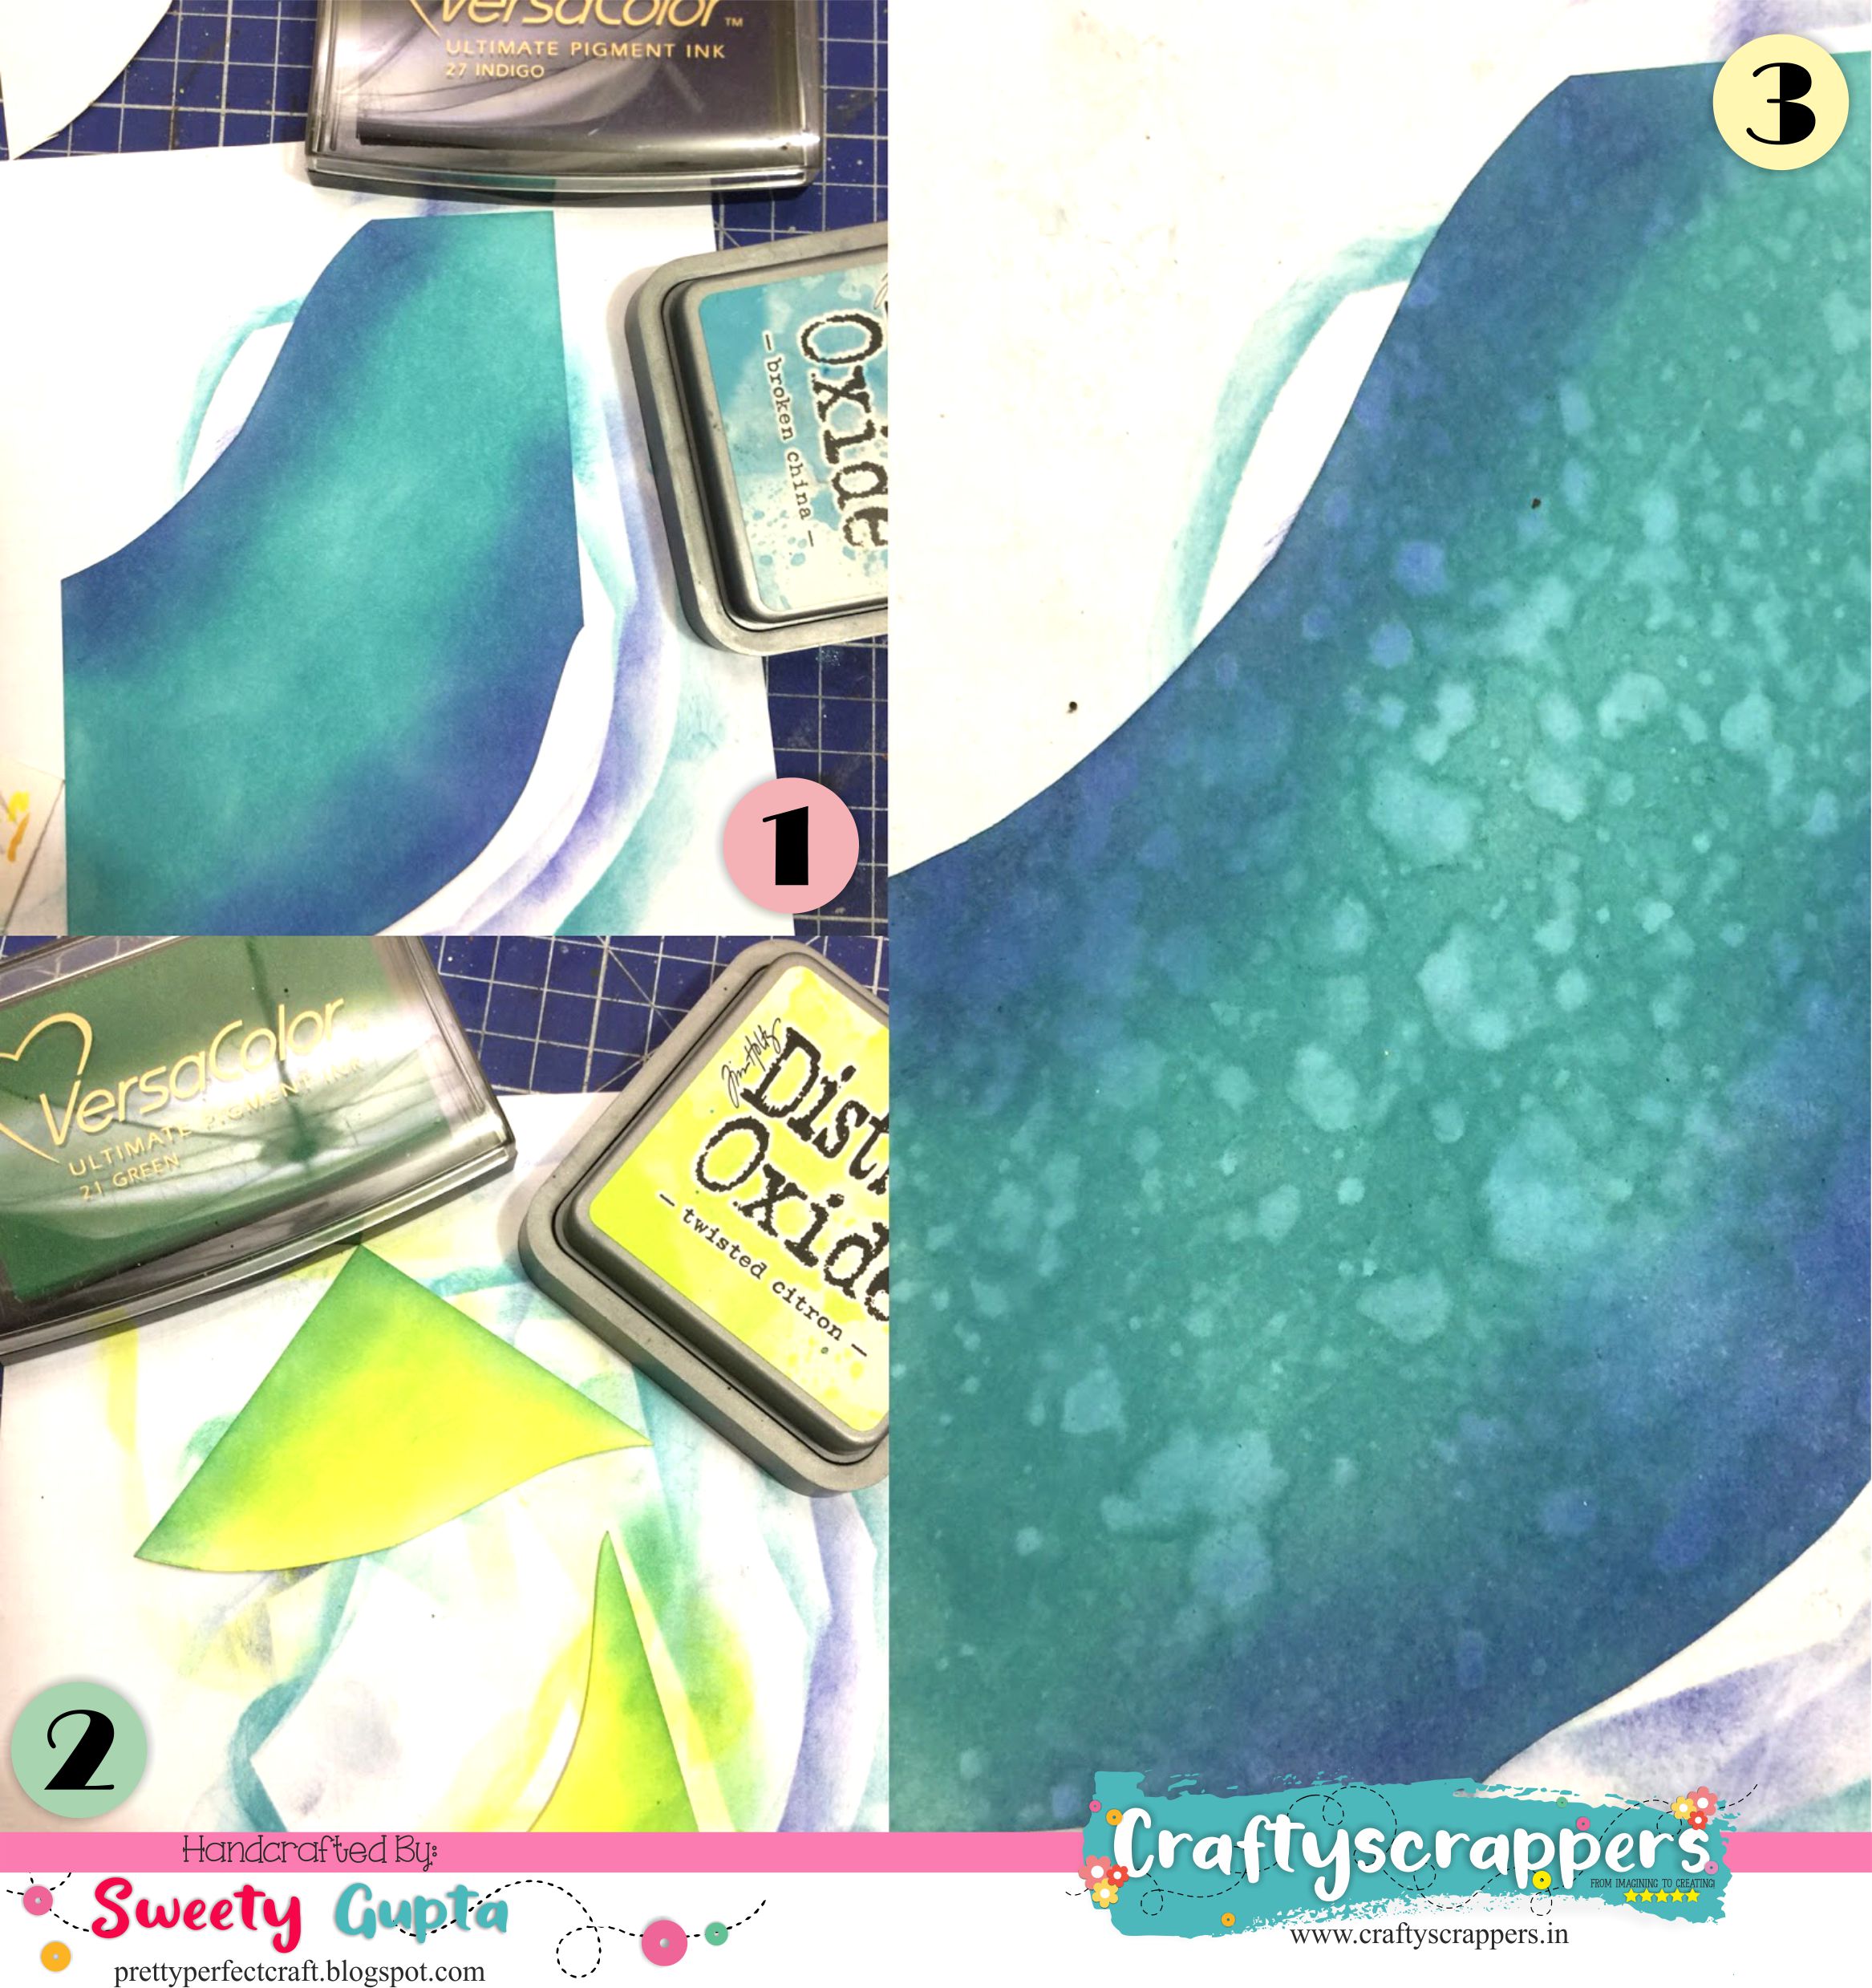
It’s time to color the panel. I did some basic blending. Did you know Distress oxides blend beautifully with so many other types of colours including pigment inks? I spritz some water to give the blue panel more watery look.

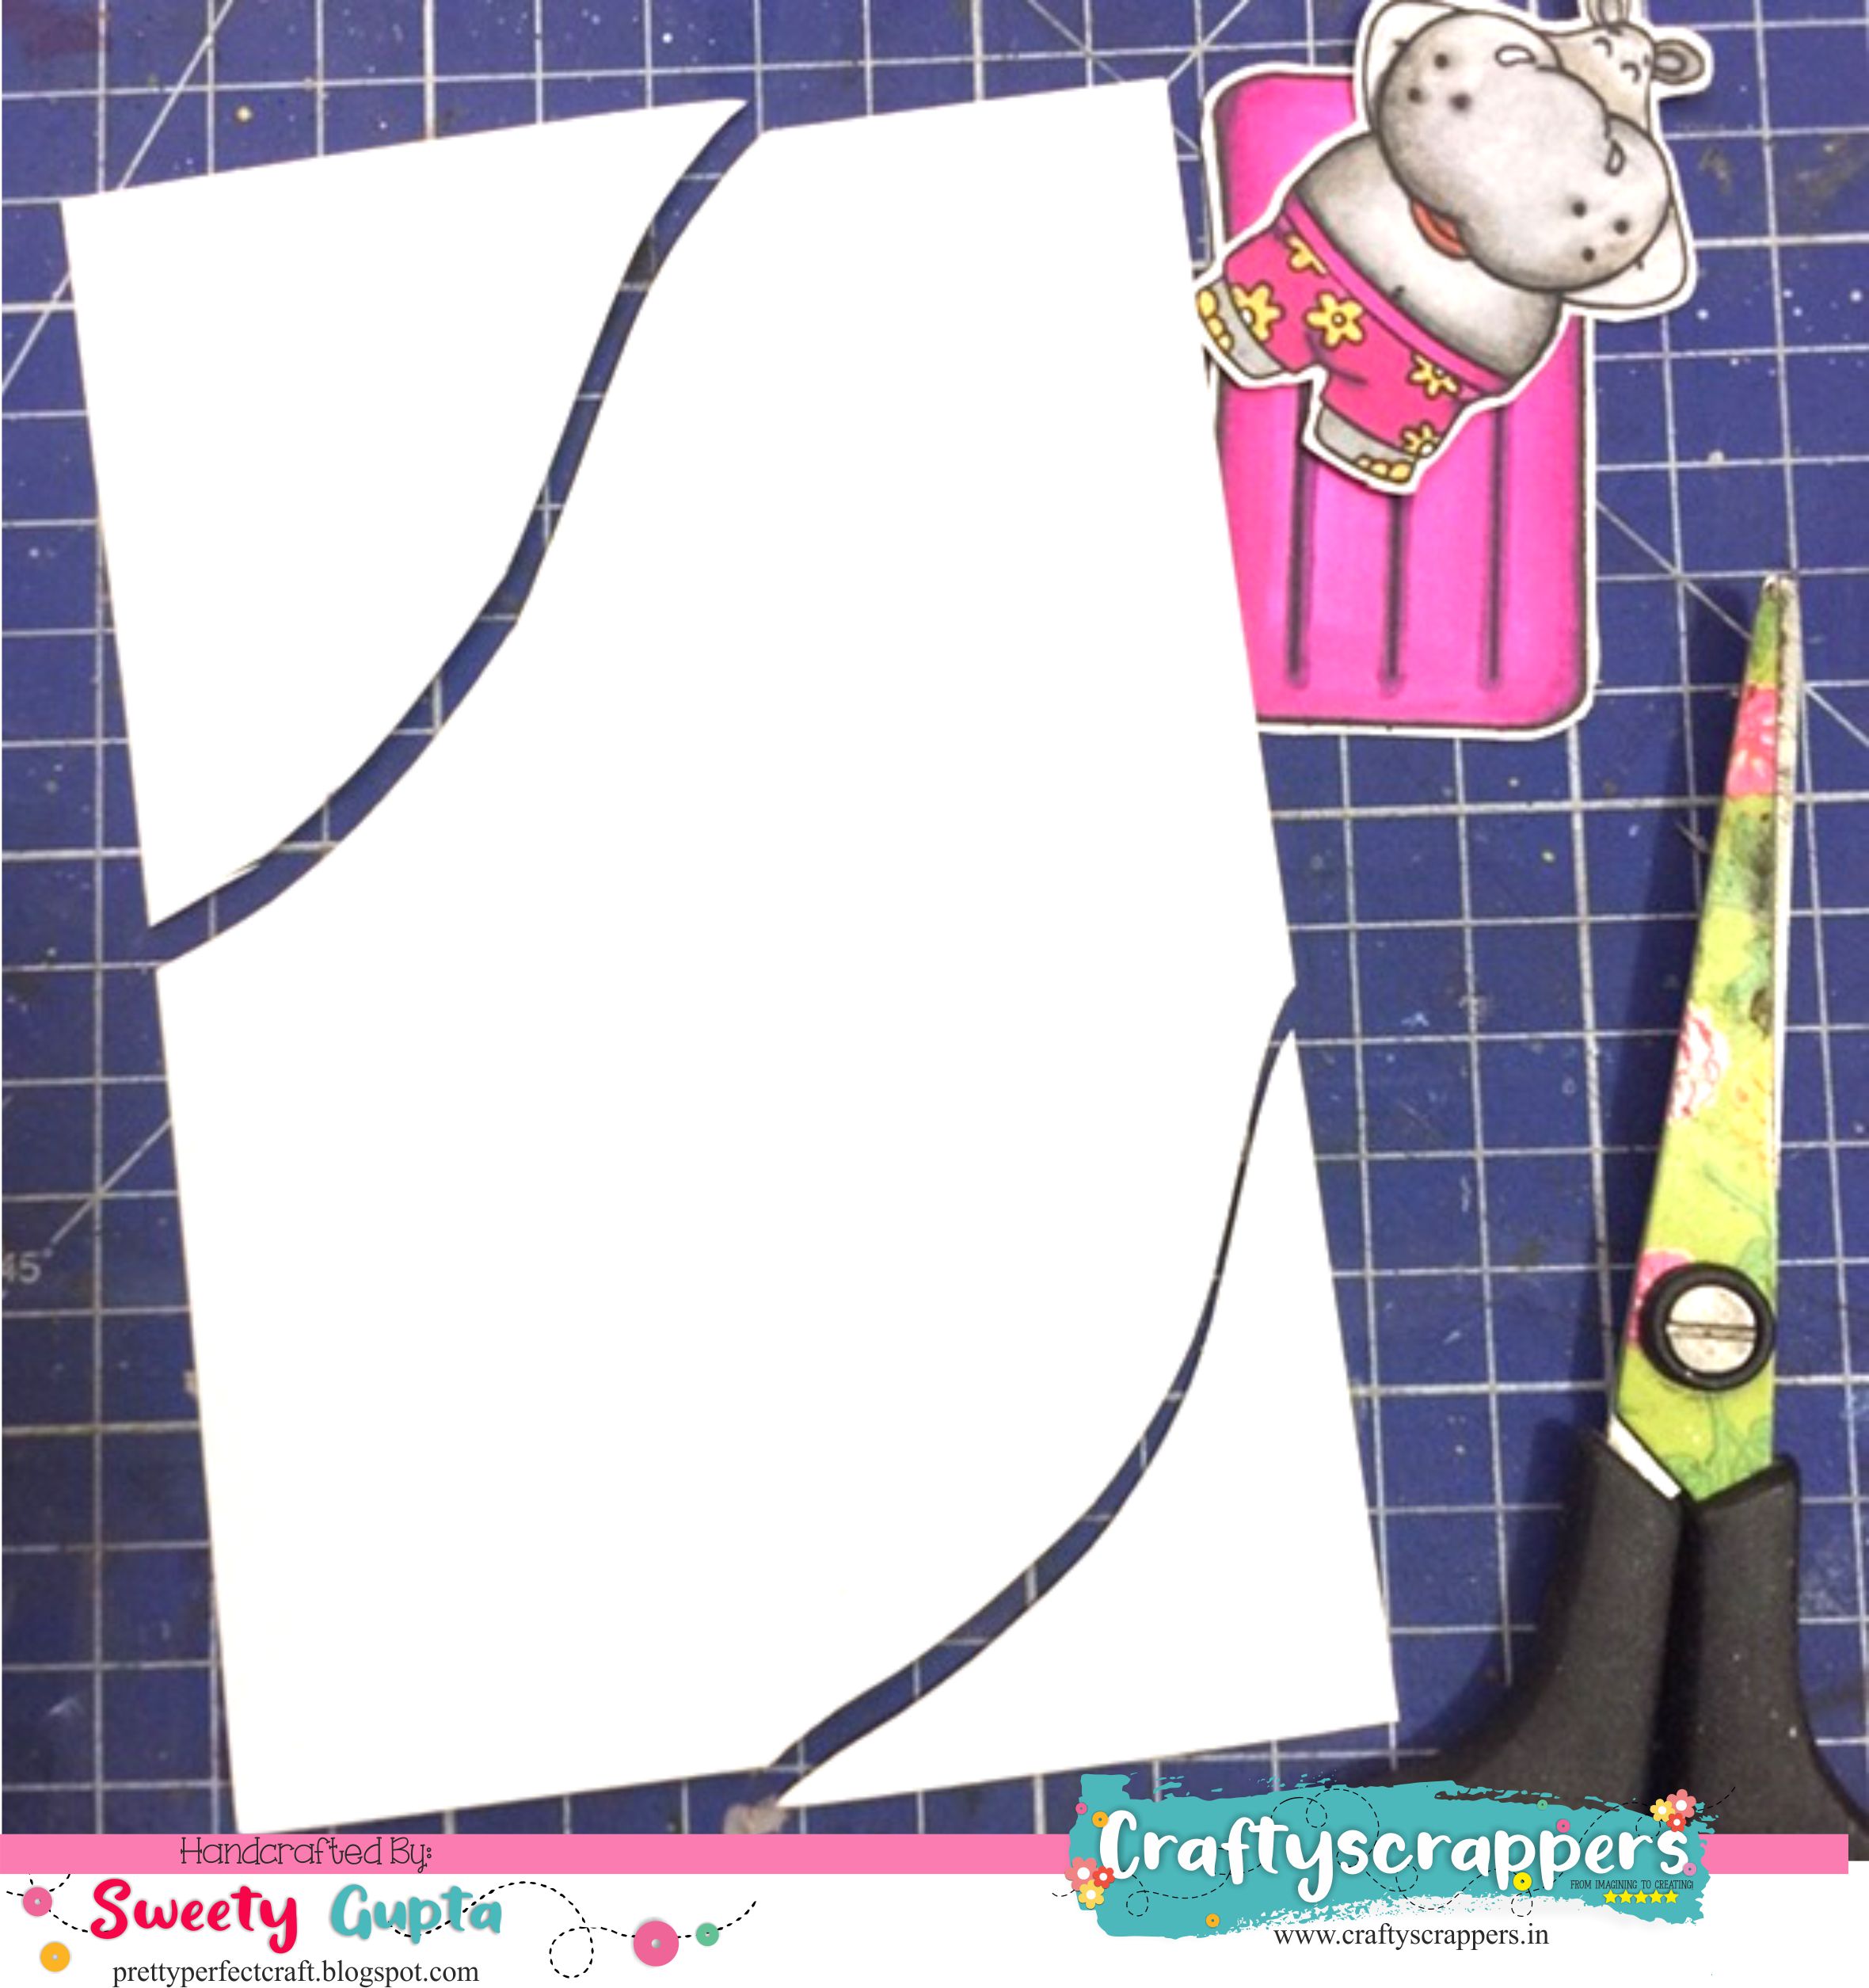
Now onto the technical part. You will need 2 small sized 1 rupee coin (the new ones, I find the old 1 rs coins to be a tad bit bigger.). Start with cutting out 2 parallel lines for the slider to work, and trim it out. There’s no need to be precise but just try getting neat edges coz they will be visible. Add foam adhesive to the coin such that it fits nicely into the slit. Remove the backing and add the other coin.

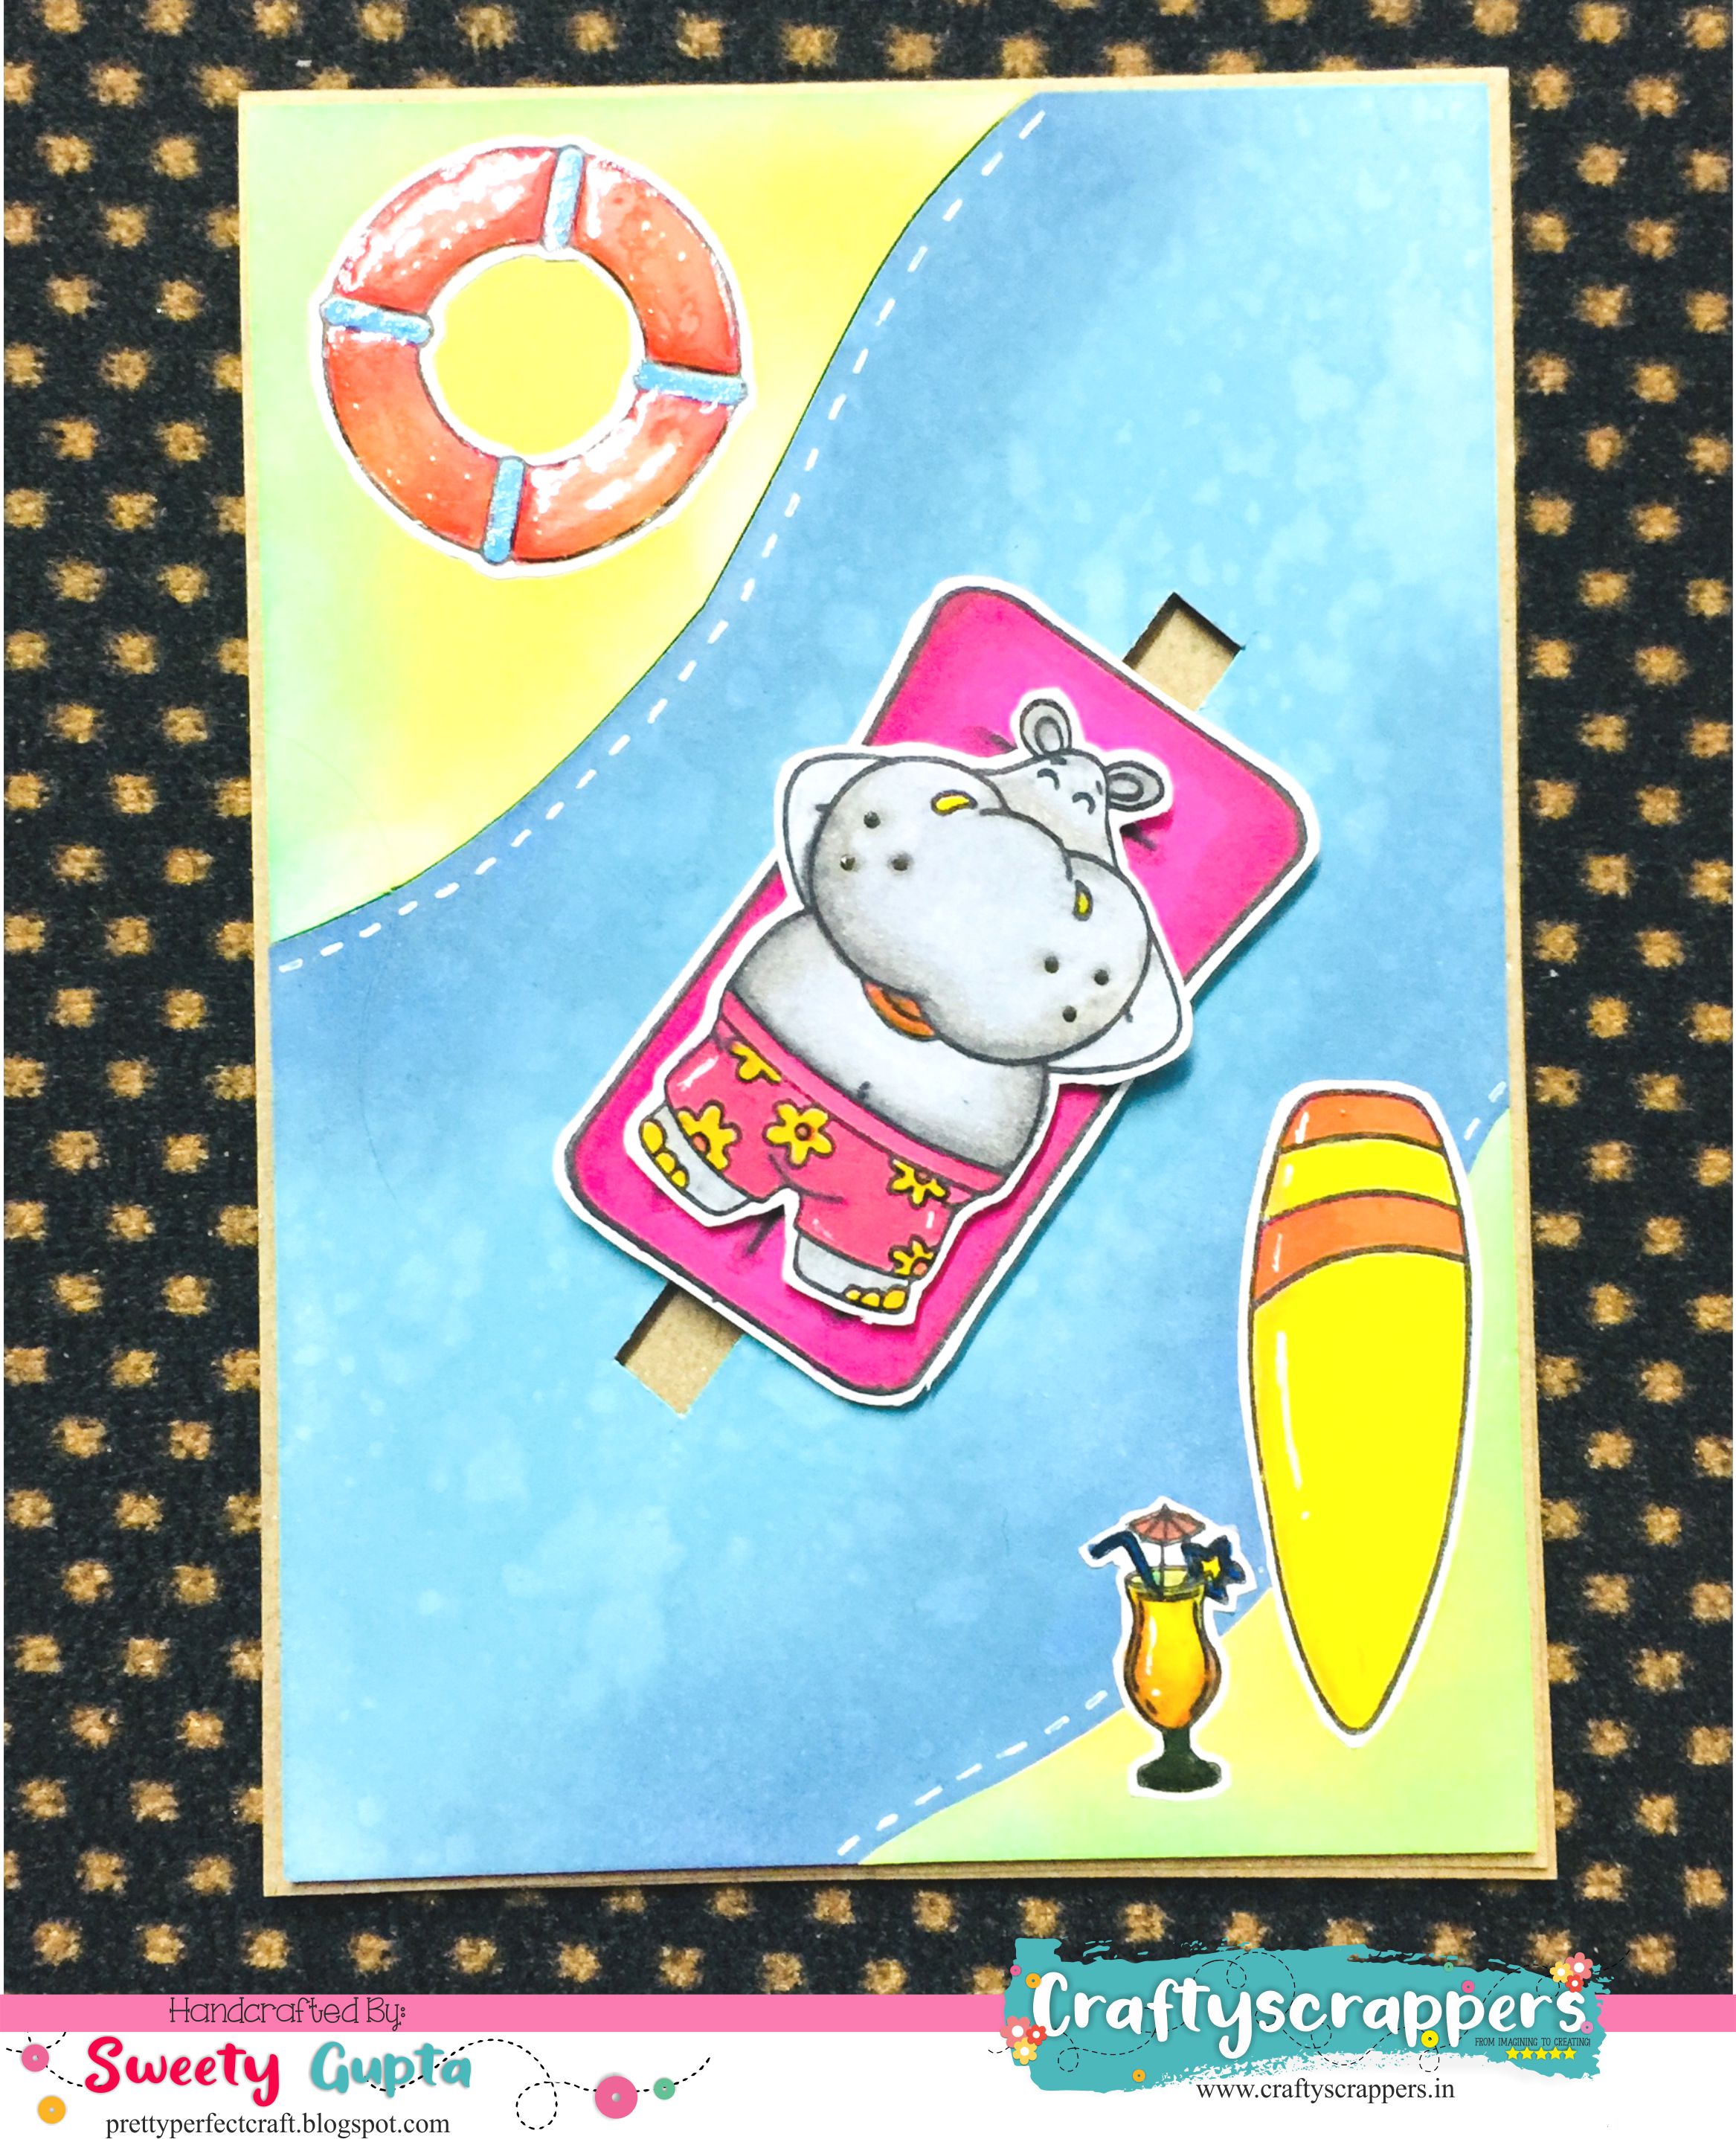
Here’s a quick boomerang video of how the card slider mechanism works.

So That’s all from my end today.I hope you like this bright, happy, summery card.
Do leave some love and feedback below and I will be back soon for more inspirations!
Don’t forget to join in our craft challenges,(details at the beginning of the post!)
You can participate via mr.linky (at the end of the challenge post)or via facebook,Instagram and even via email.
(While sharing your creation post over the social media, ie
Facebook/twitter/instagram
please use #Craftyscrappers challenge23 to qualify for submission,
failing to do so, the entry would be disqualified.)
Thanks for stopping by. Have a fabulous Day!
HUGS,
