
Hello friends!
Anila here and iam back again at the blog with a tutorial.
But before i get into that, let me tell you…
Our challenge for this month of October is ongoing.
If you missed our previous post,check it out here…
But before i get into that, let me tell you…
Our challenge for this month of October is ongoing.
If you missed our previous post,check it out here…
CHALLENGE#16:”Sparkle It Up”
You can create cards, layouts, journal pages, altered art, MDF items, anything crafty and add glamour to your projects in any form, be it foil, glitter, shimmer or anything to sparkle it,to participate…
- Last date of submission is 31st Oct 2017.

to win amazing prices!!!

Coming back to today’s tutorial now….
We often give out gifts to kids for birthdays or even as birthday return gifts.
How about making environment-friendly treat bags to give these gifts.
How about making environment-friendly treat bags to give these gifts.
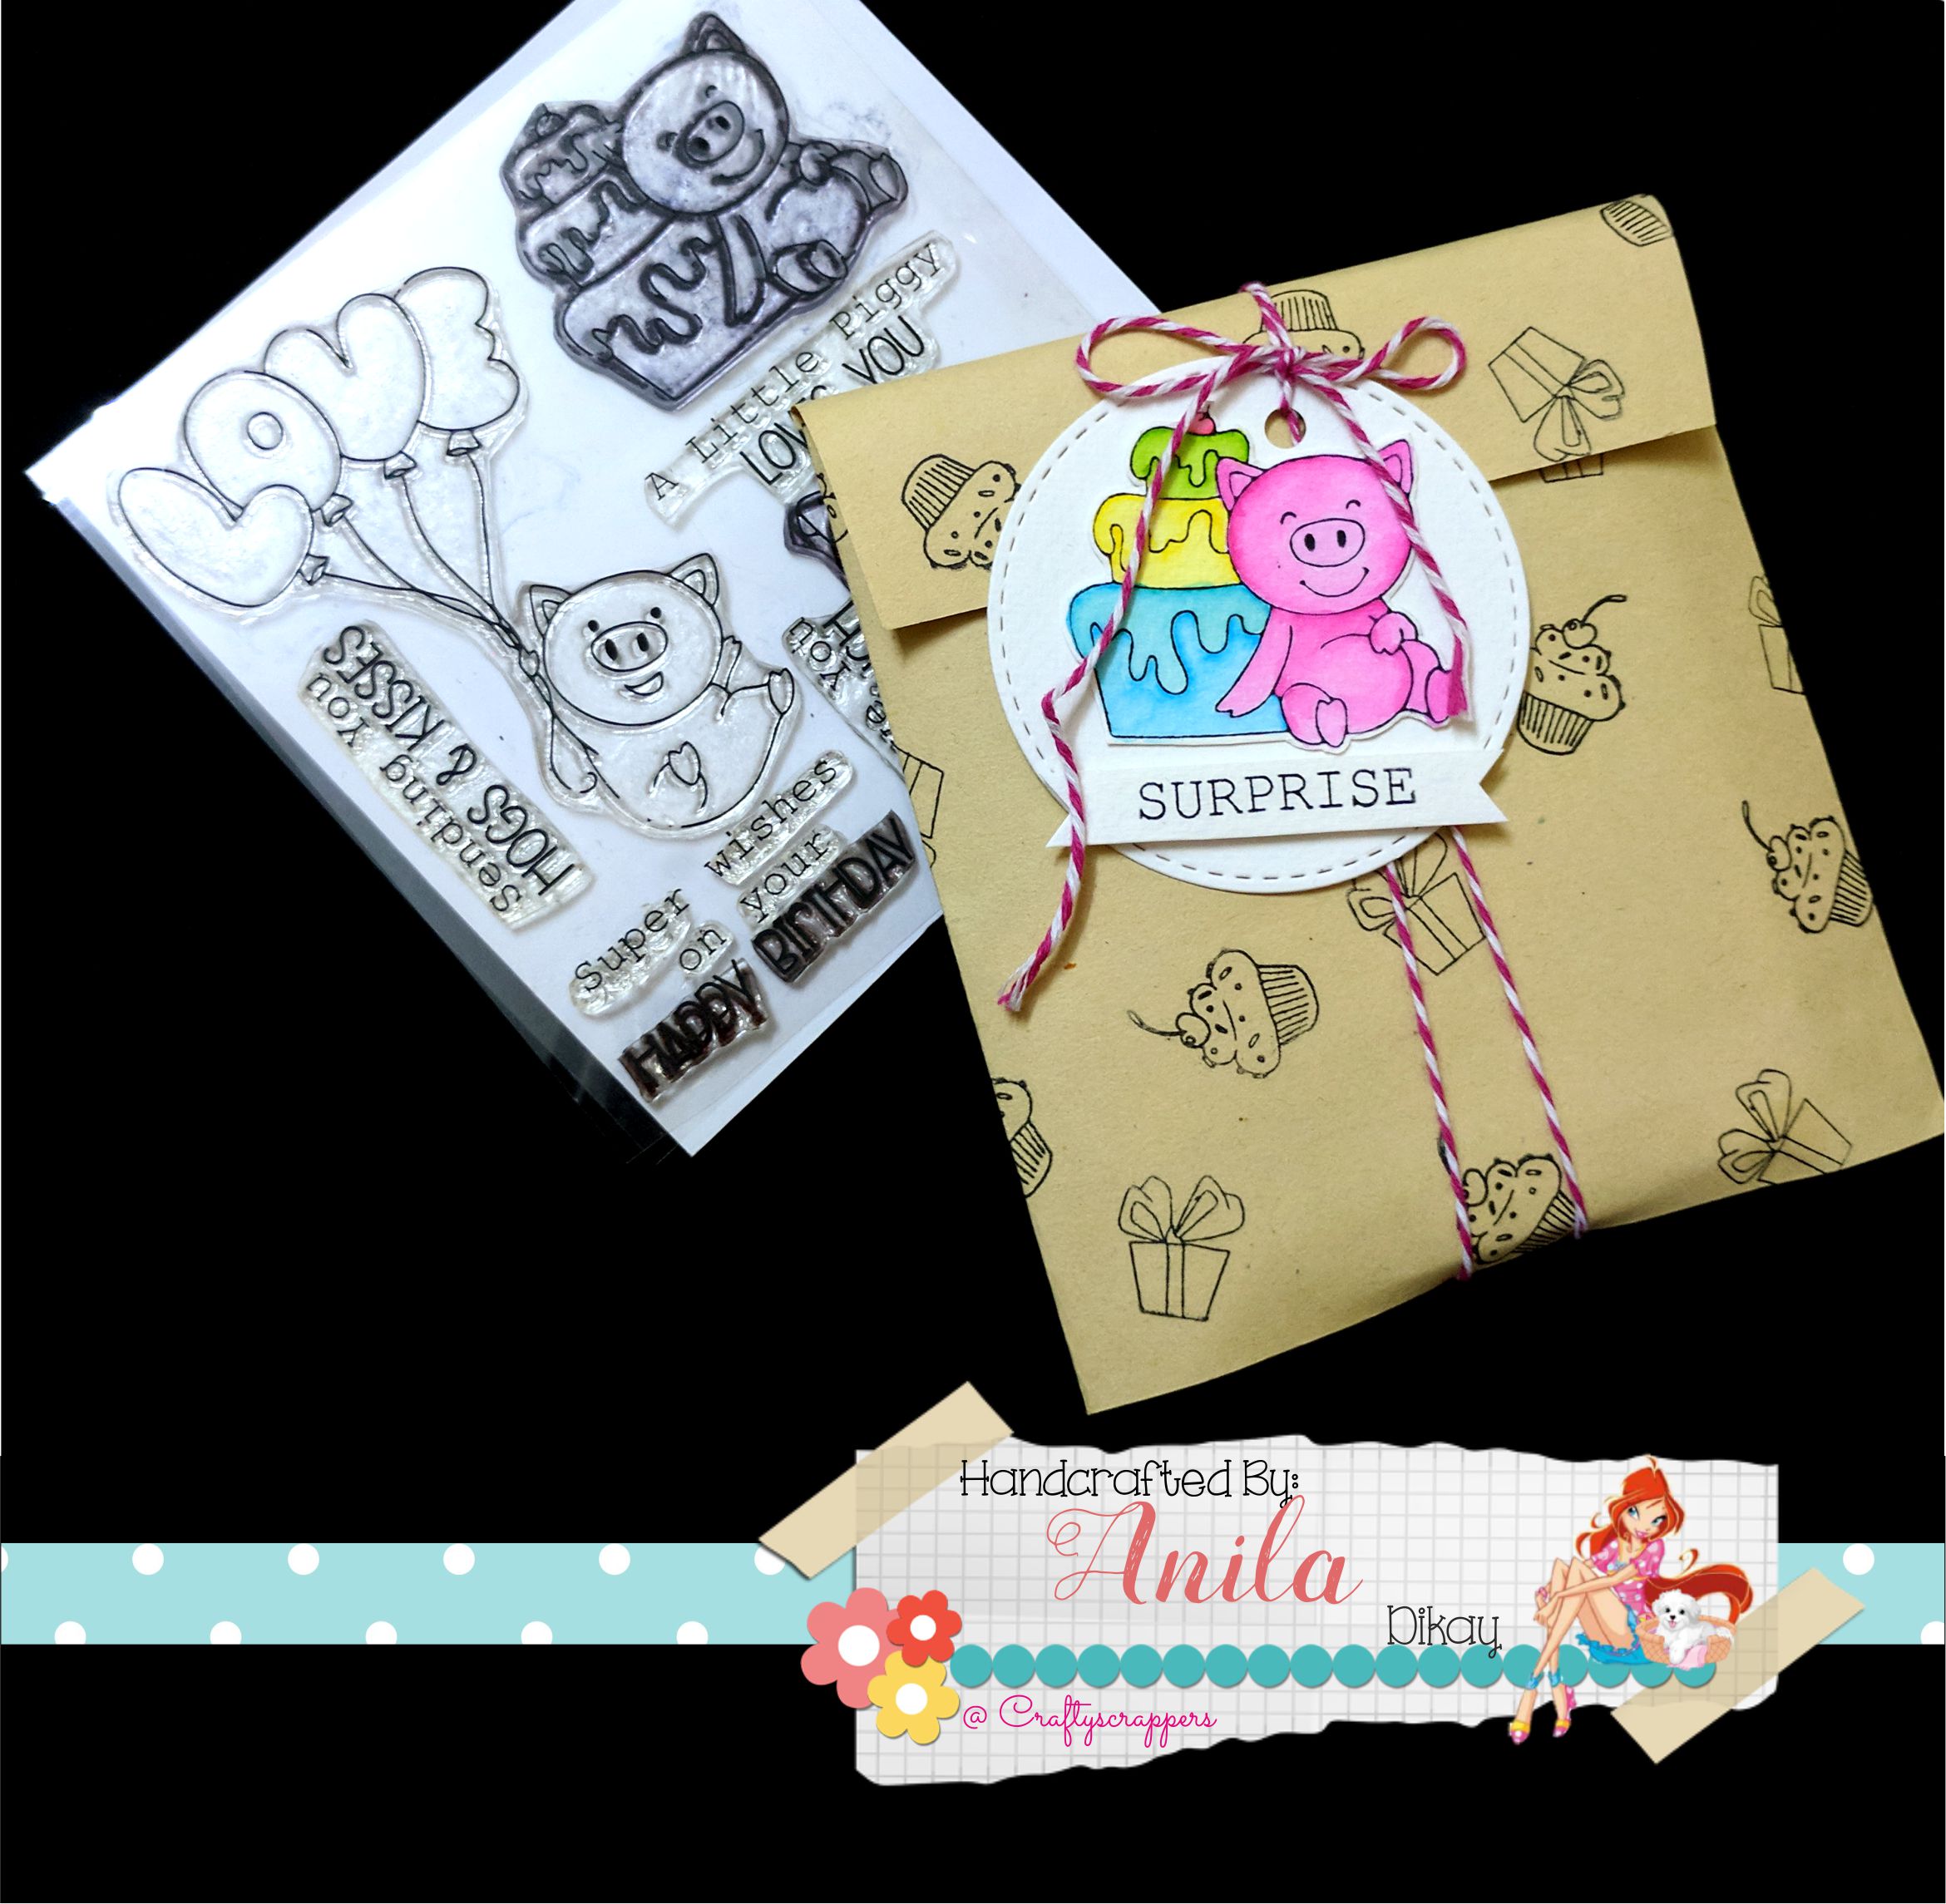
Today, I am going to show you how to make pretty treat bags using two
stamp sets – Hogs & Kisses and Peek-a-boo.
stamp sets – Hogs & Kisses and Peek-a-boo.

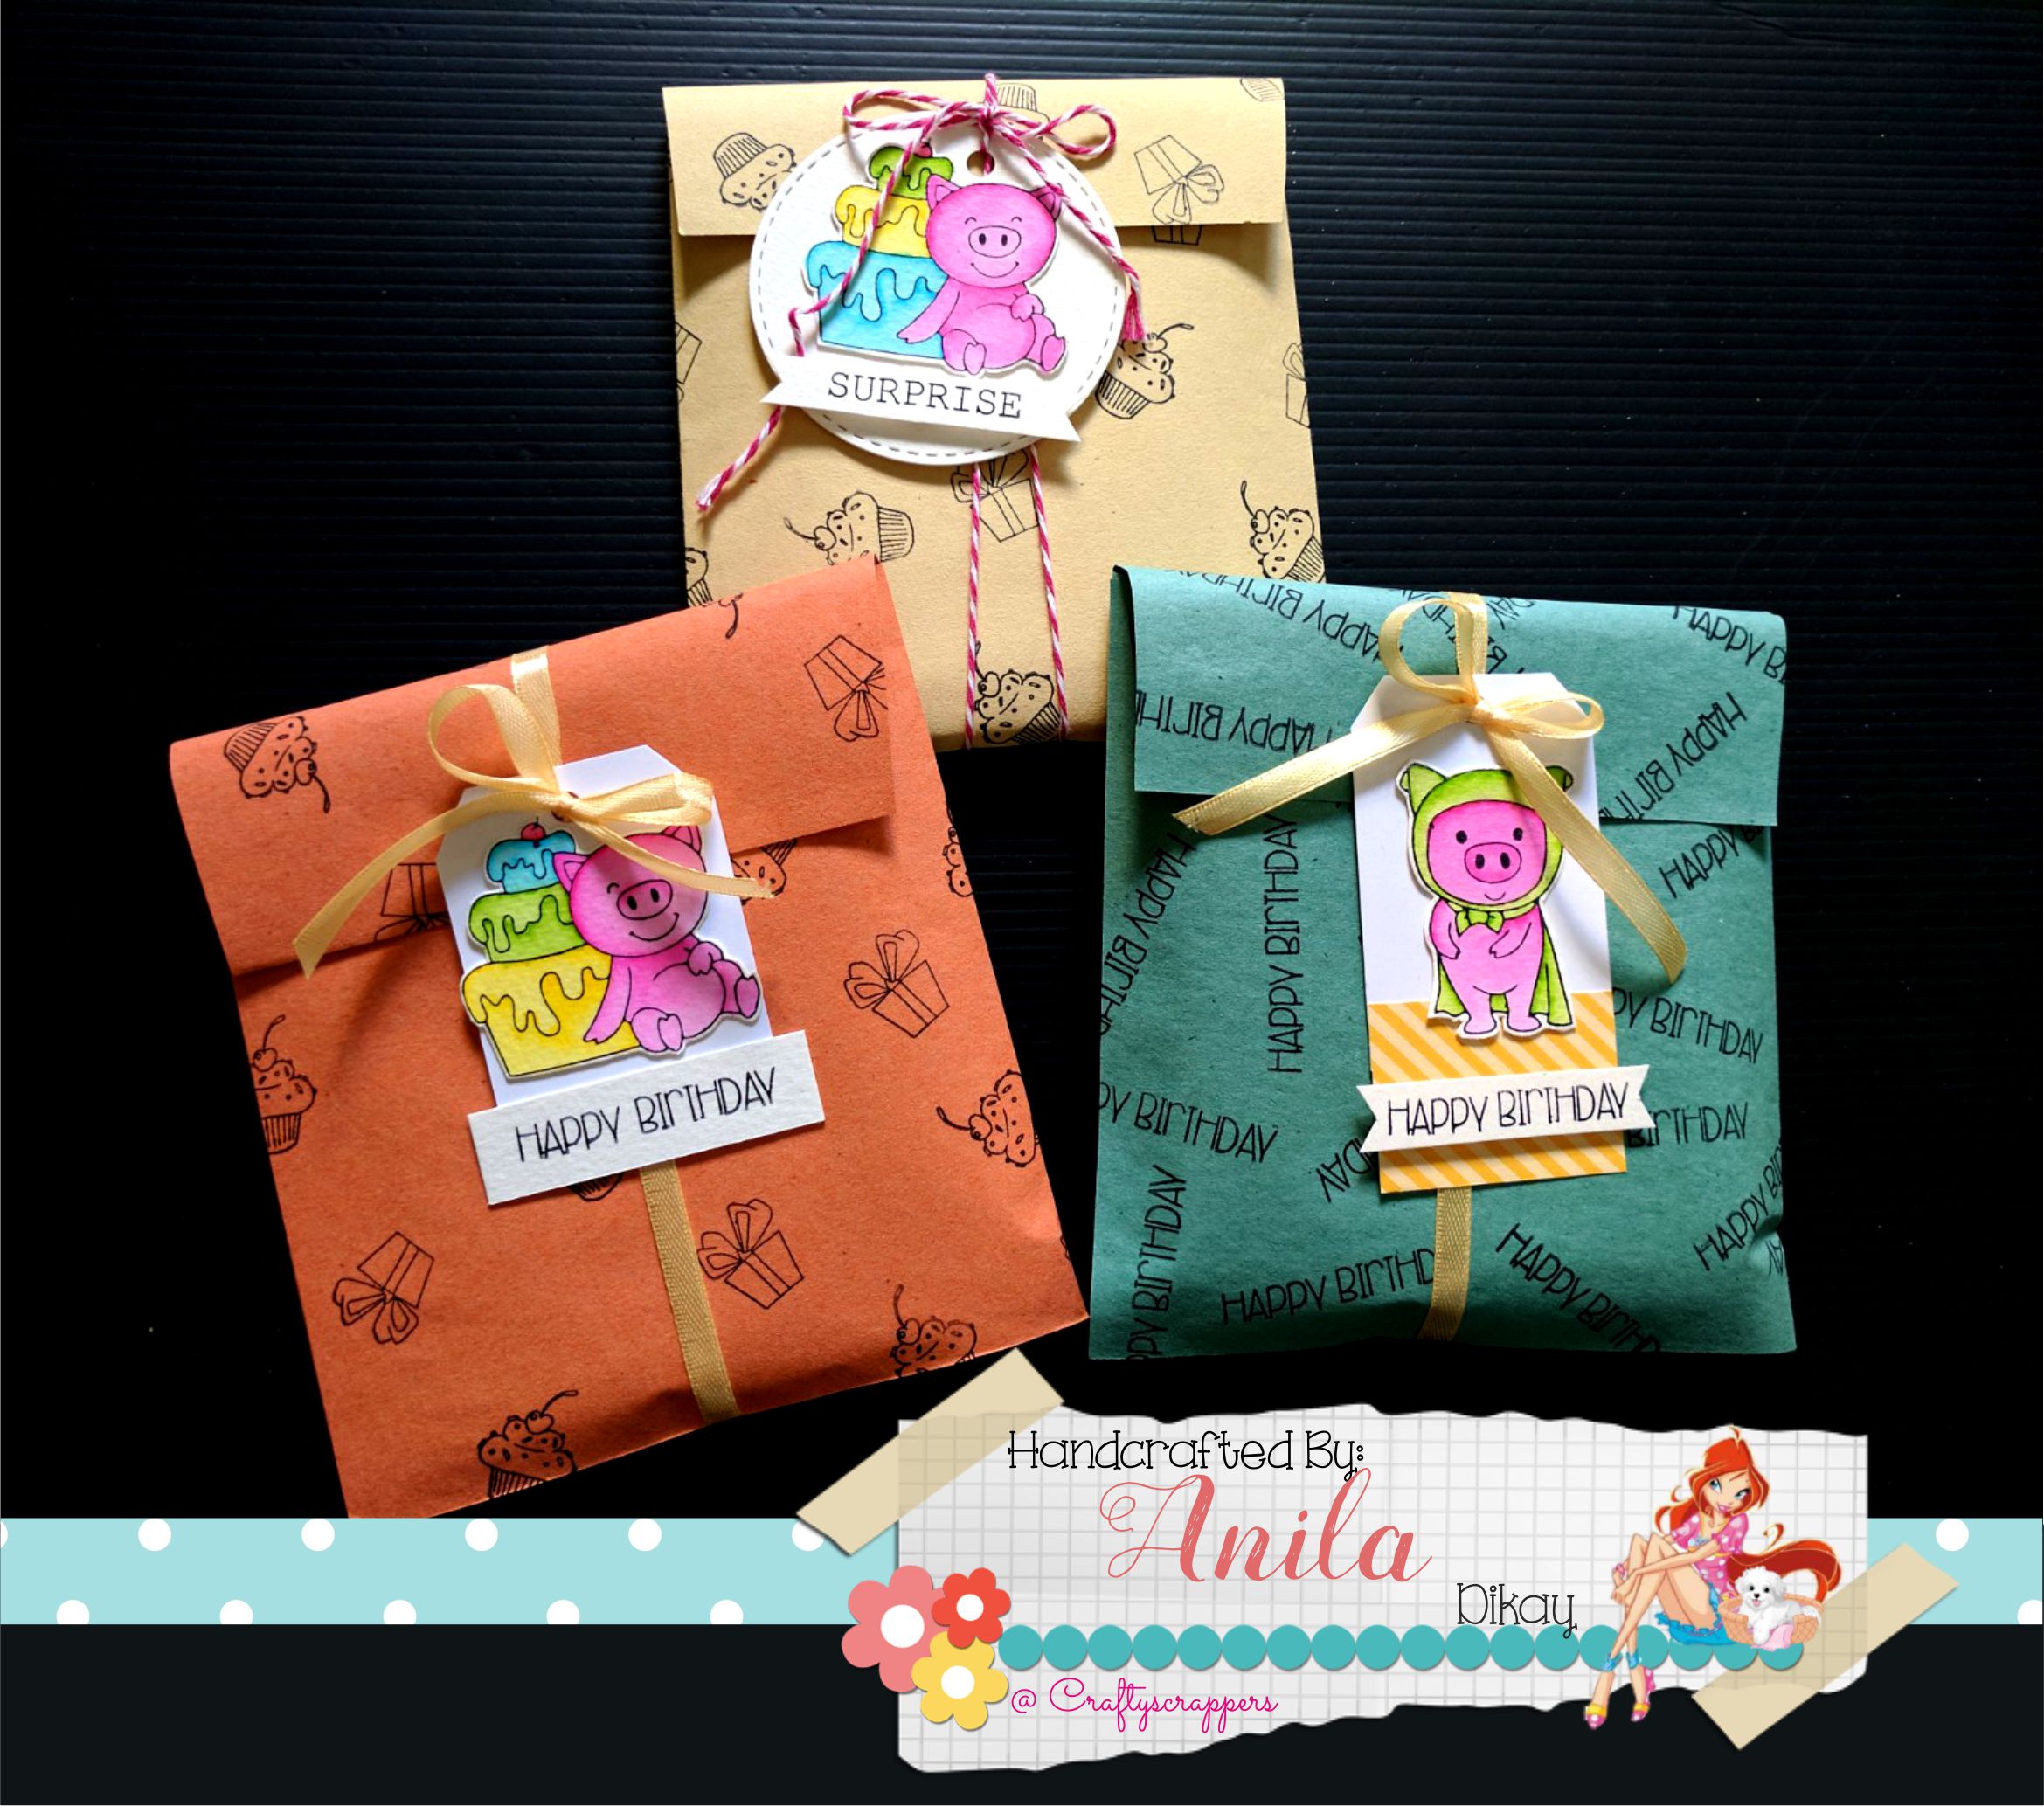
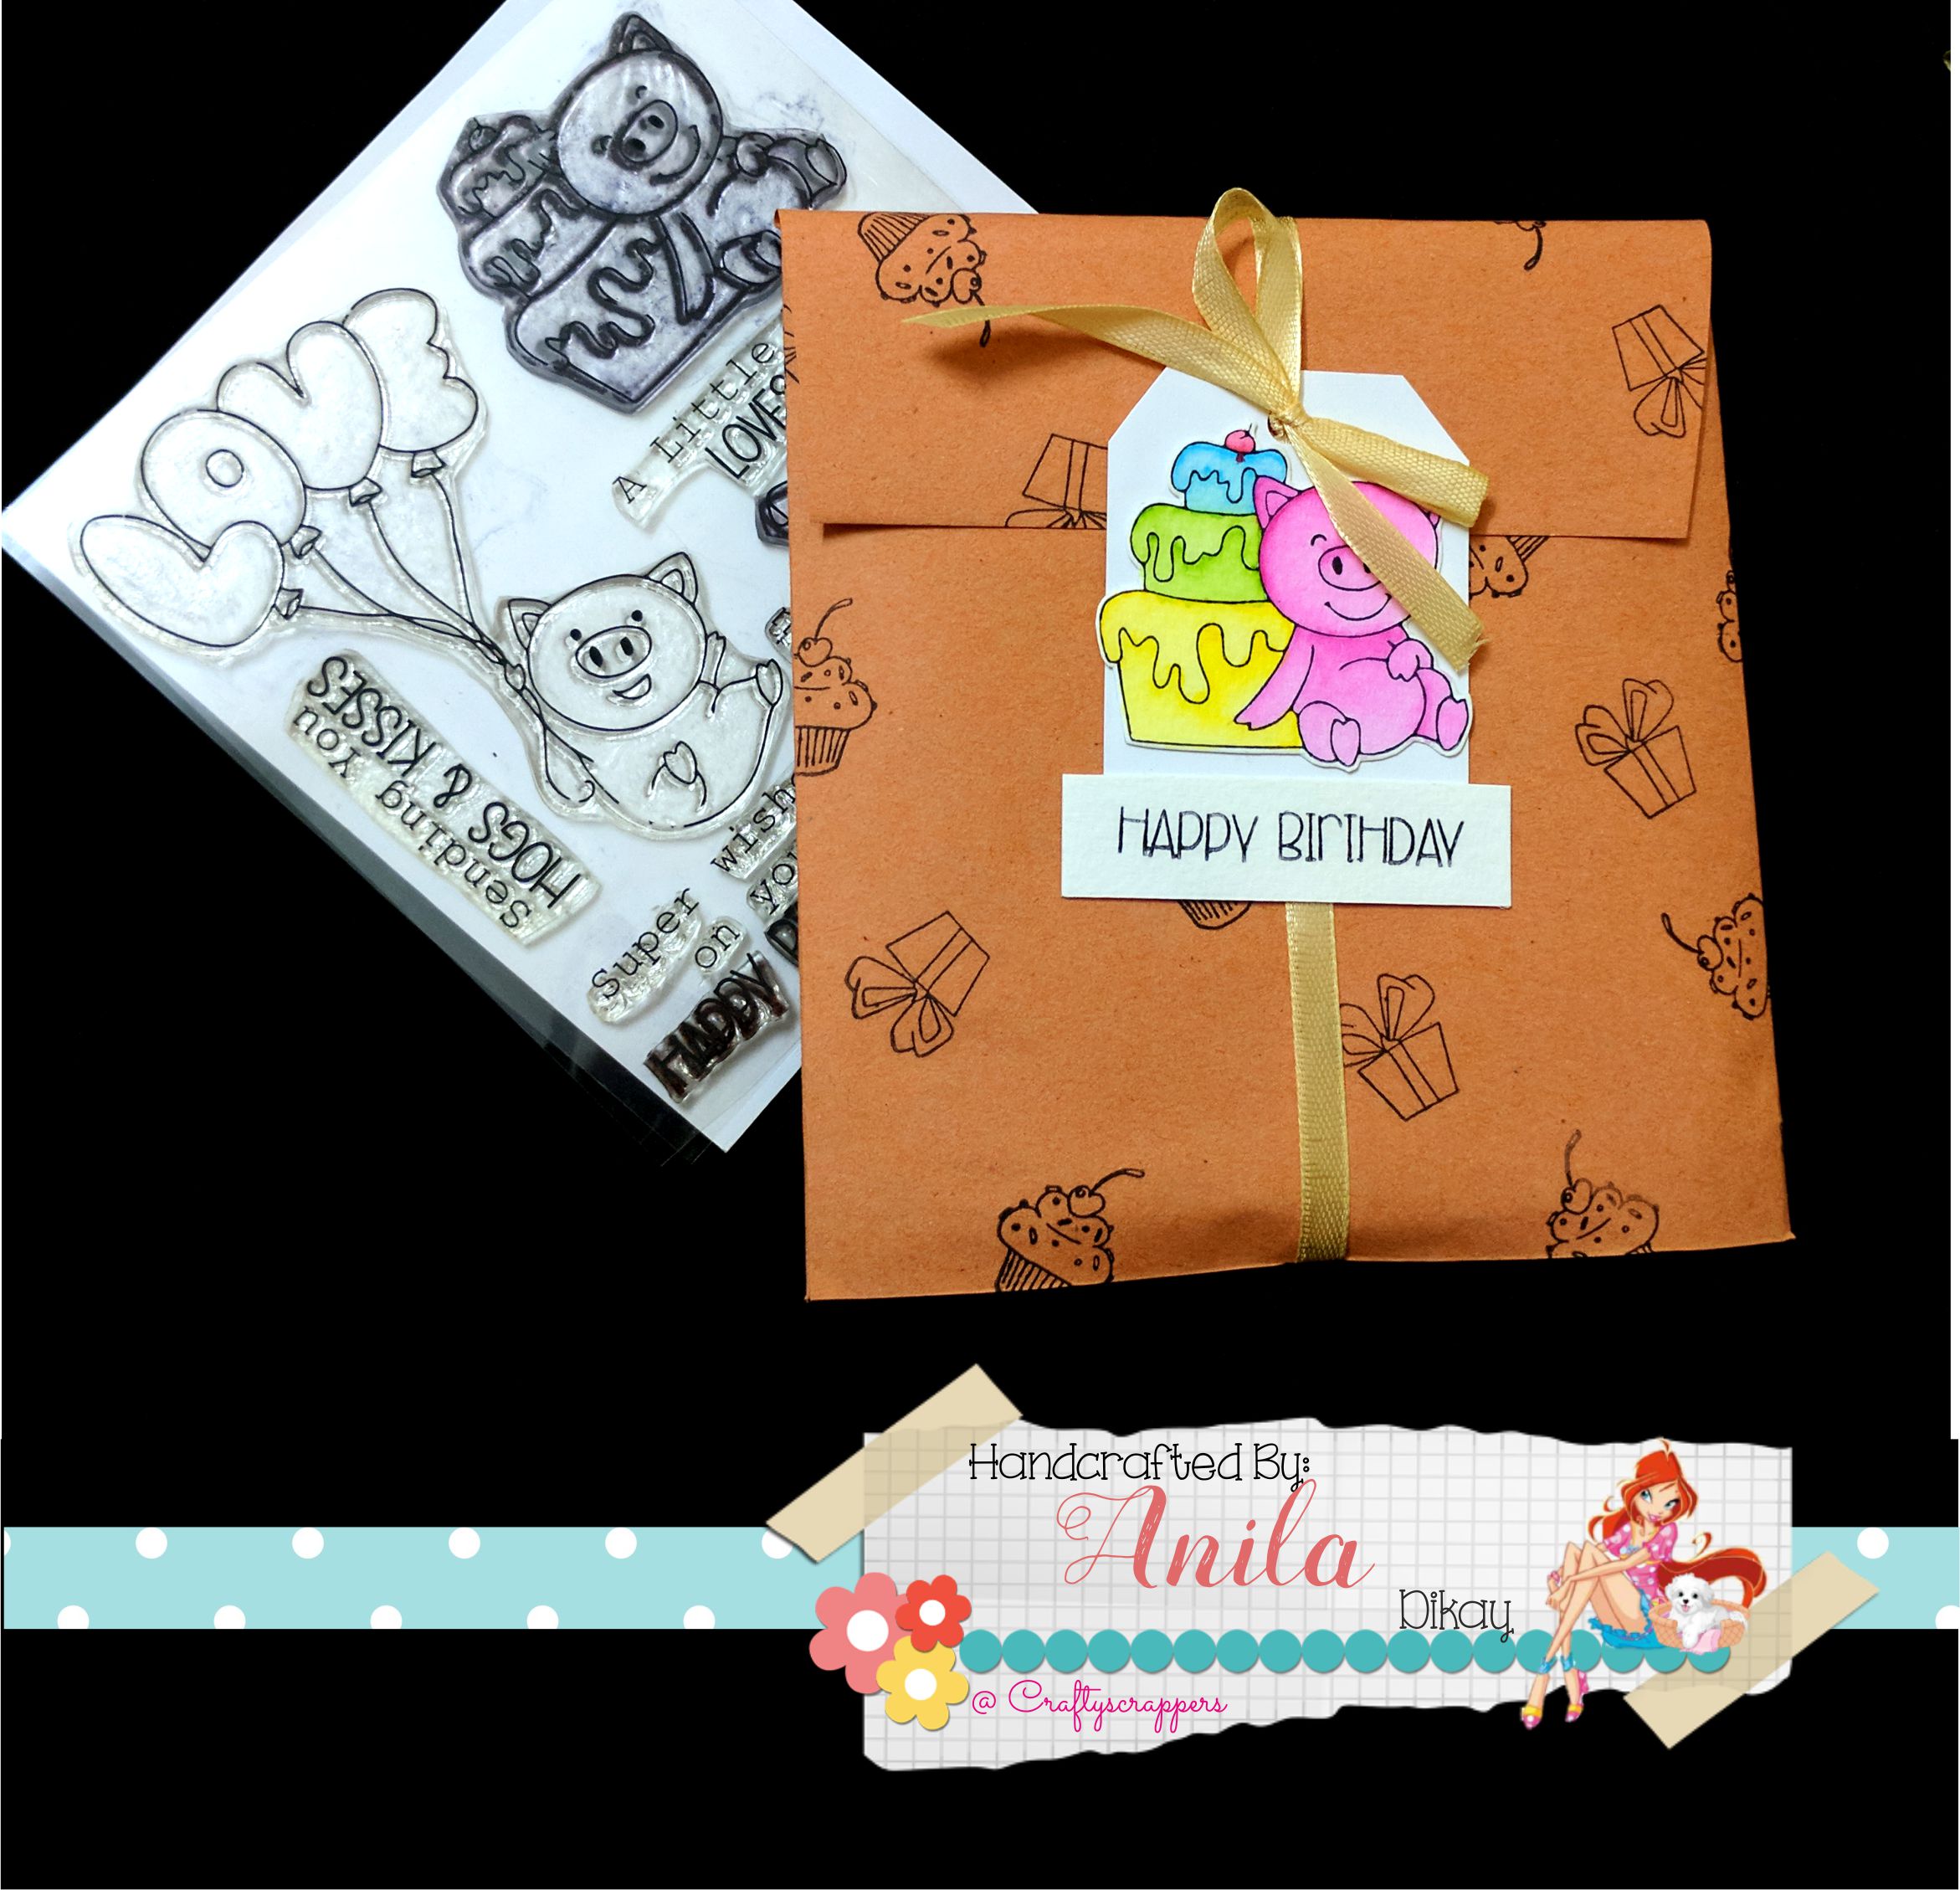
Here’s a look at the completed treat bags!

- A4 sized colored papers
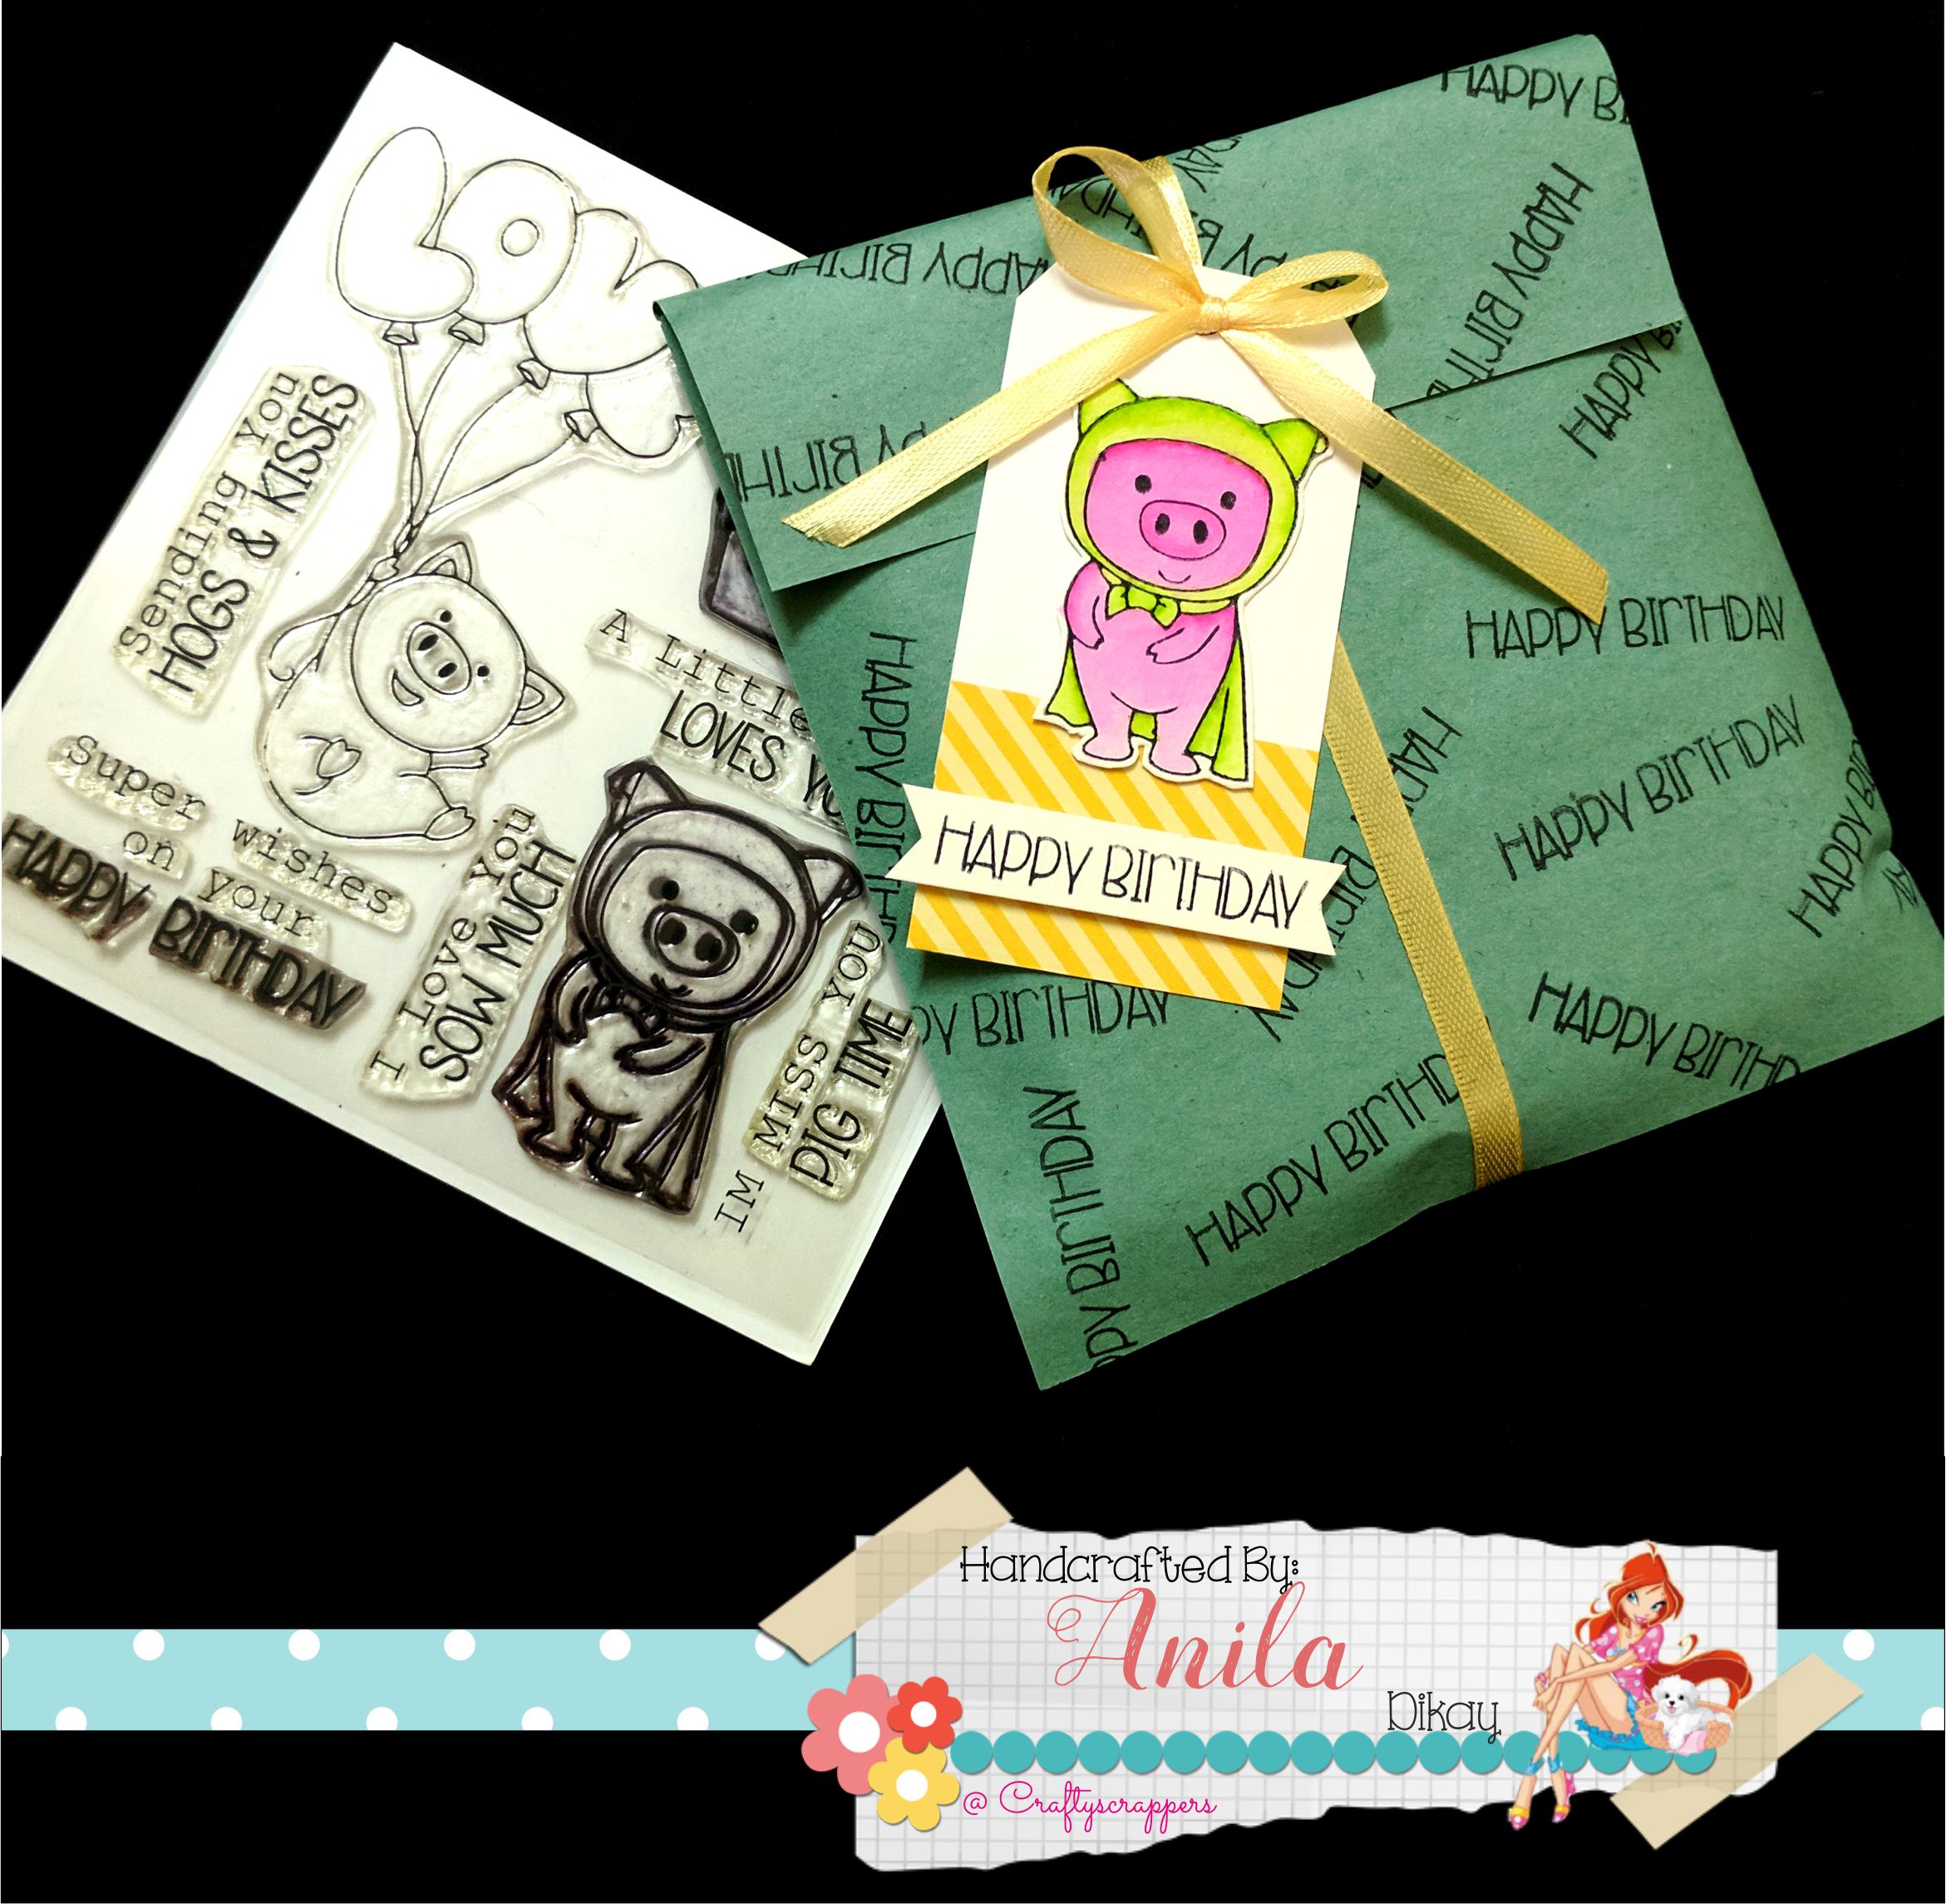
- Stamp sets (Peek-a-boo and Hogs & Kisses)
- Archival ink
- Zig clean markers (or your choice of colors)
- Scrap papers
- Satin ribbon/twine
- Foam adhesive
A step-by-step pictorial guiding you in making your own treat bags.
so lets begin…
so lets begin…

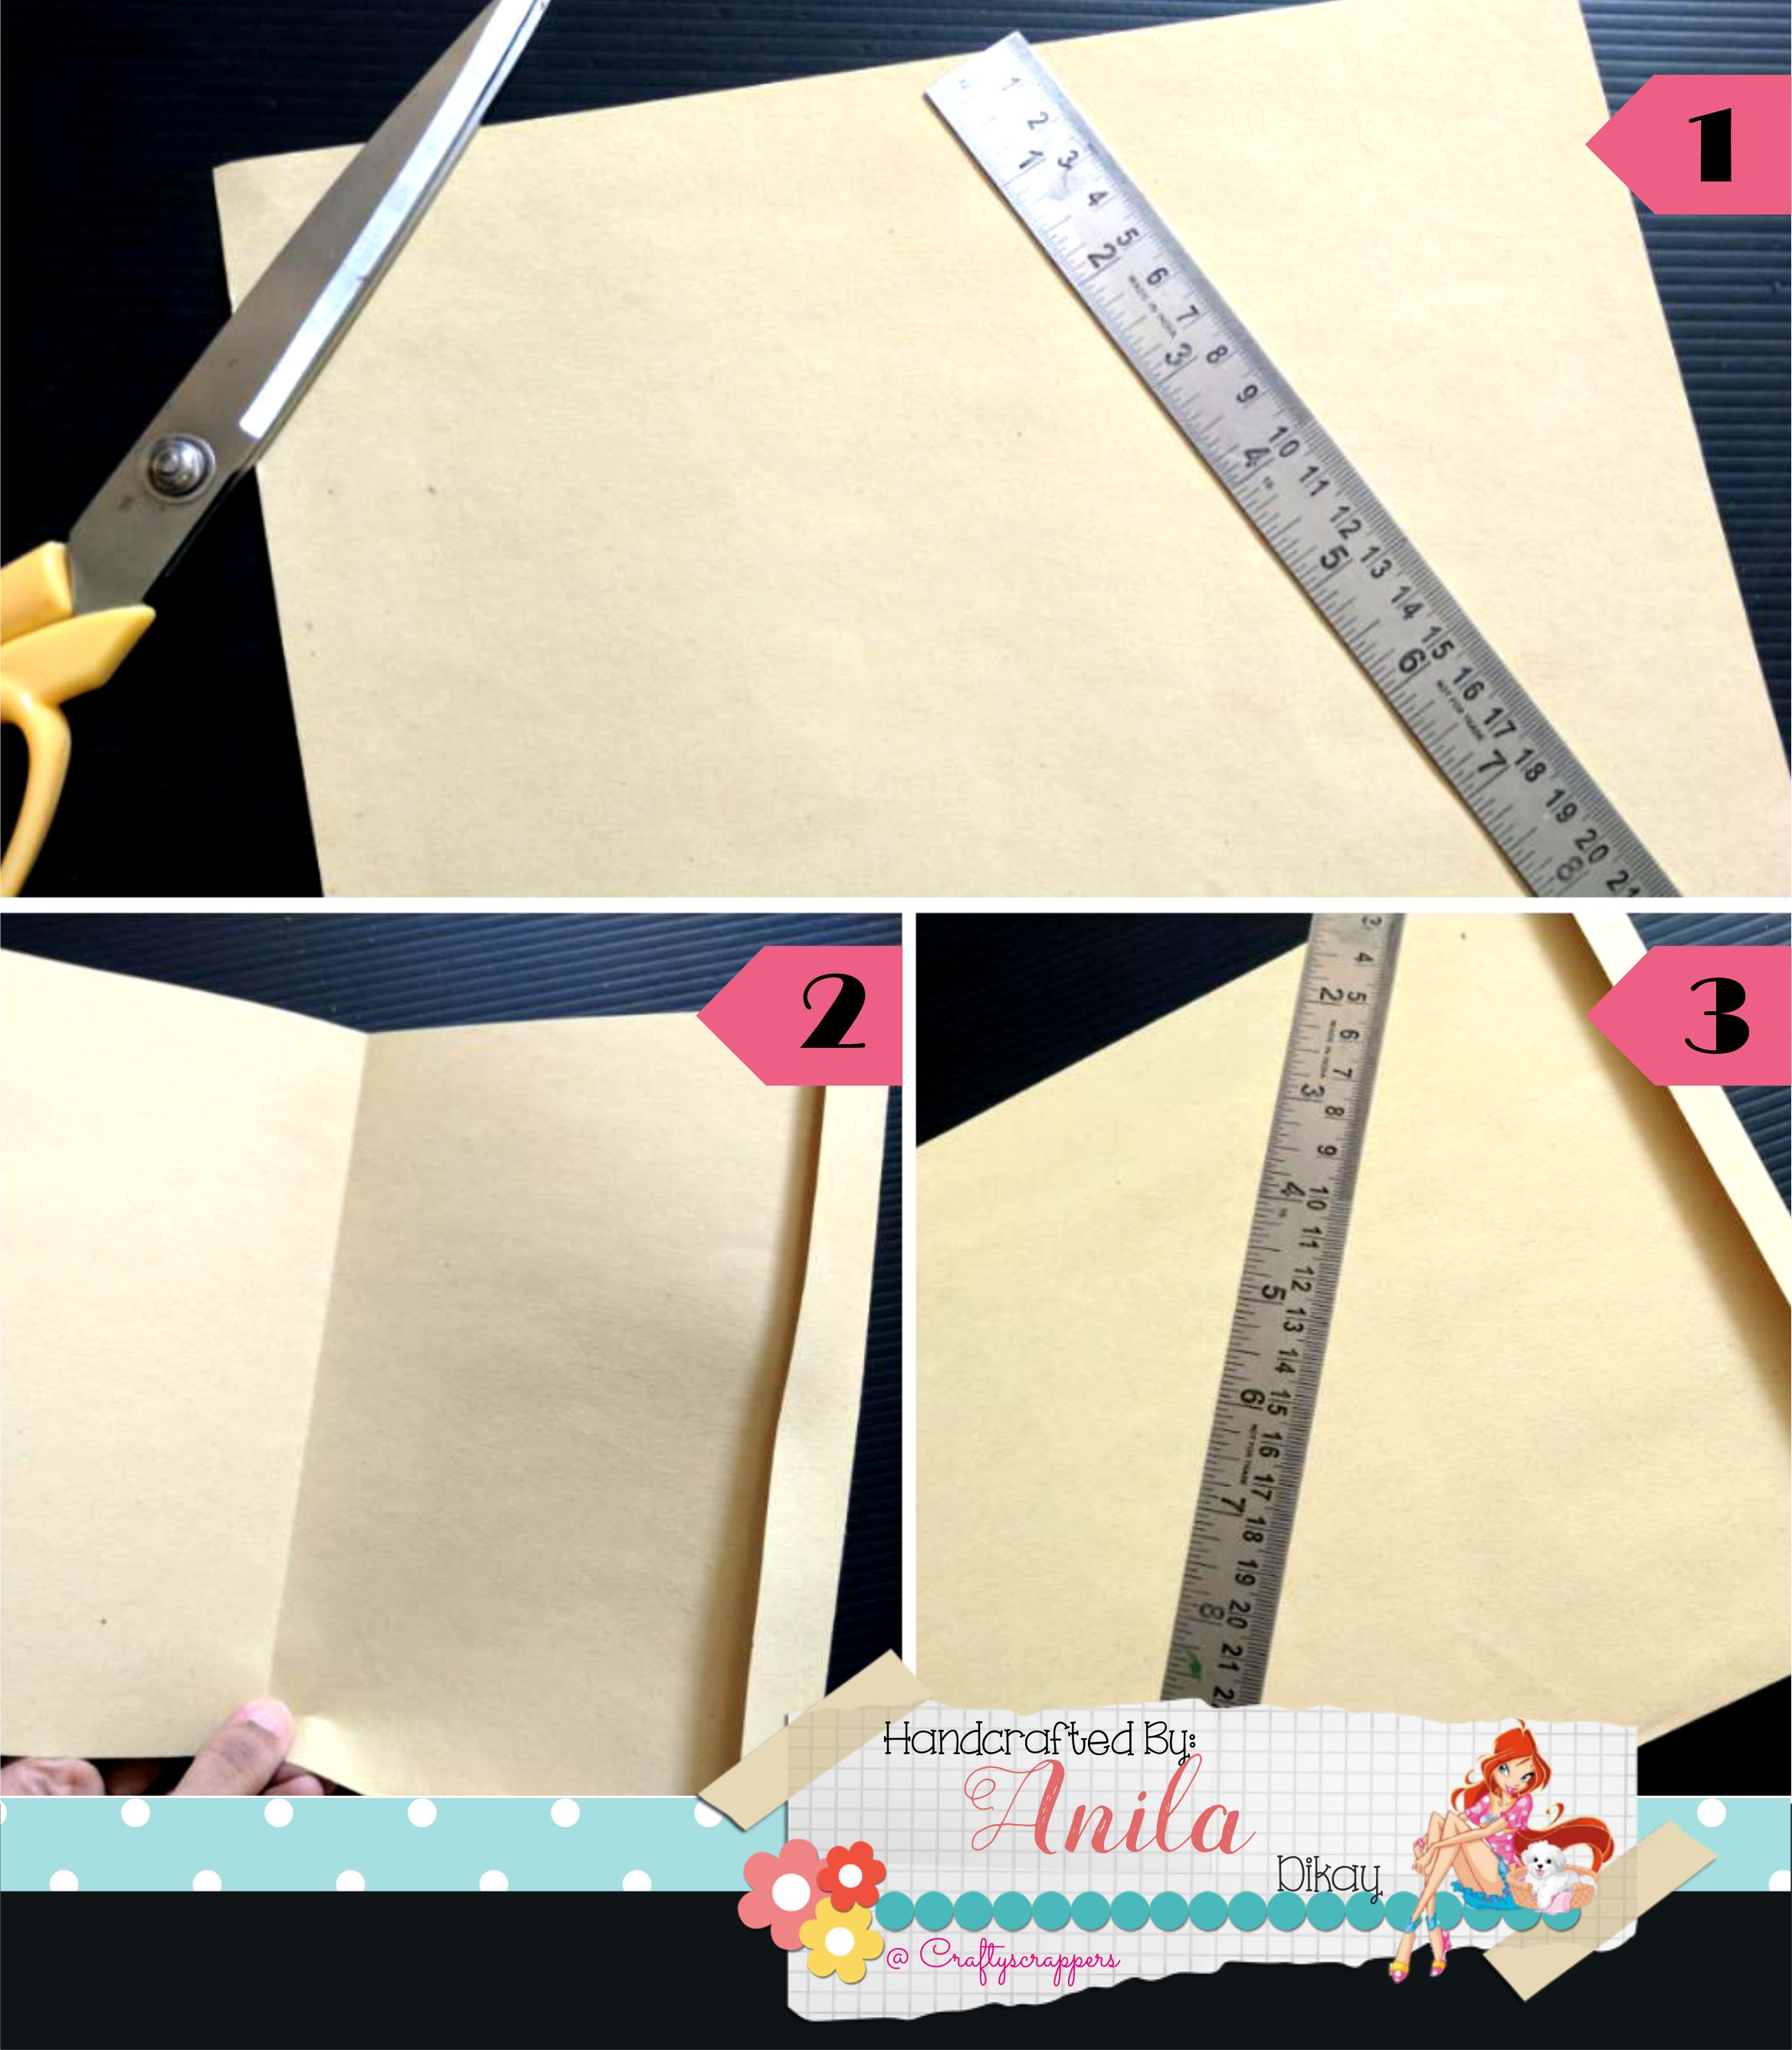
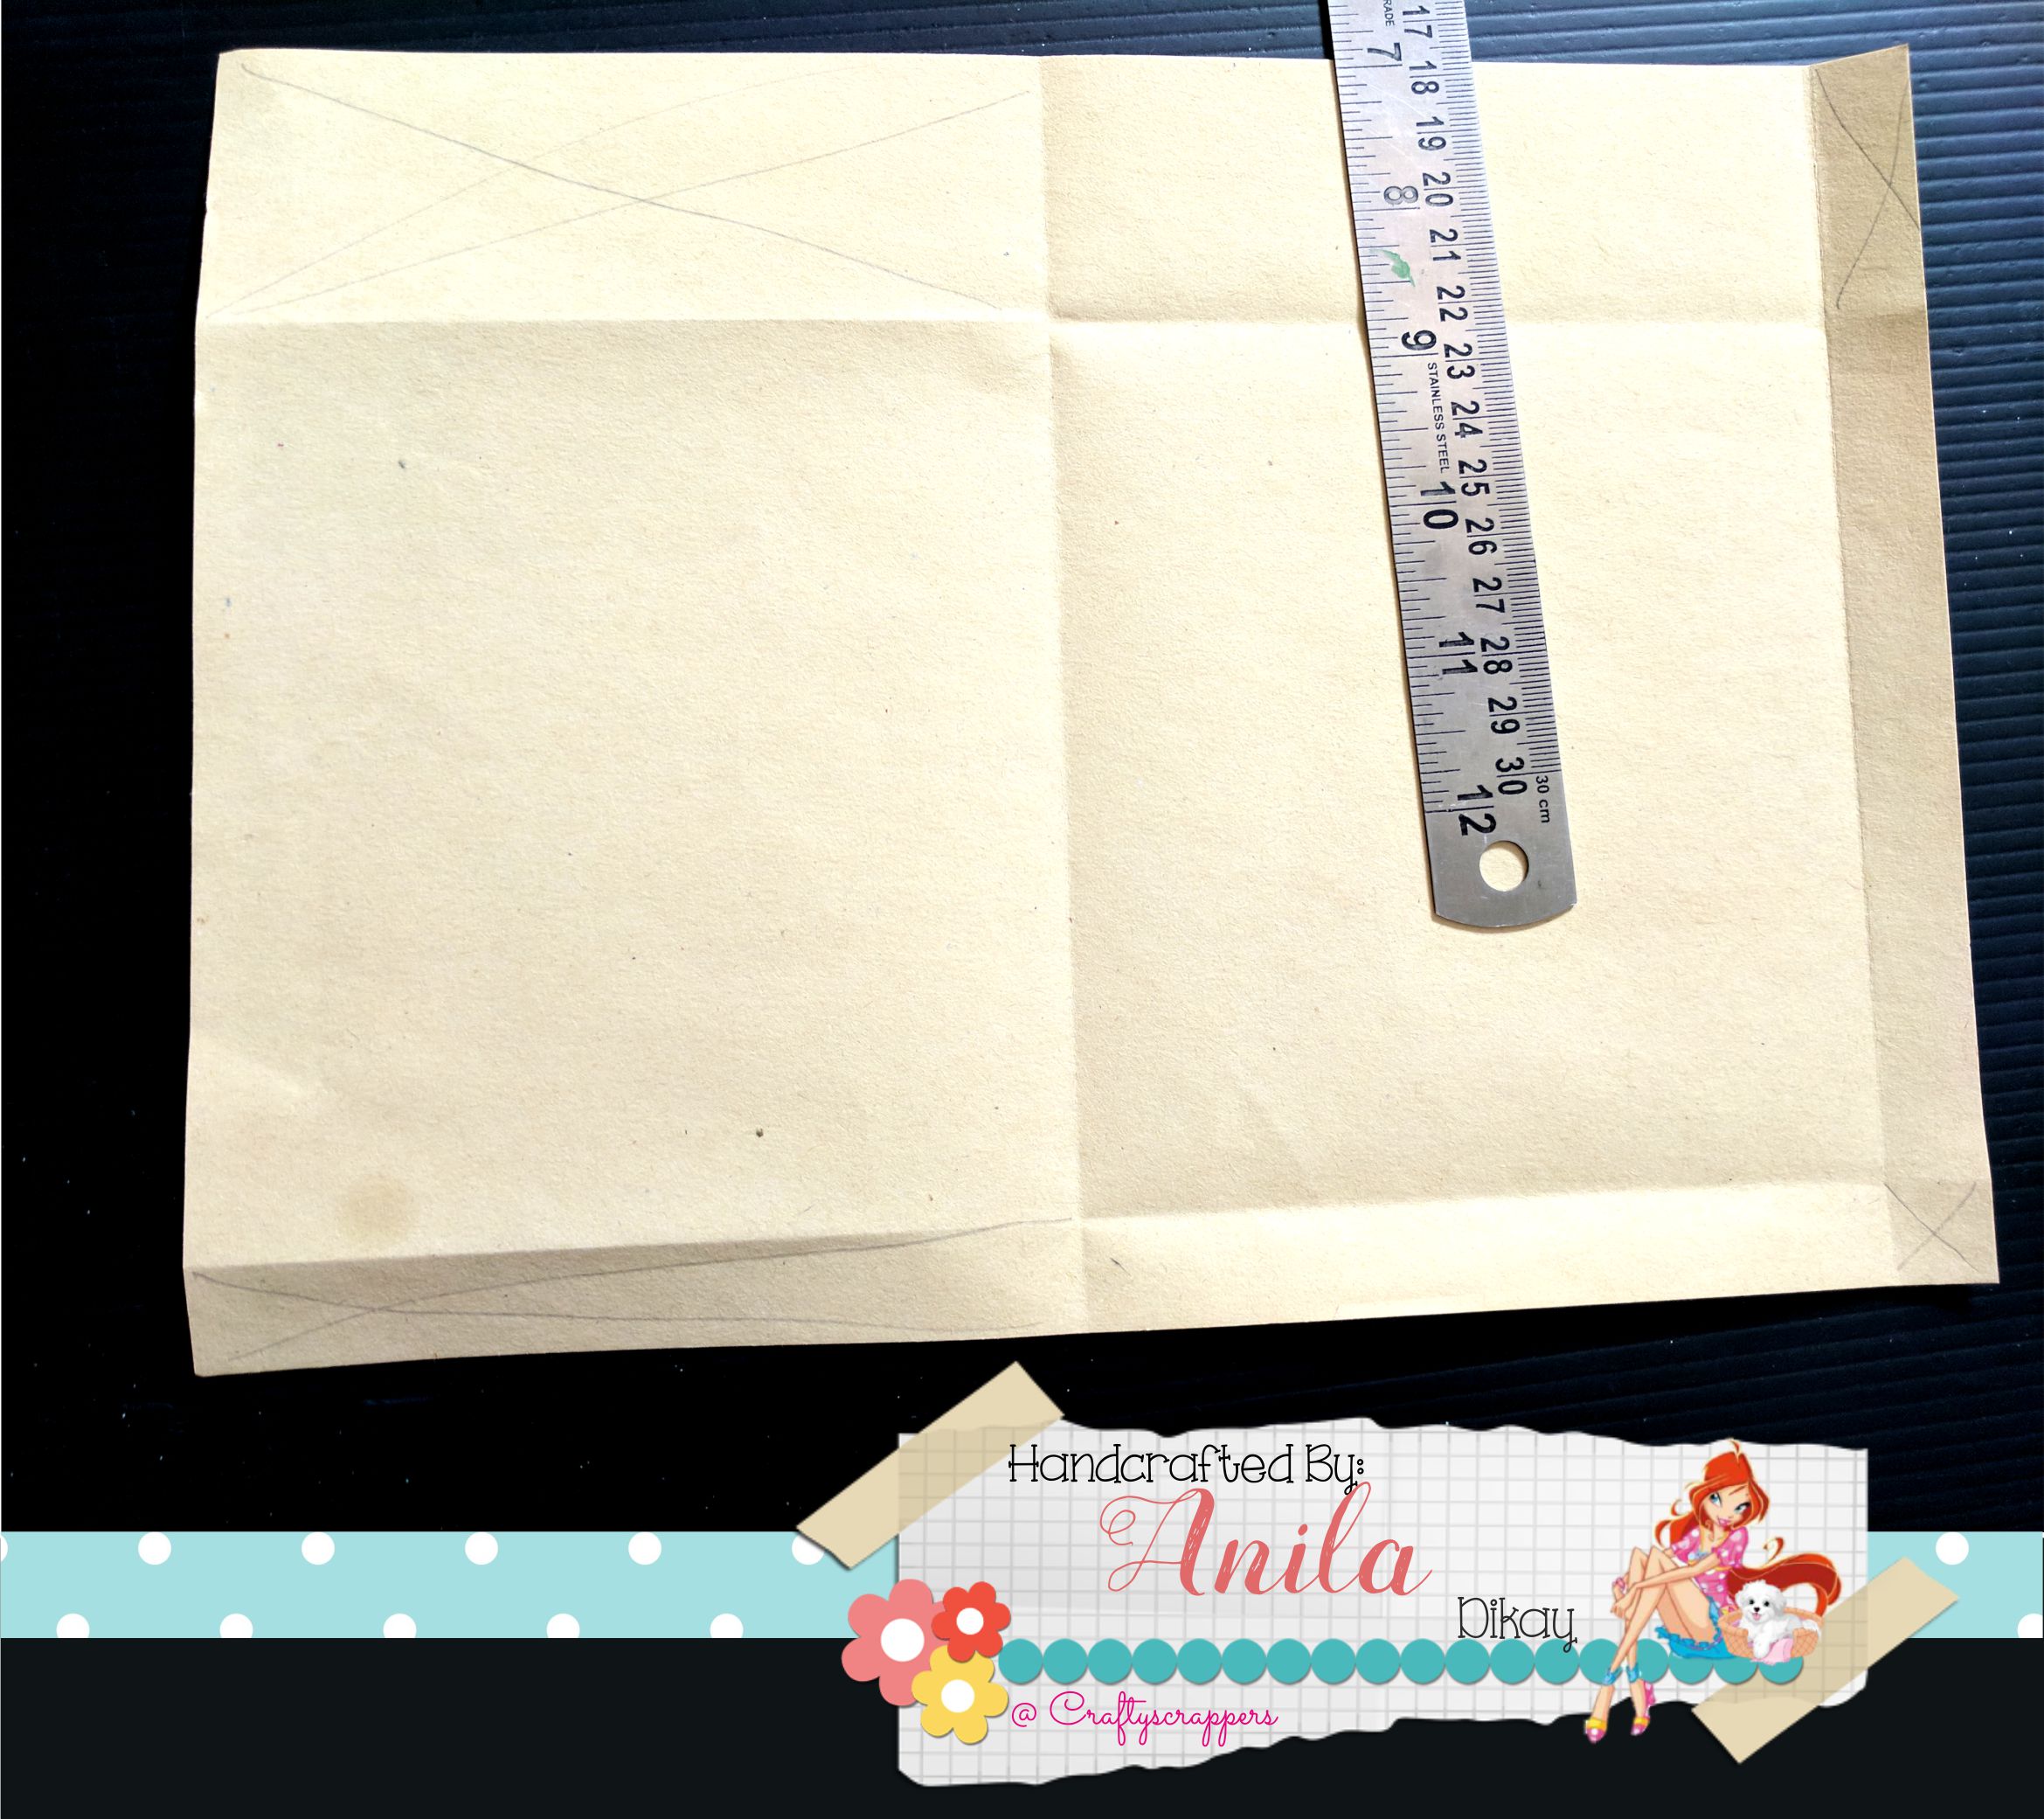
I took an A4 size paper.
(The paper size would depend on the size of your gift.)
Folded half-inch margin at one edge.
Folded the remaining paper into half.
Folded the remaining paper into half.

Folded /Scored half an inch at the one end of this folded paper
and one and a half inch at the other end.

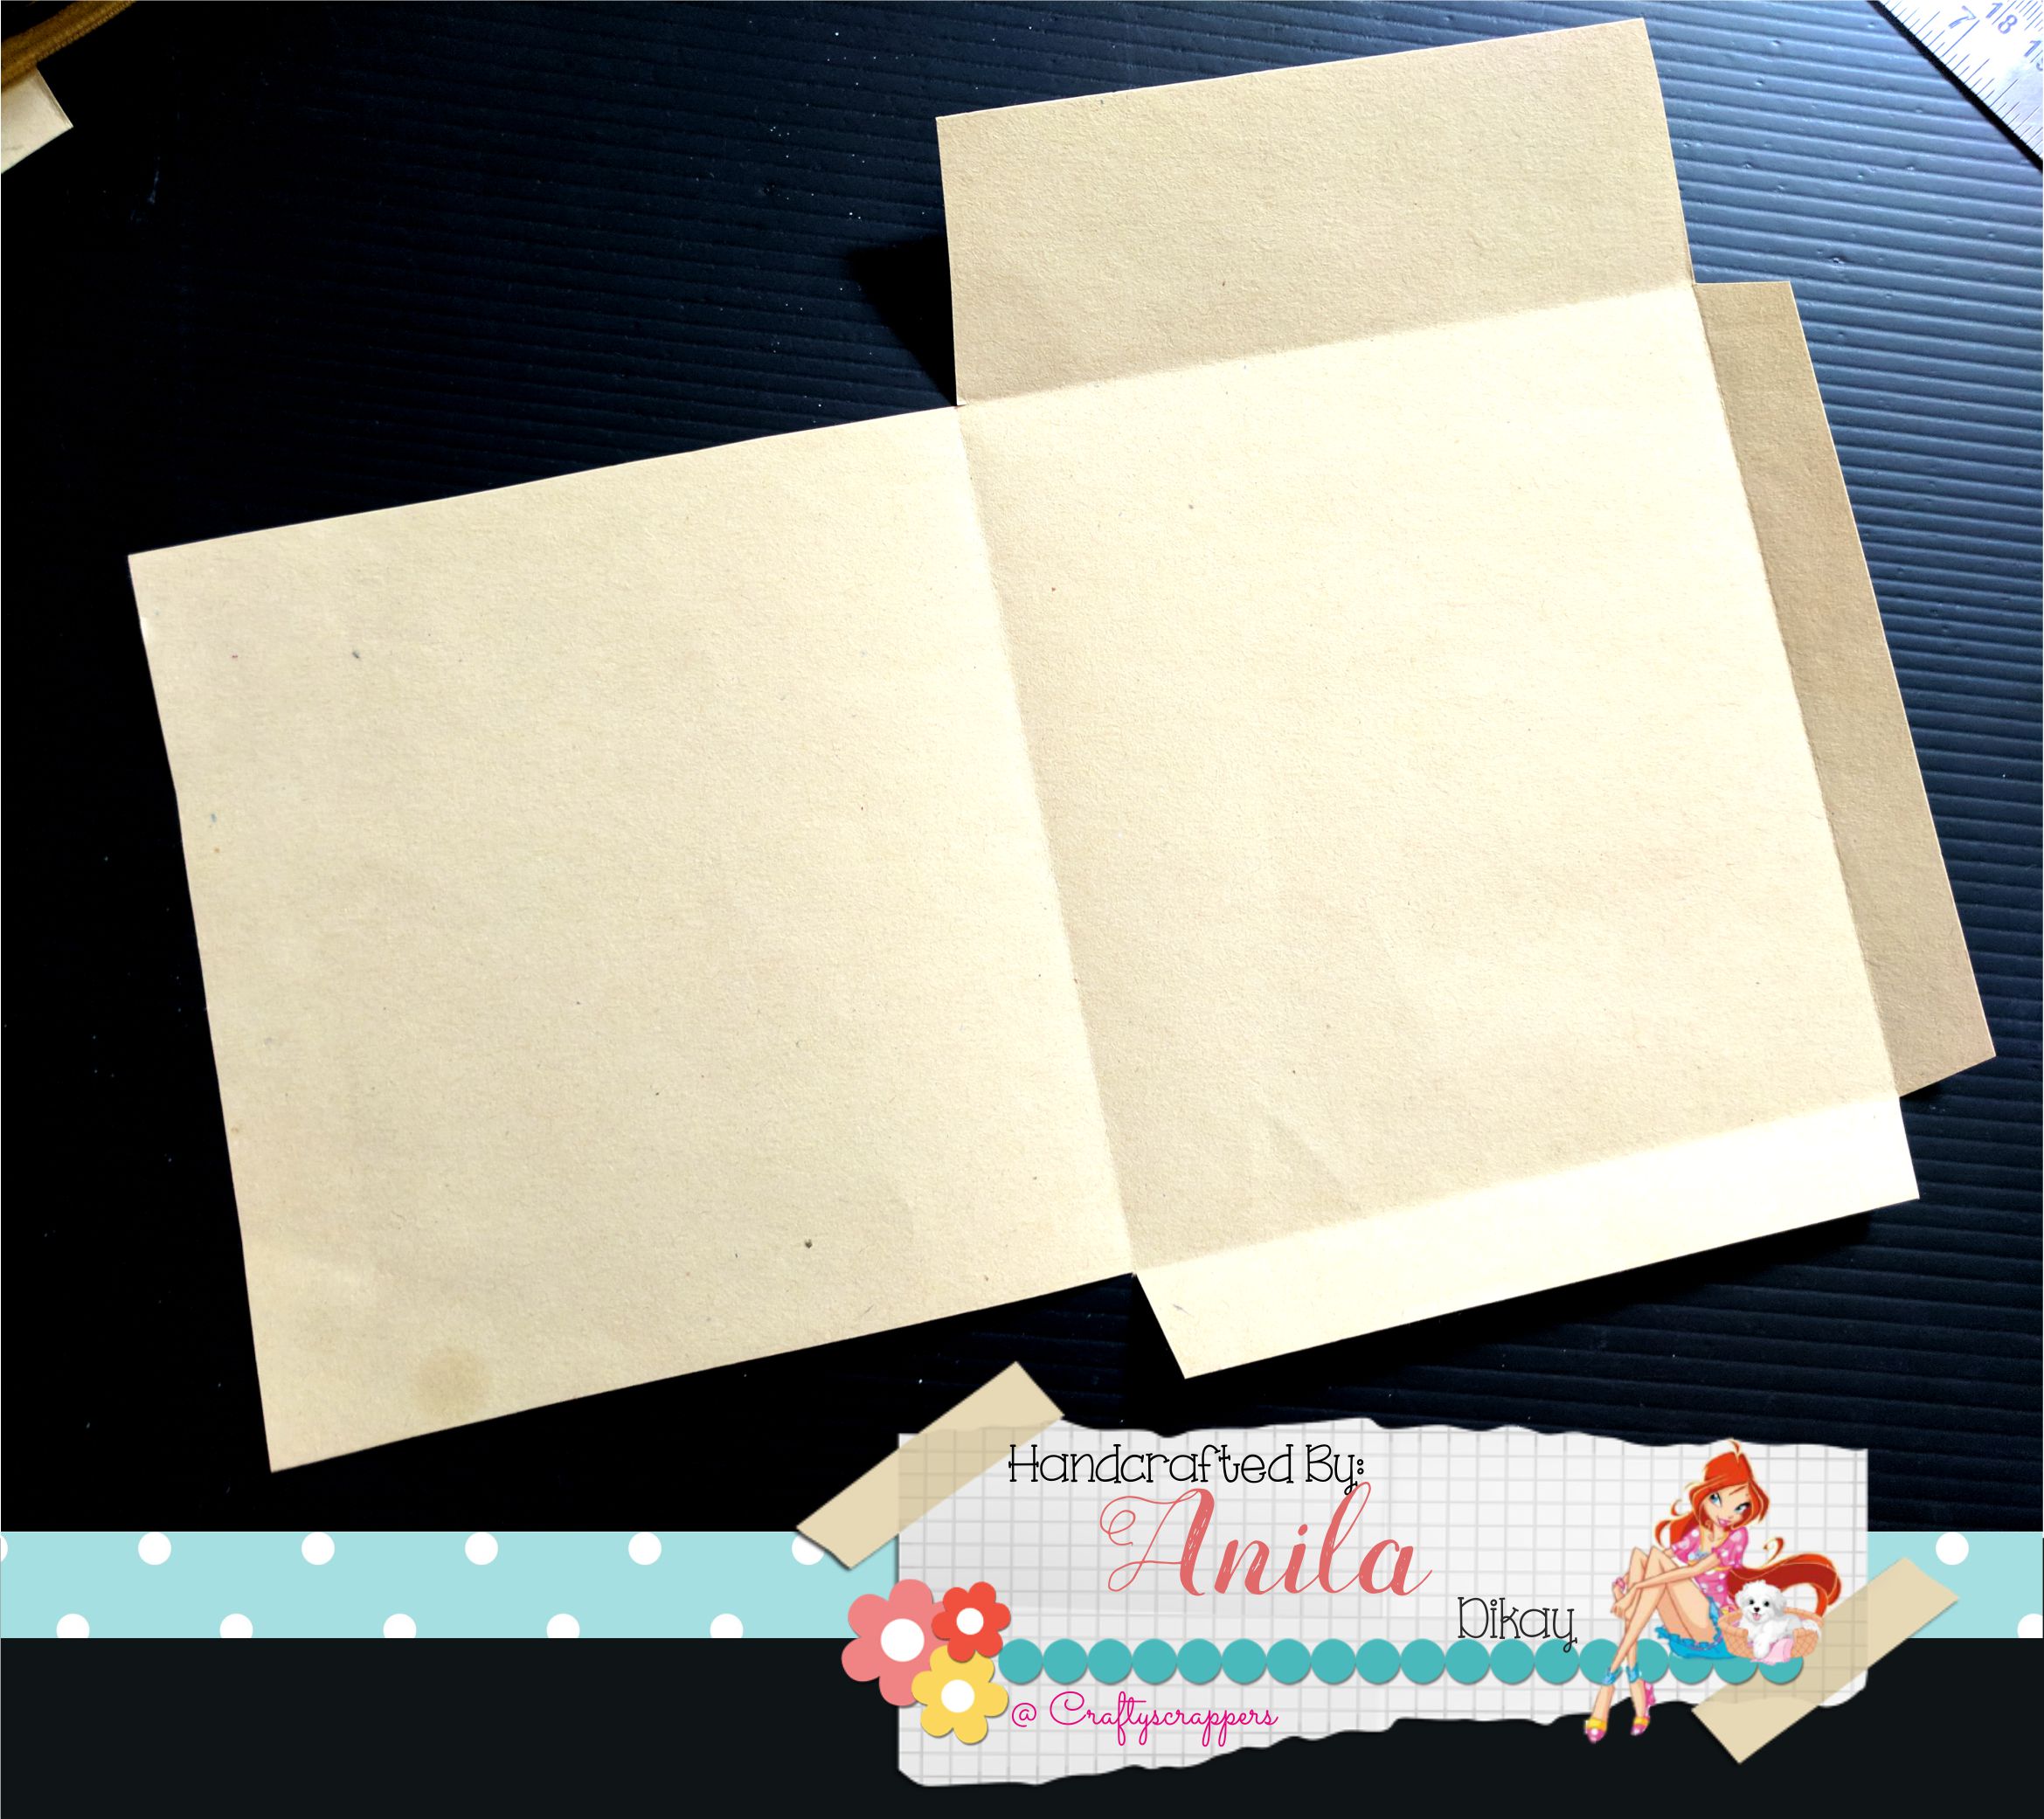
Opened the sheet and cut the marked parts.

On cutting/trimming the marked parts, you get a sheet with scored sides.
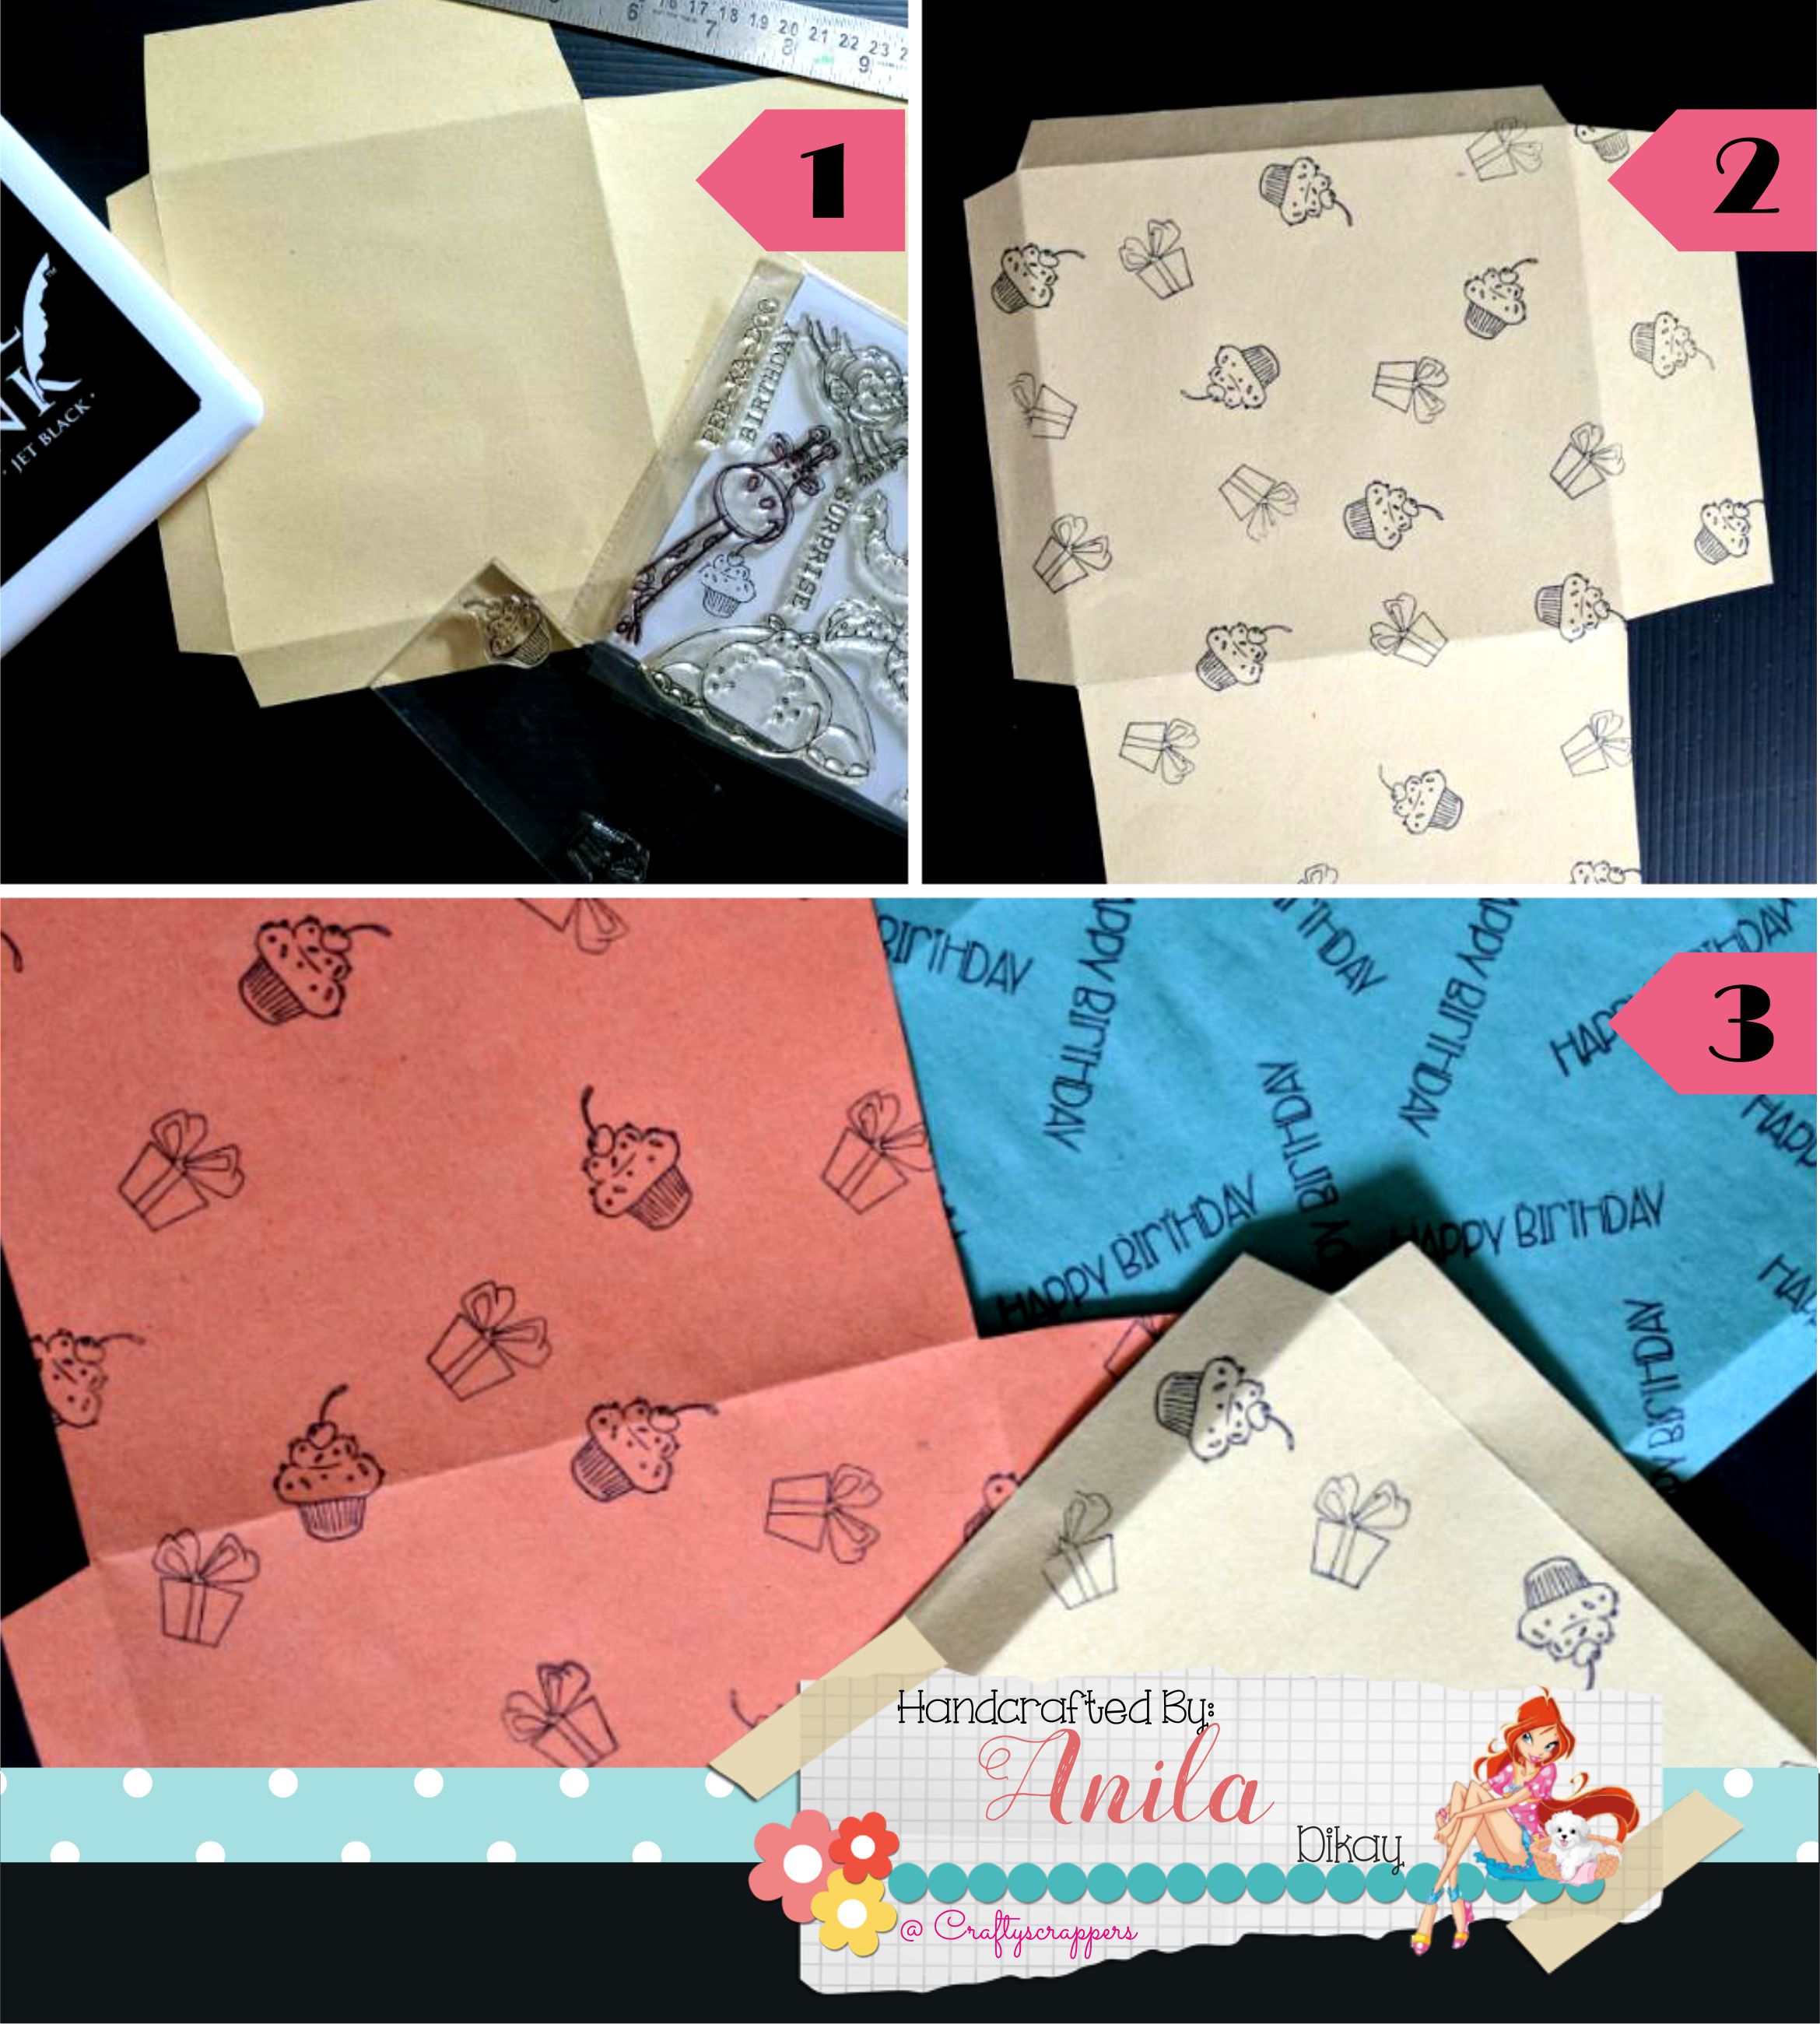
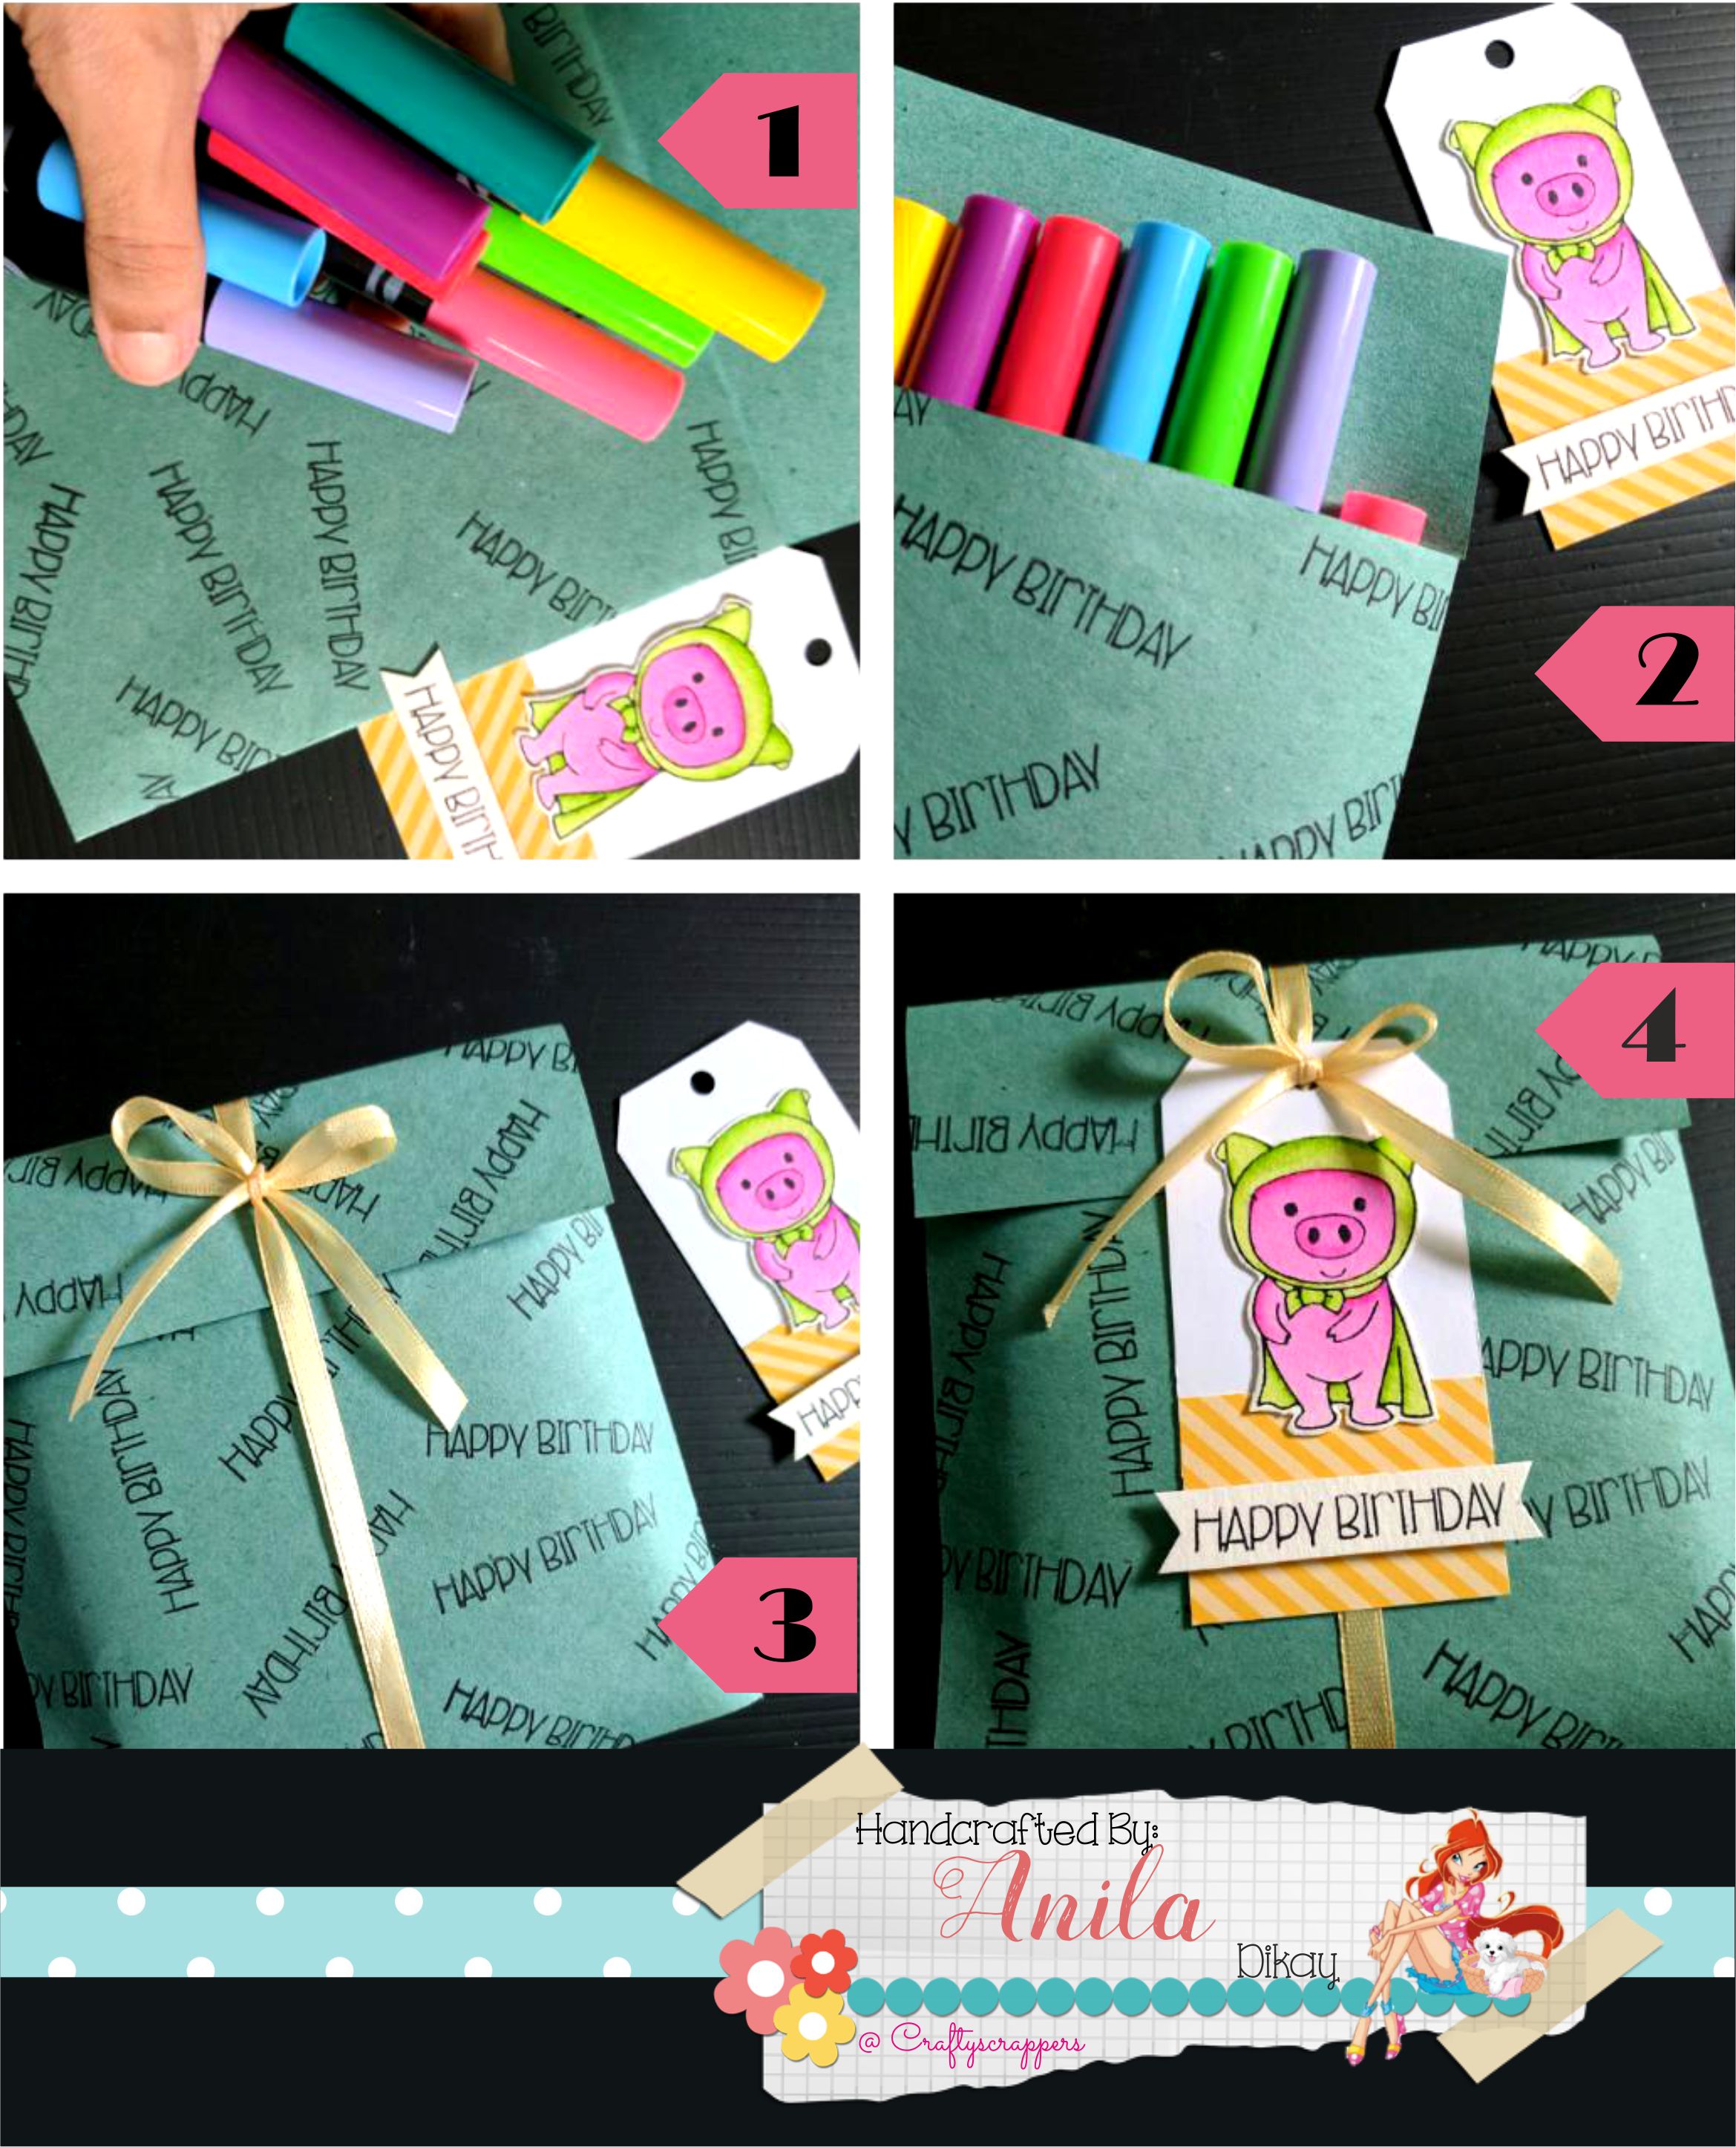
I took Archival ink and my favorite stamp sets.
I took two images from the stamp set and stamped the images randomly all over the sheet (rotating the image randomly) Let the ink dry before the next step.
I took two images from the stamp set and stamped the images randomly all over the sheet (rotating the image randomly) Let the ink dry before the next step.
Here, I have used different colored papers to make the treat bags. You can also use a white sheet and lightly color these stamped images.

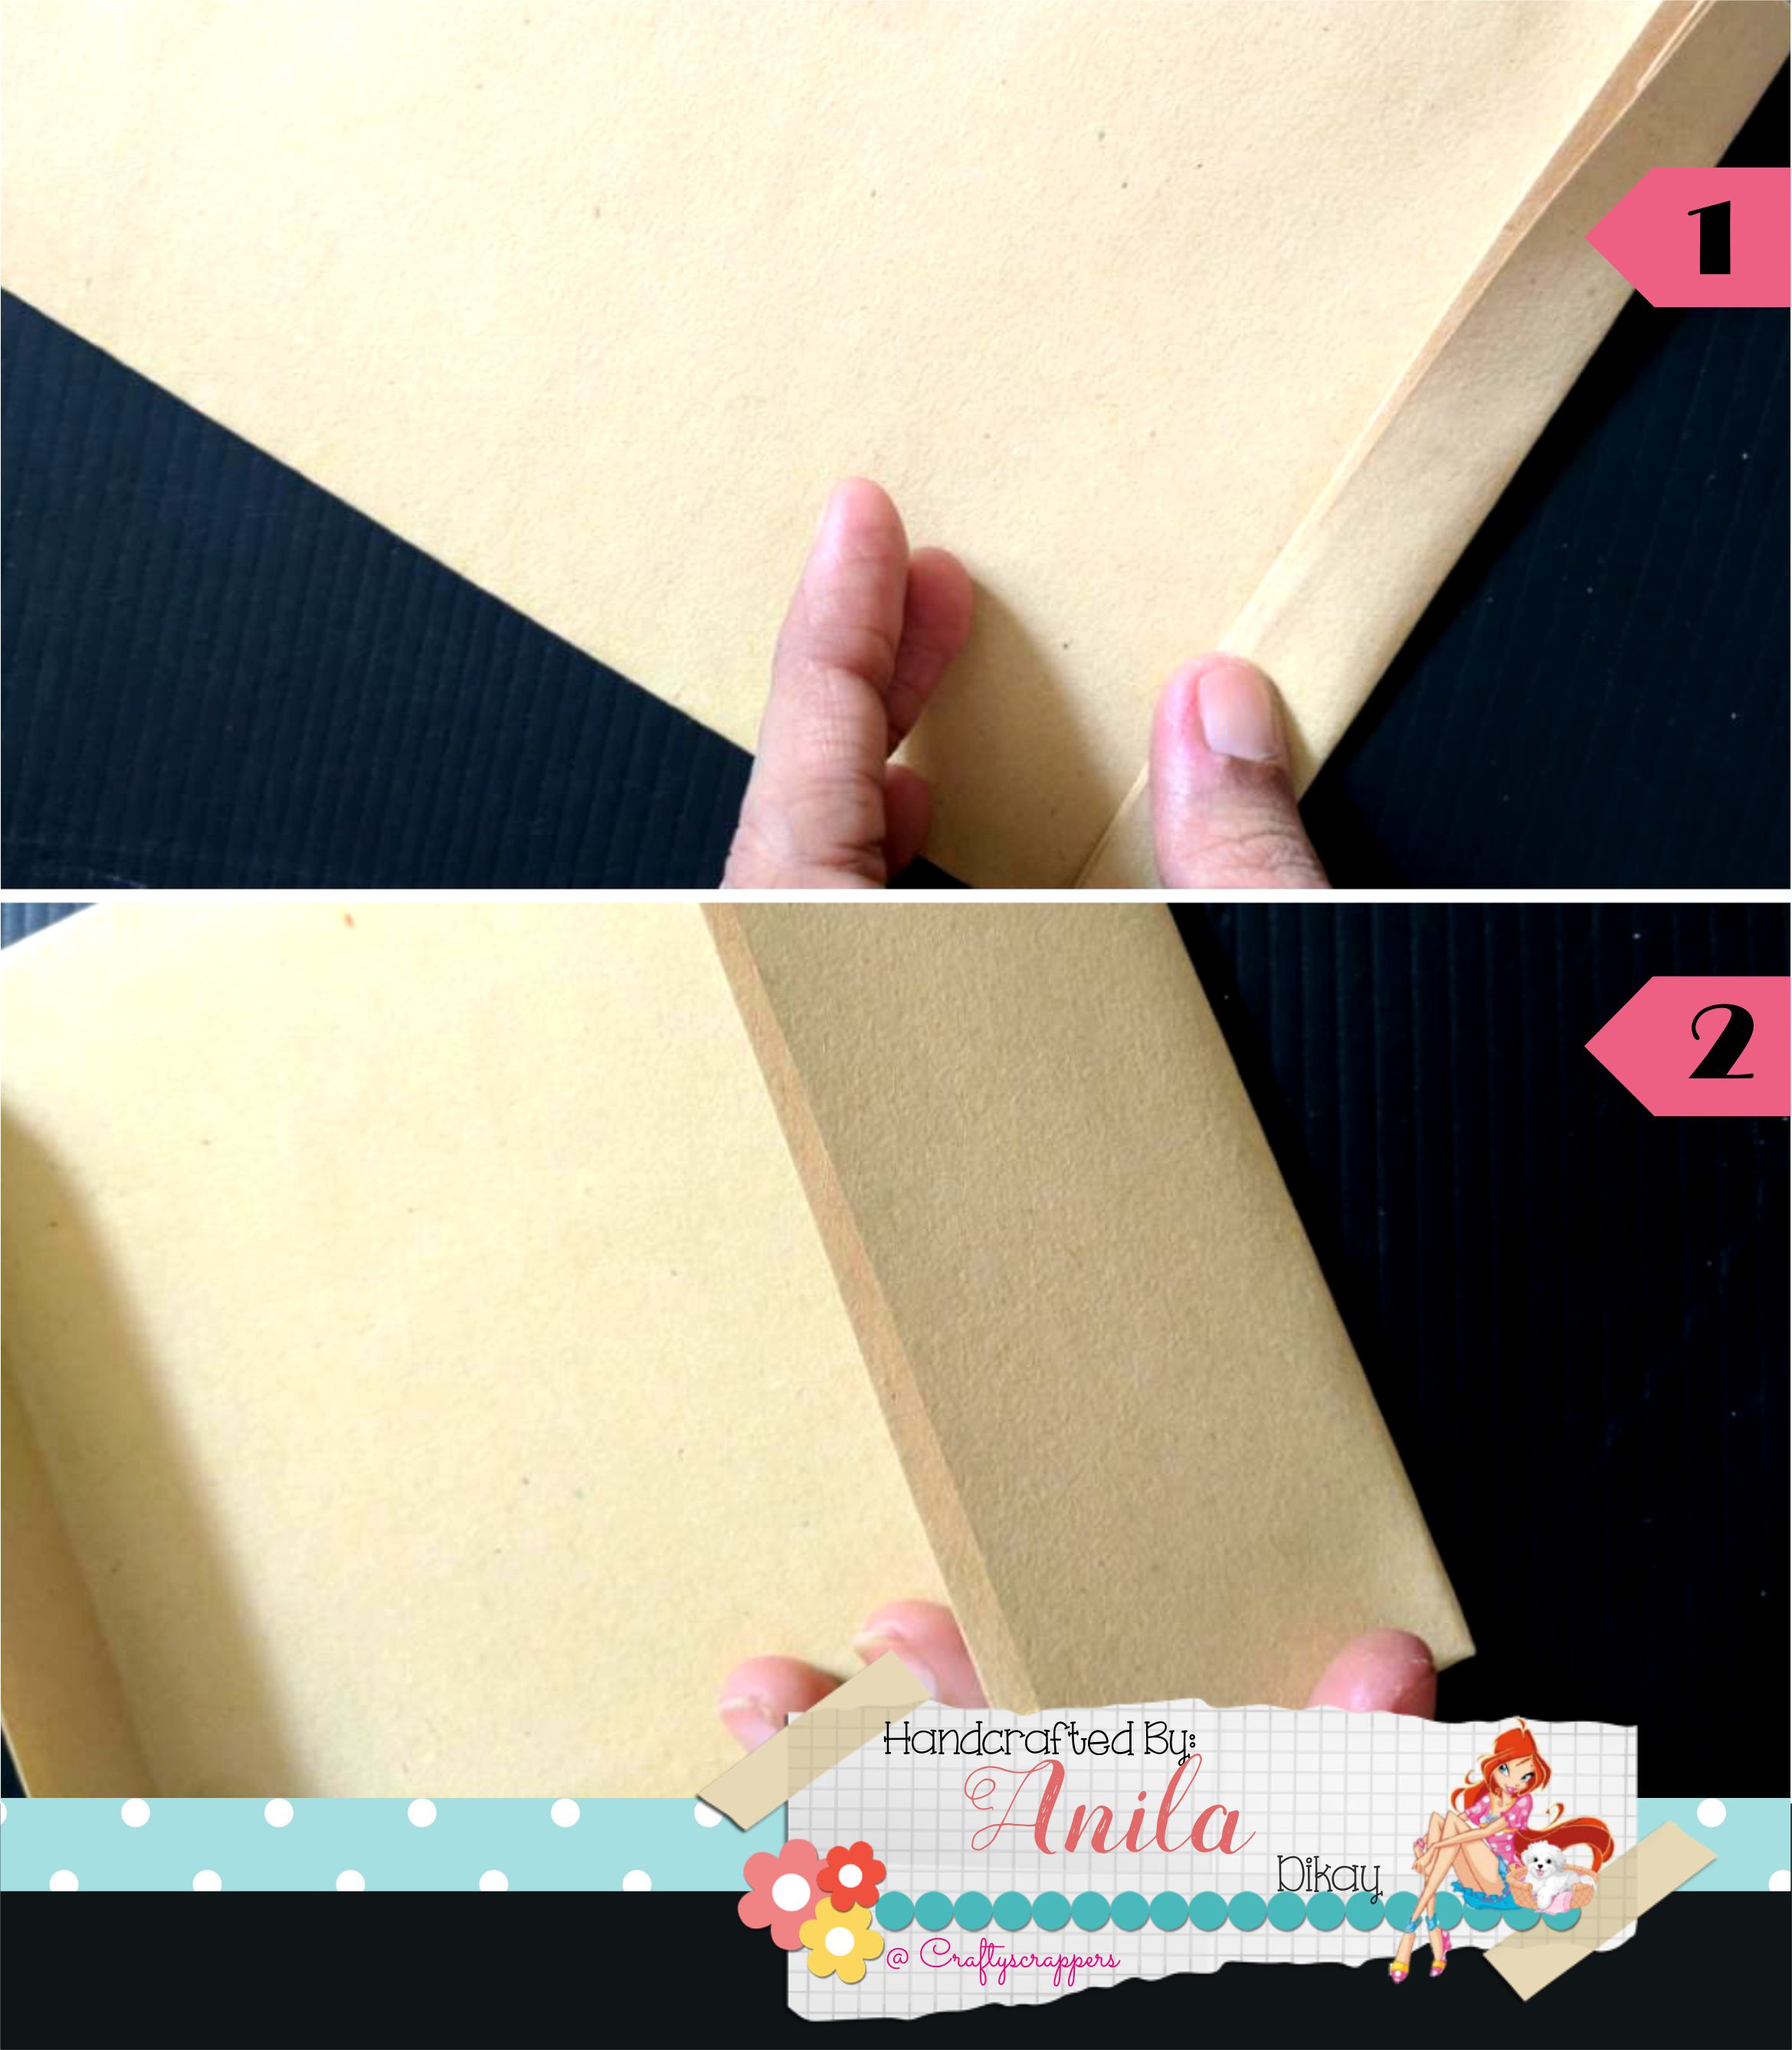
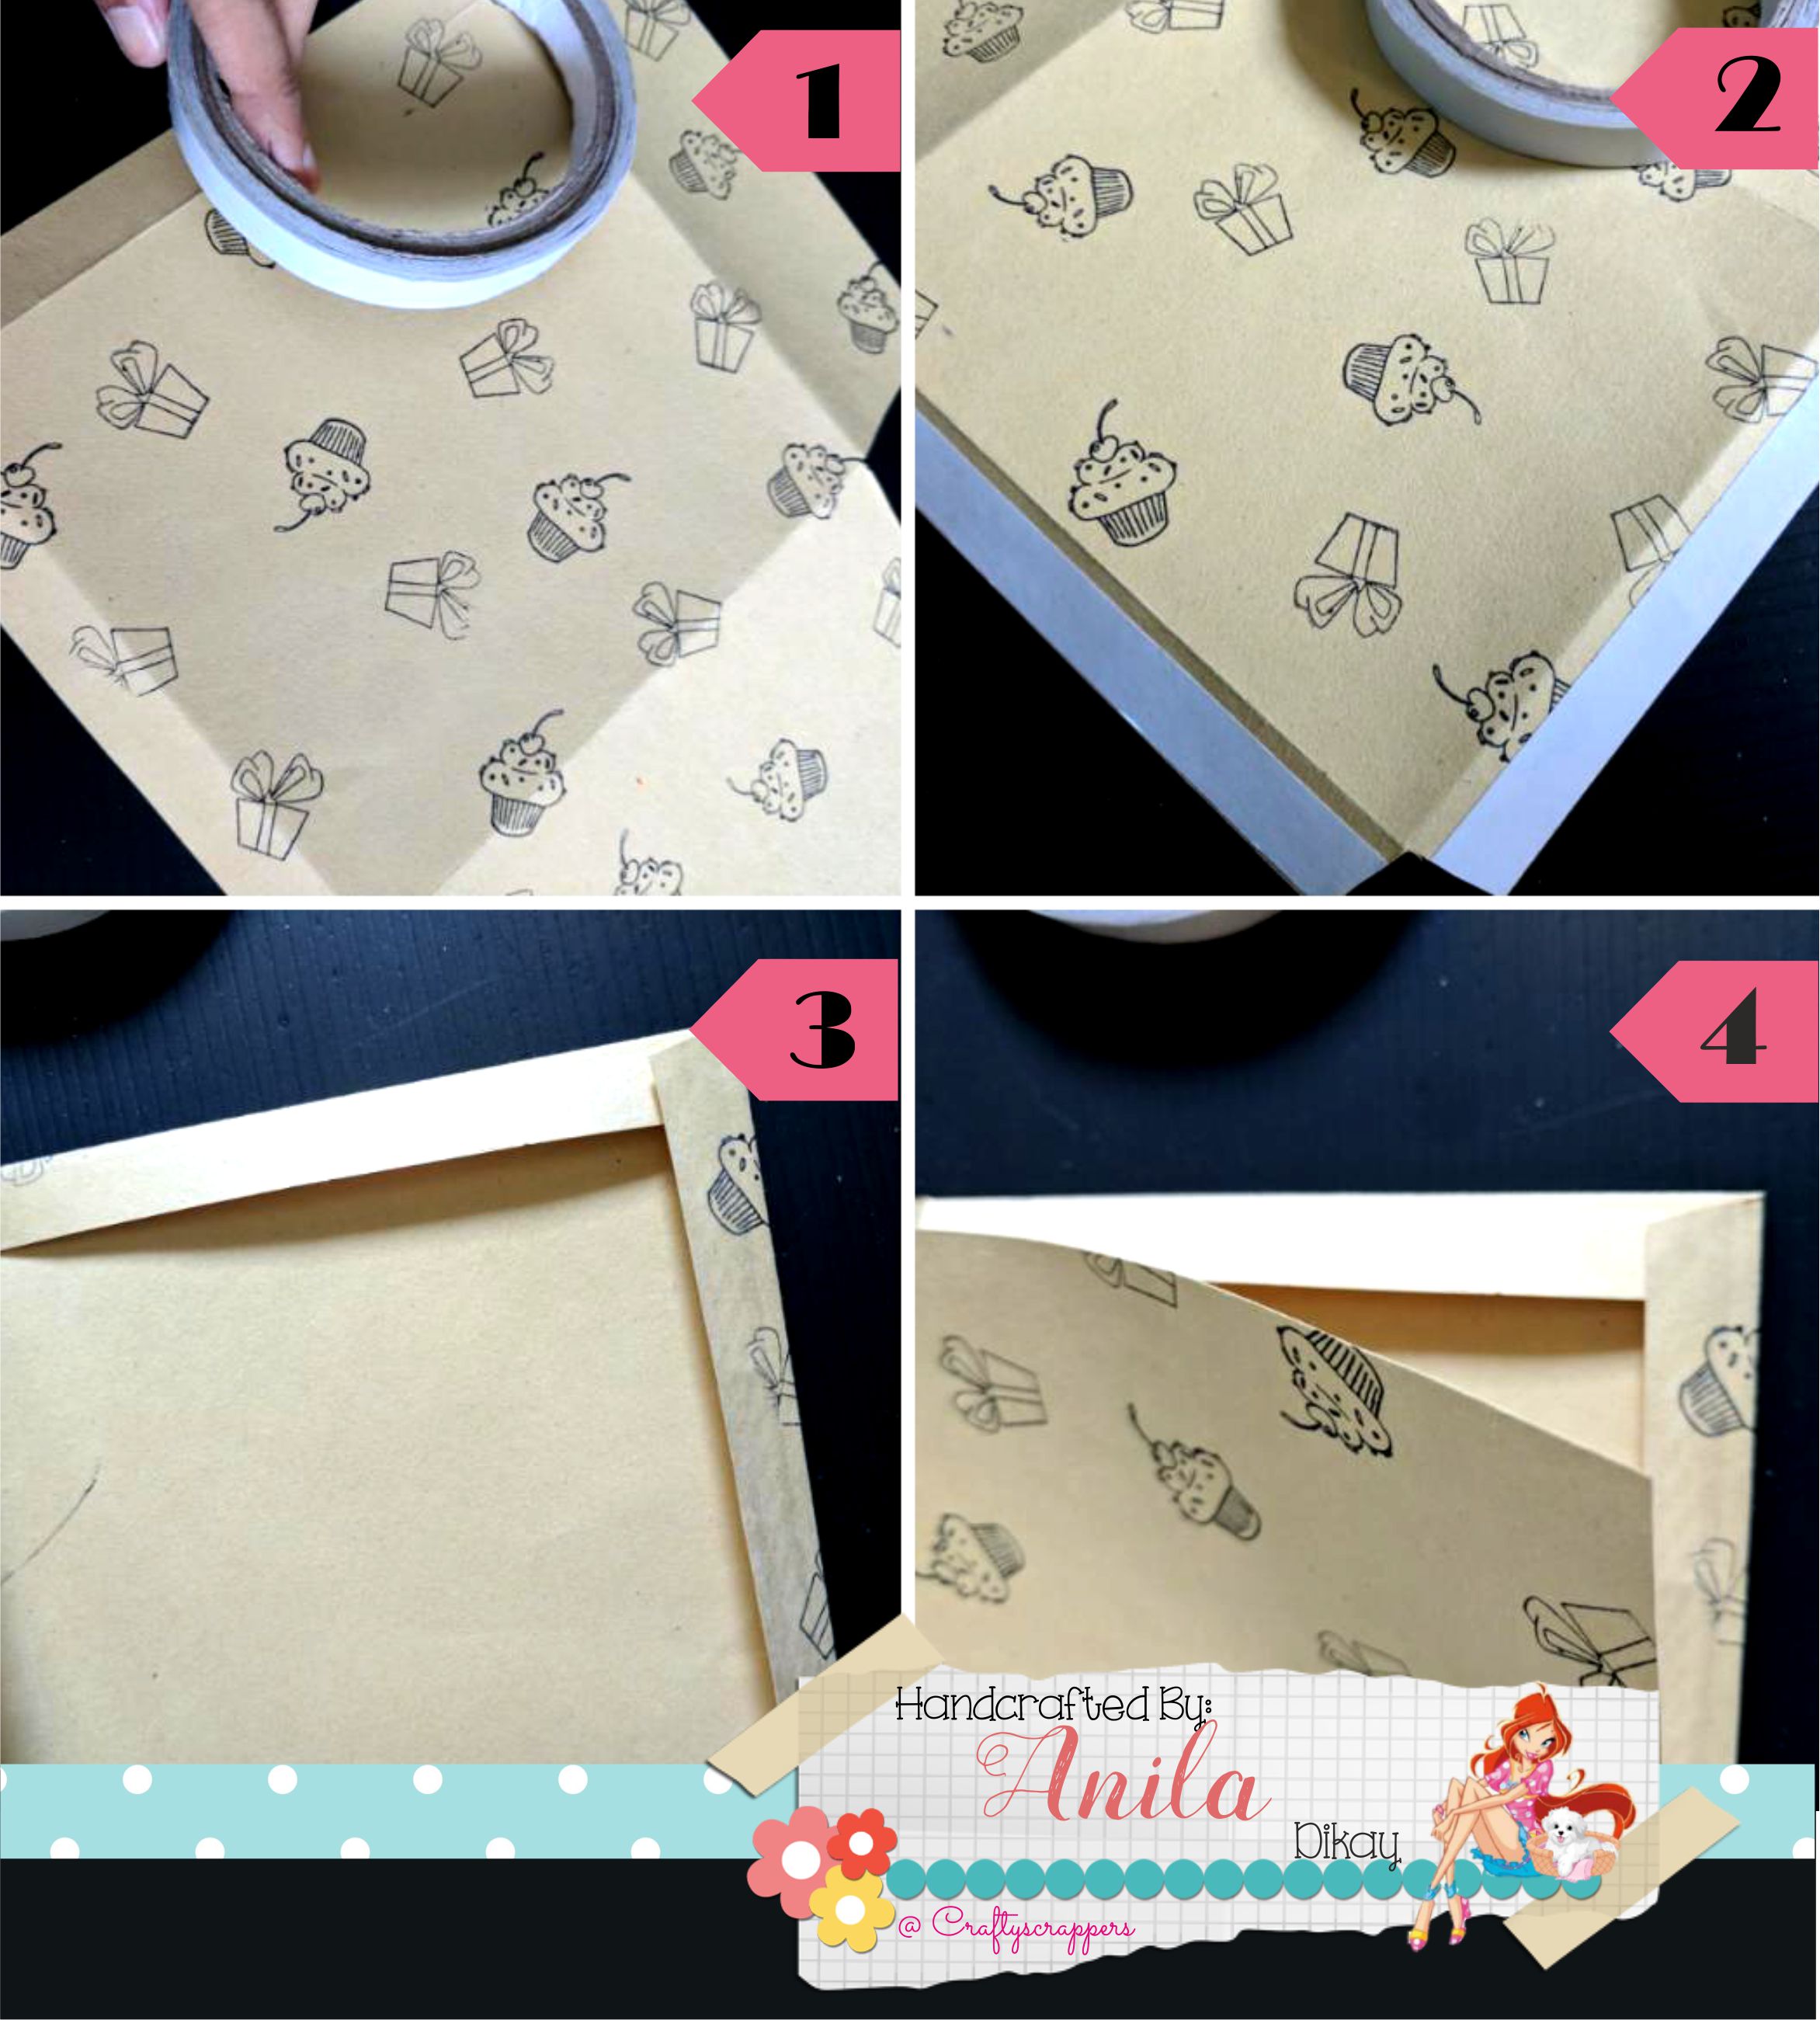
Once the ink dried, I adhered the adhesive tape to the two margins on the sheet. Peeled open the tape and assembled the treat bag by bringing in the sides together. The one and a half inch margin remain open as it is the lid/cover of the treat bag. Repeated the process with all the three bags.
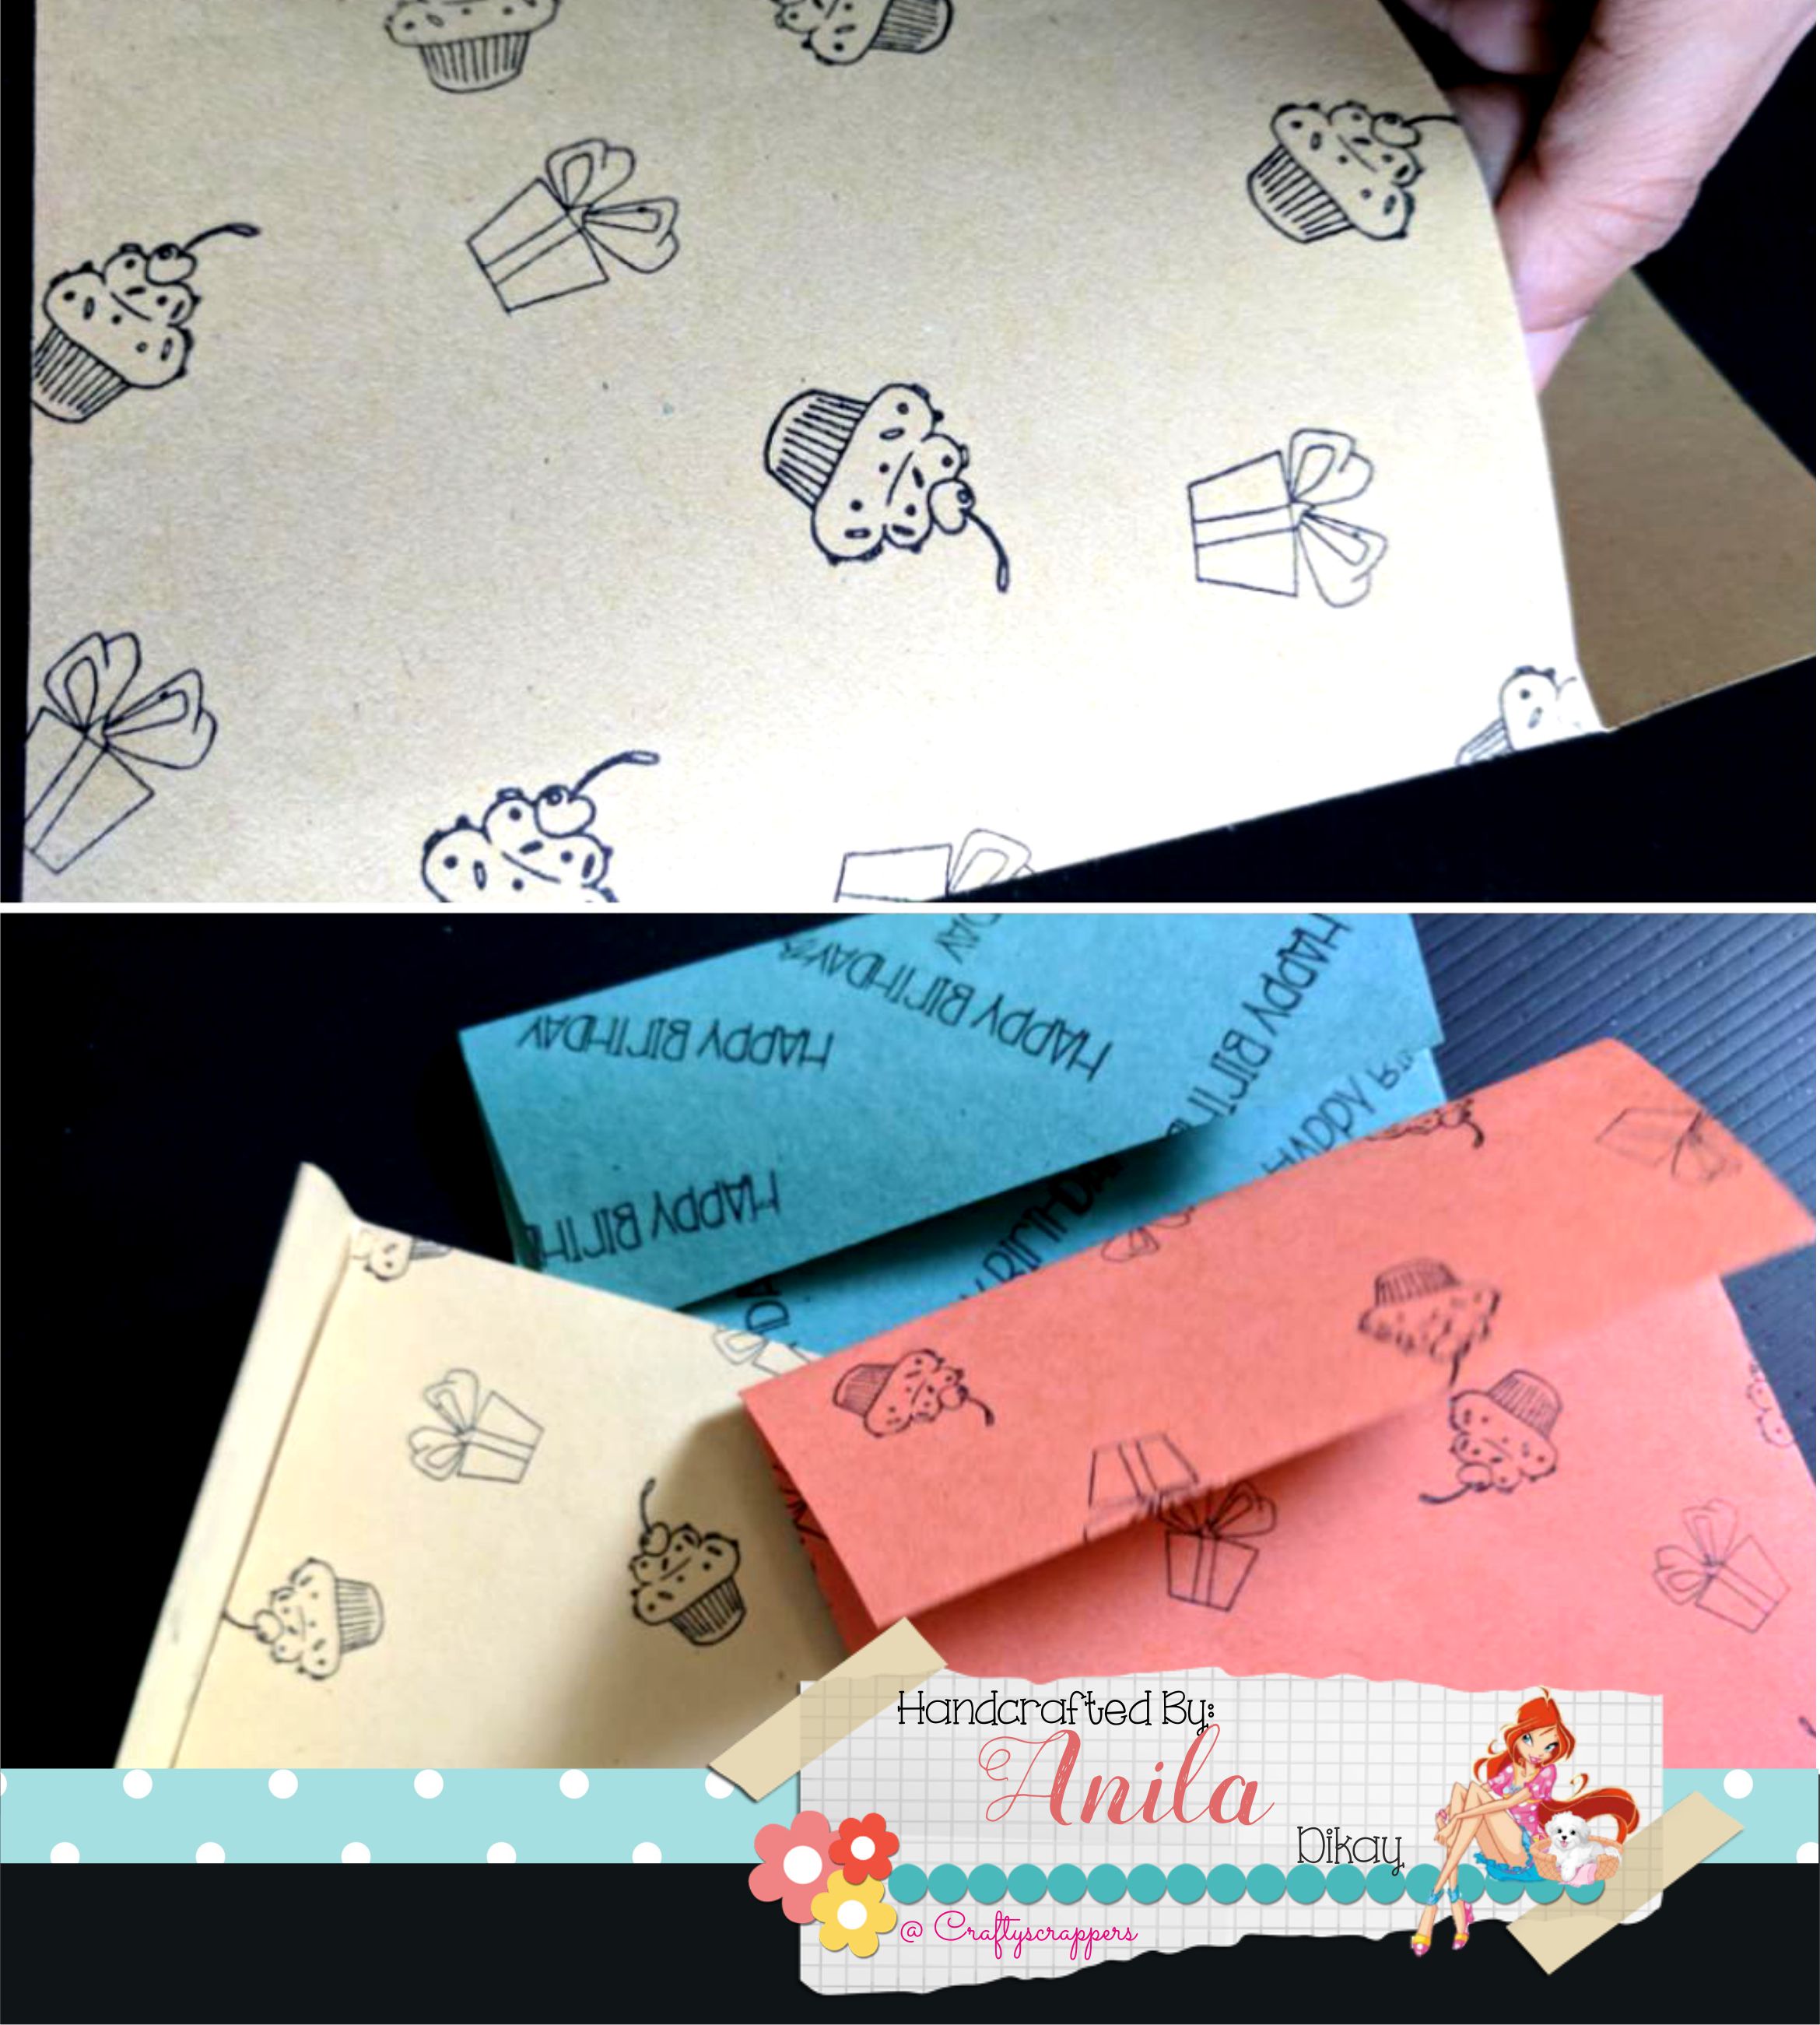
And the treat bags are ready….

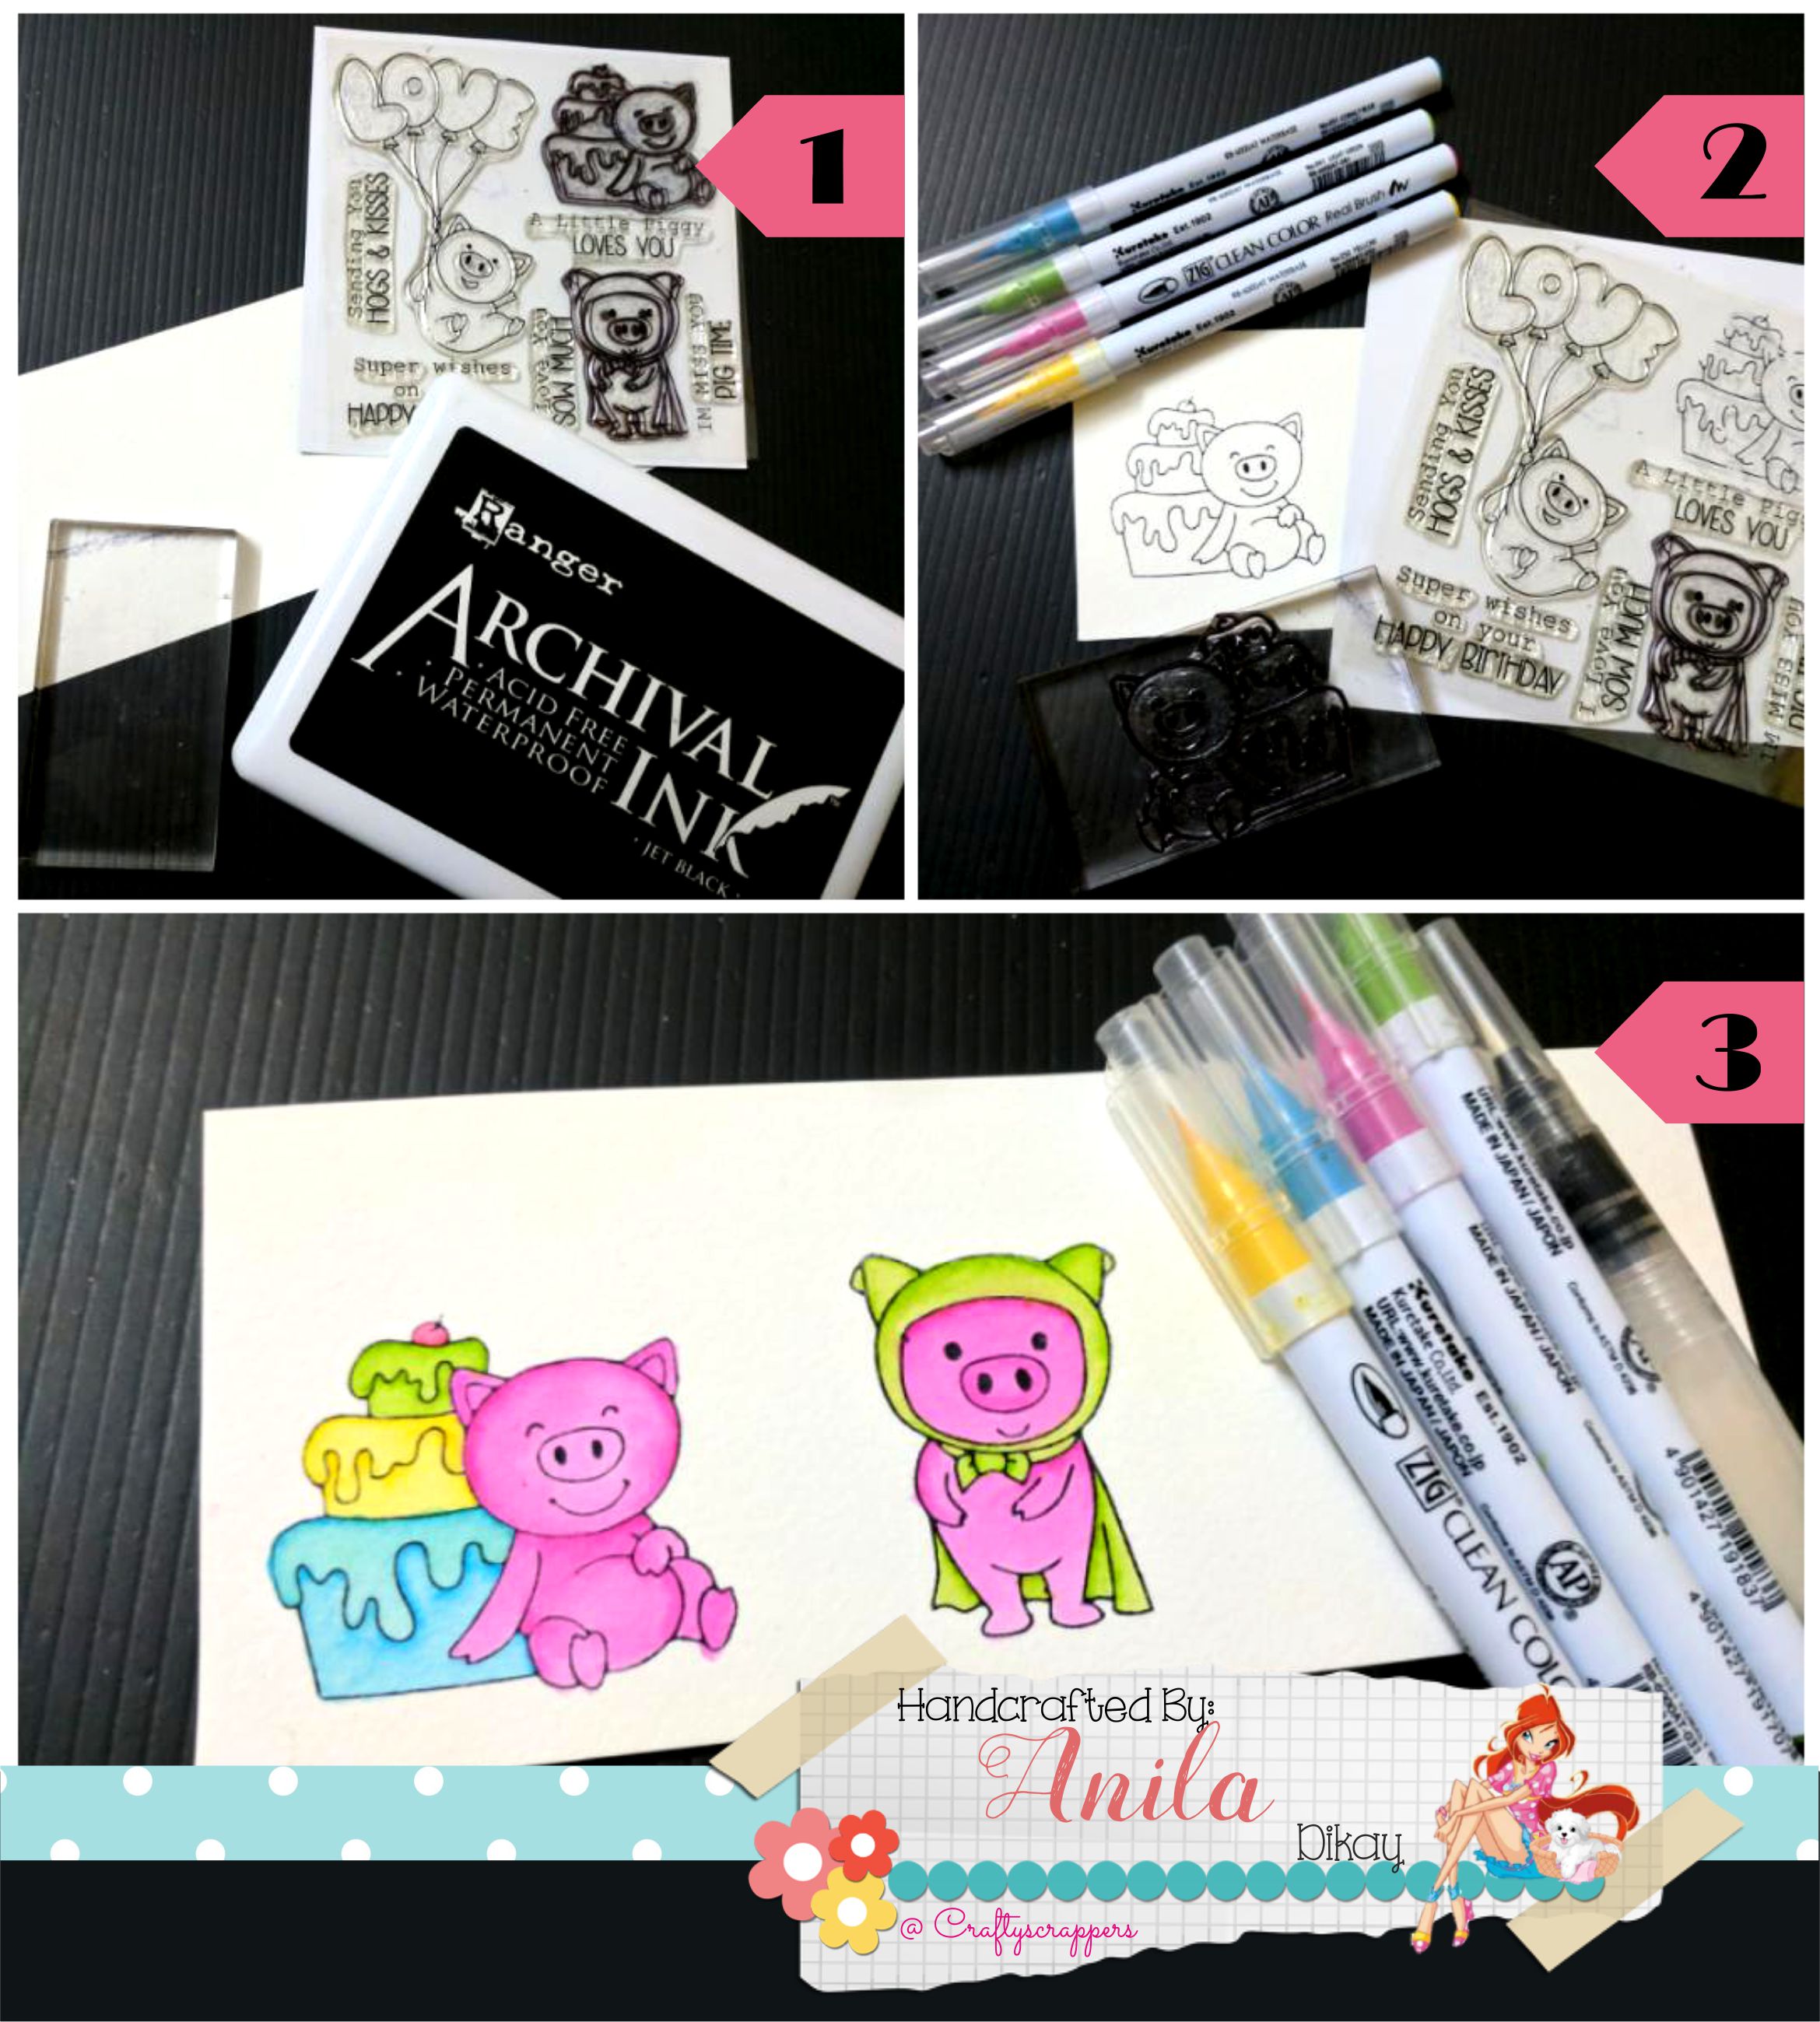
To decorate the treat bags….
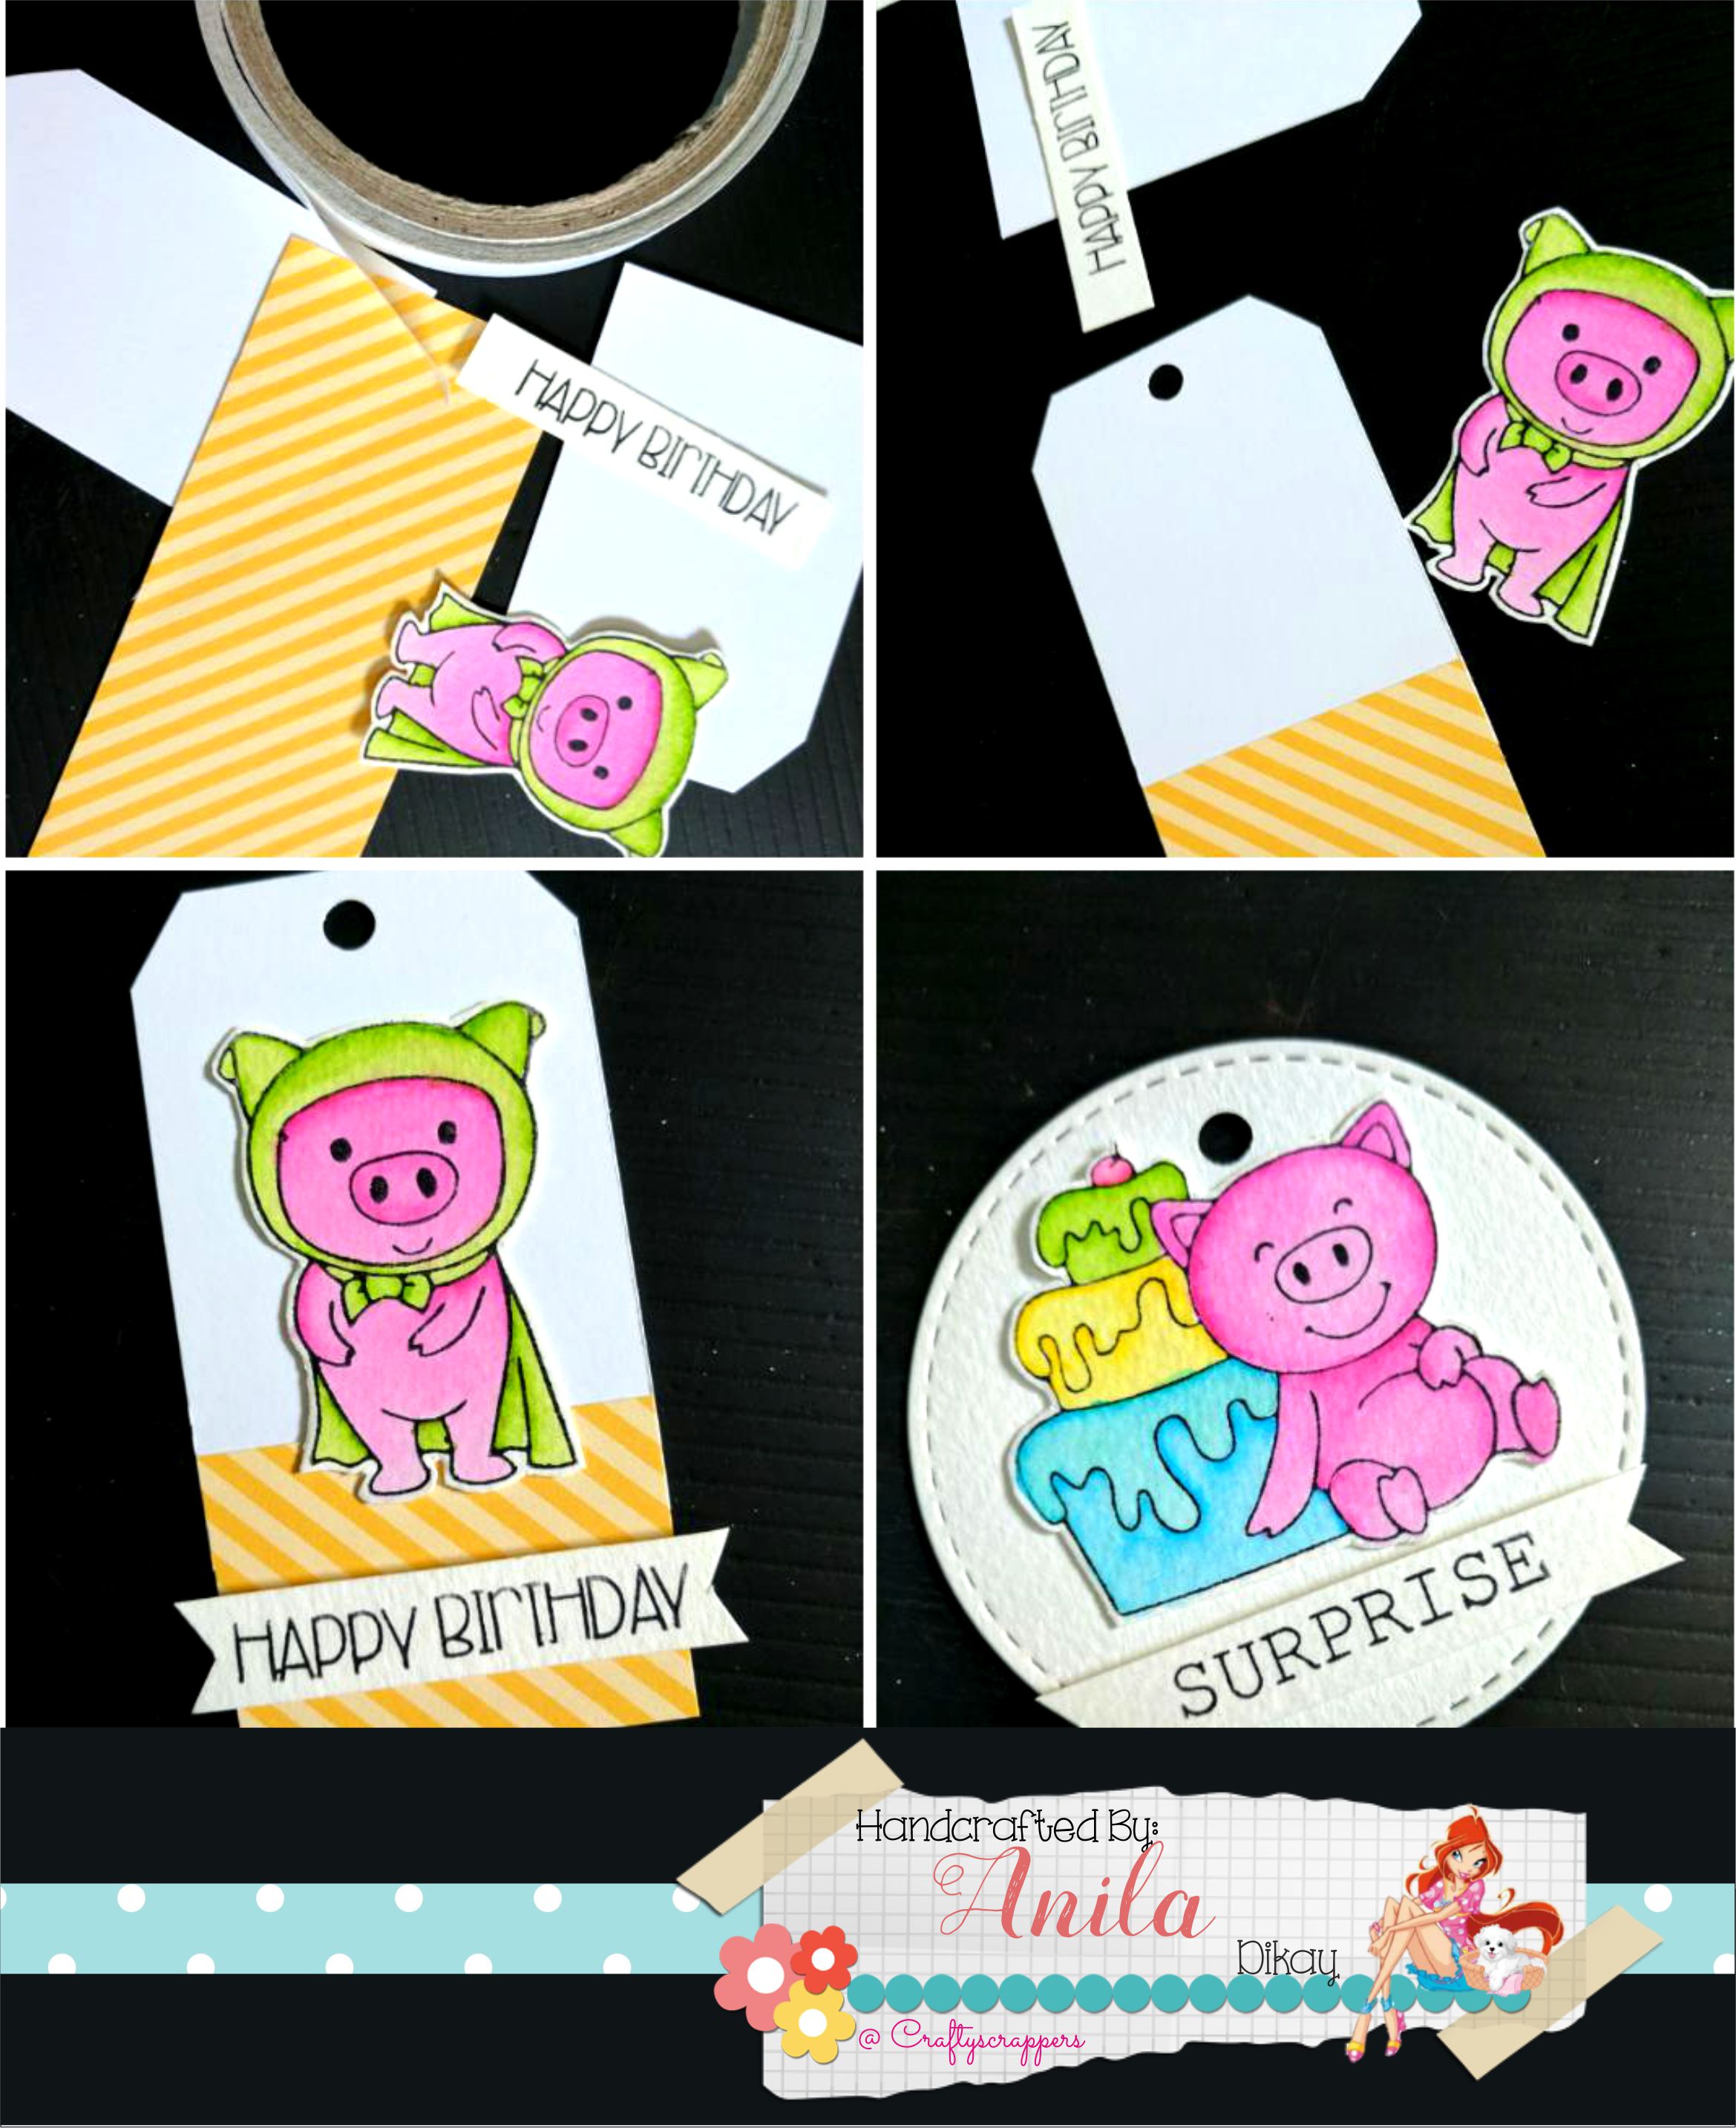
On a watercolor card-stock, I stamped the critters from the Hogs and Kisses stamp set, using Archival ink. Colored the critters with zig markers and fussy cut them.
On a watercolor card-stock, I stamped the critters from the Hogs and Kisses stamp set, using Archival ink. Colored the critters with zig markers and fussy cut them.

Cut tags from scrap pieces of CS.
Assemble the tag using the fussy-cut critters and the sentiments.

Now fill the treat bags, tie a ribbon/twine around it to close it.
Tie the tag along with the ribbon/twine.
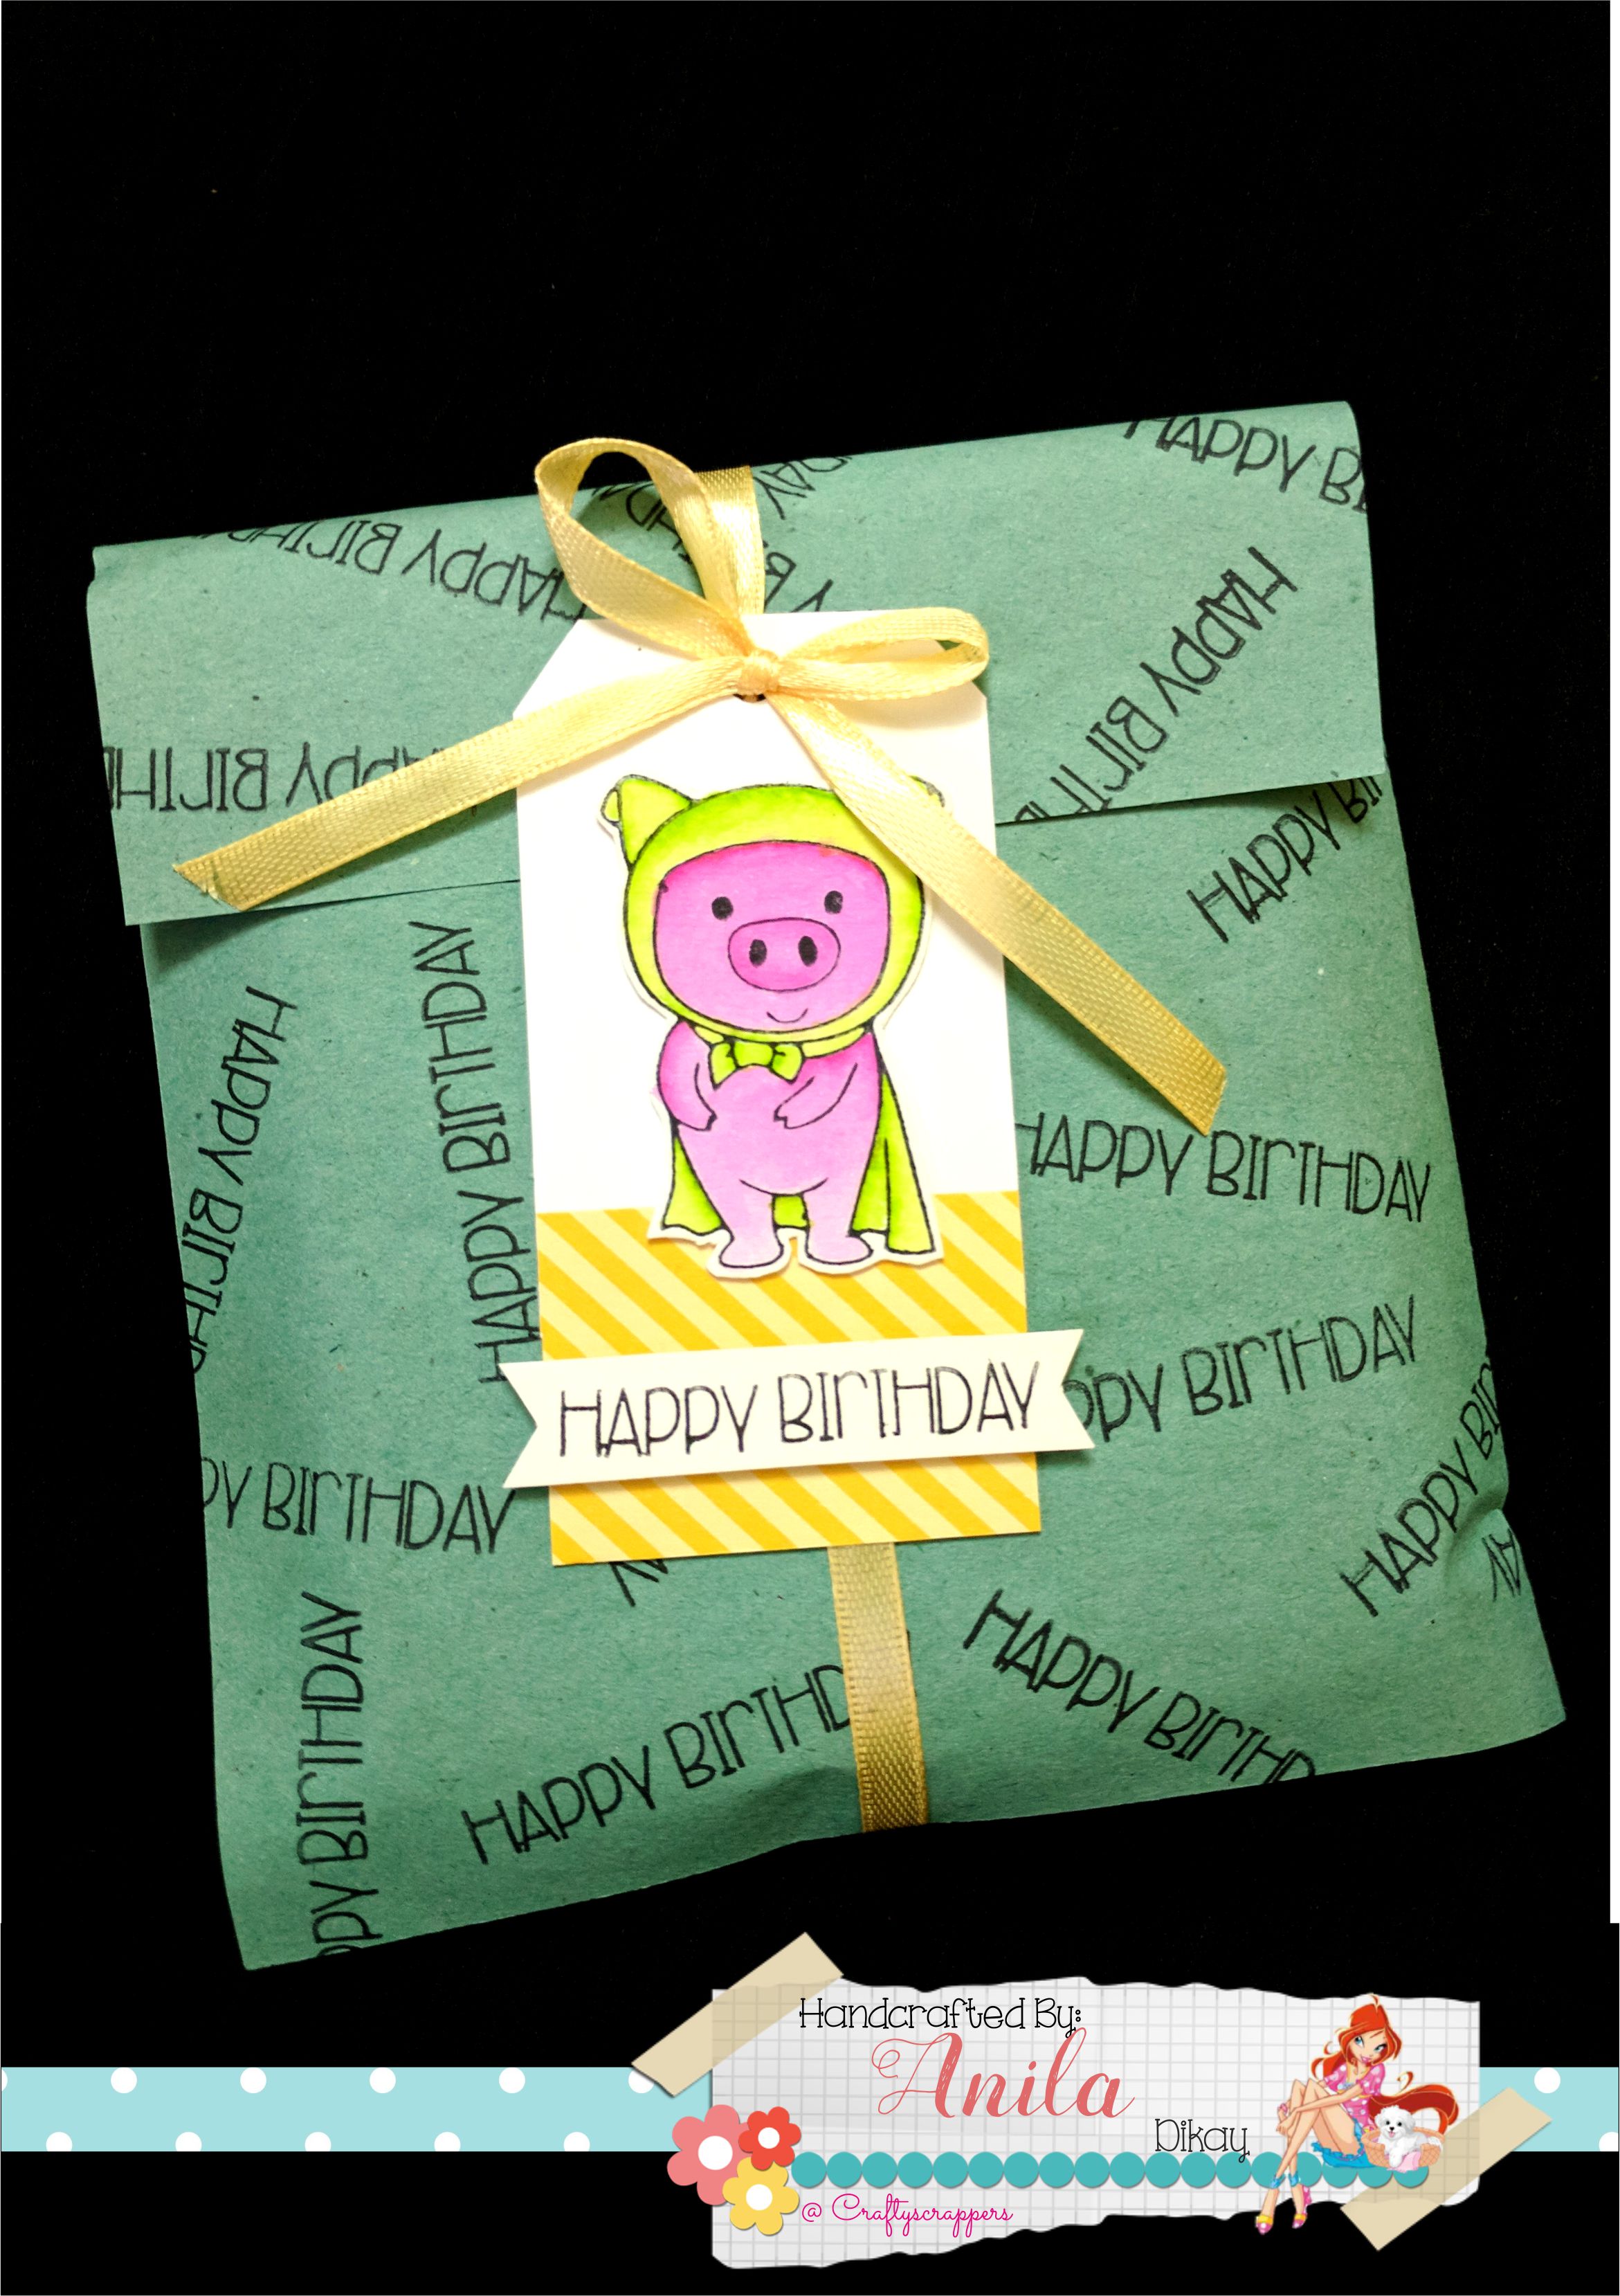
Here are all the finished treat bags.
environment-friendly treat bag #1
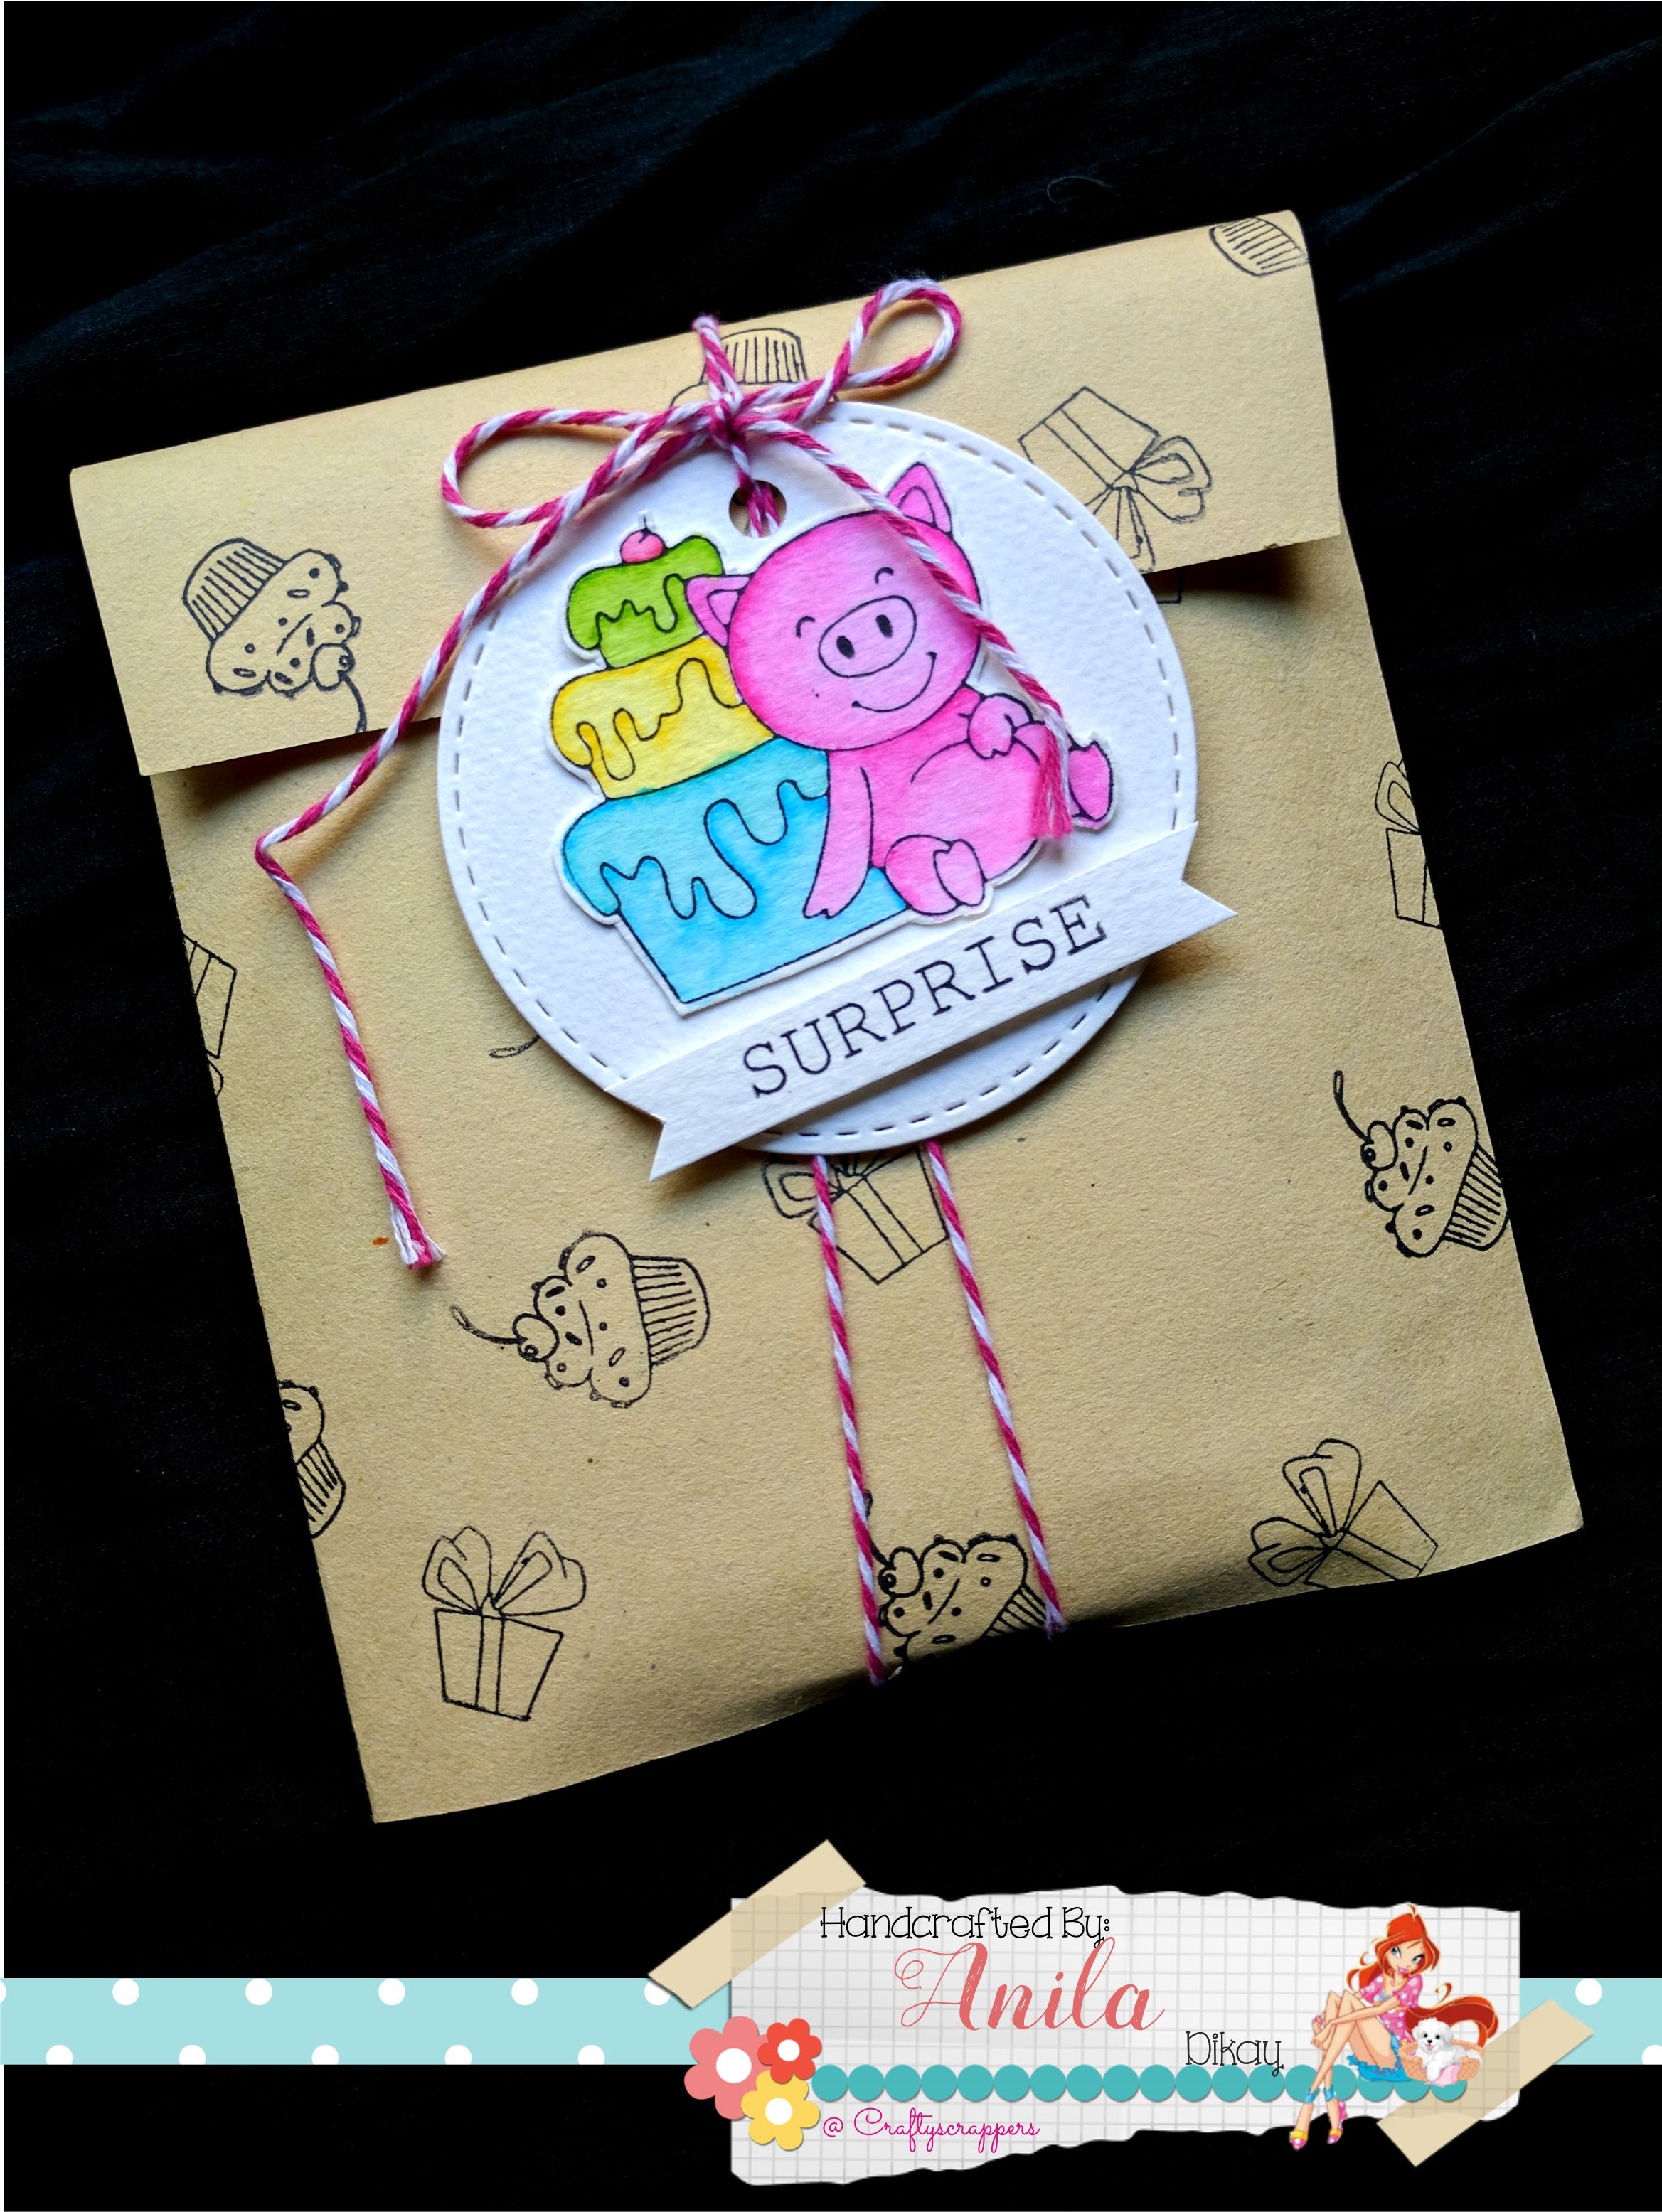
environment-friendly treat bag #2

environment-friendly treat bag #3
Hope you enjoyed making these treat bags.
I would love to hear from you.
I would love to hear from you.
Don’t forget to join in our craft challenges,(details at the beginning of the post!)
You can participate via mr.linky (at the end of the challenge post)or via facebook,Instagram and even via email.
Thank you for stopping by.

awwwww sooo cute 🙂 loved this…thanks for the awesome ideas and tutorial dear anila
hugs
preeti
Thankyou so much preety!
we have our a challenge ongoing… would love to see you part take!!!
best wishes,,,
🙂
Thankyou so much 🙂