
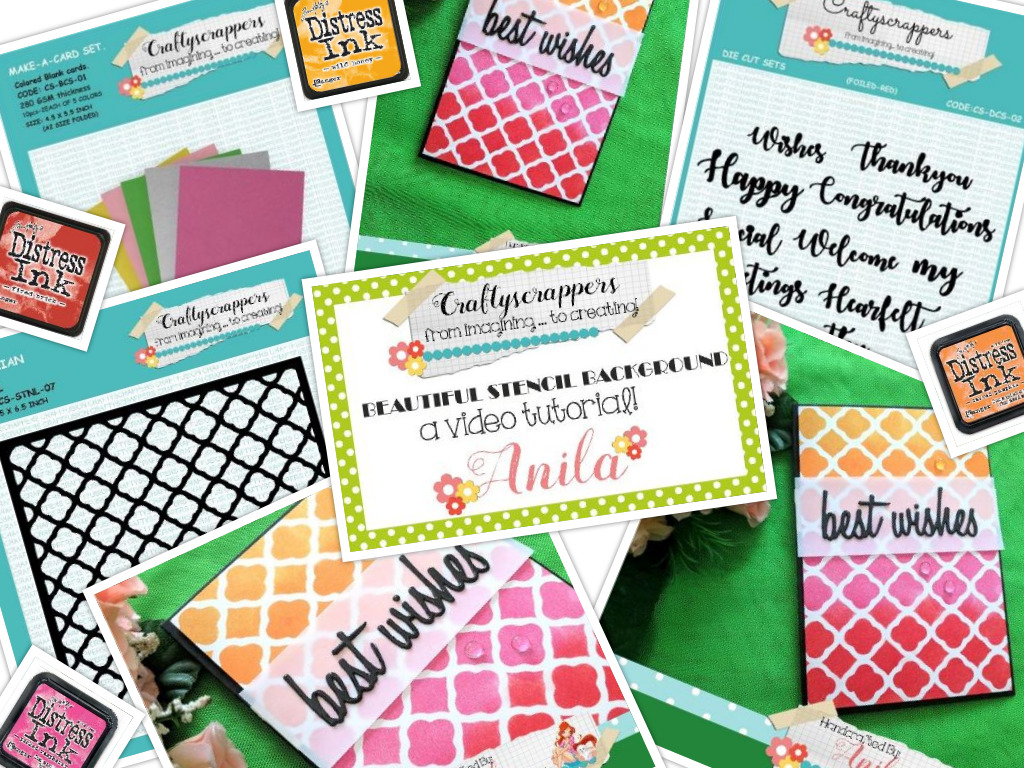
I will be showing a simple distressing technique that will help you achieve clean distressed backgrounds with the stencils.
Craftyscrappers Stencils are high quality stencils,for you to create amazing backgrounds
or highlights on your projects.
These stencils comes in a trendy package and are 6.5×6.5INCH in size thats the Big size and are also available in Mini Sizes, which covers 4×5.5INCH in size,
which makes it easier for you to twist and turn the stencils according to your work surface.
And the most incredible thing about them is, they are pocket friendly.

Our challenge for this month of November is ongoing.
If you missed our previous post,check it out here…
CHALLENGE#17:”Sketch”
You can create any project using the provided sketch it can be a layout, a journal page, a simple card, interactive cards, mixed media canvas or project, altered art, anything crafty,to participate…
- Last date of submission is 30th November 2017.

to win amazing prices!!!
Okay so moving on to the Video tutorial now…

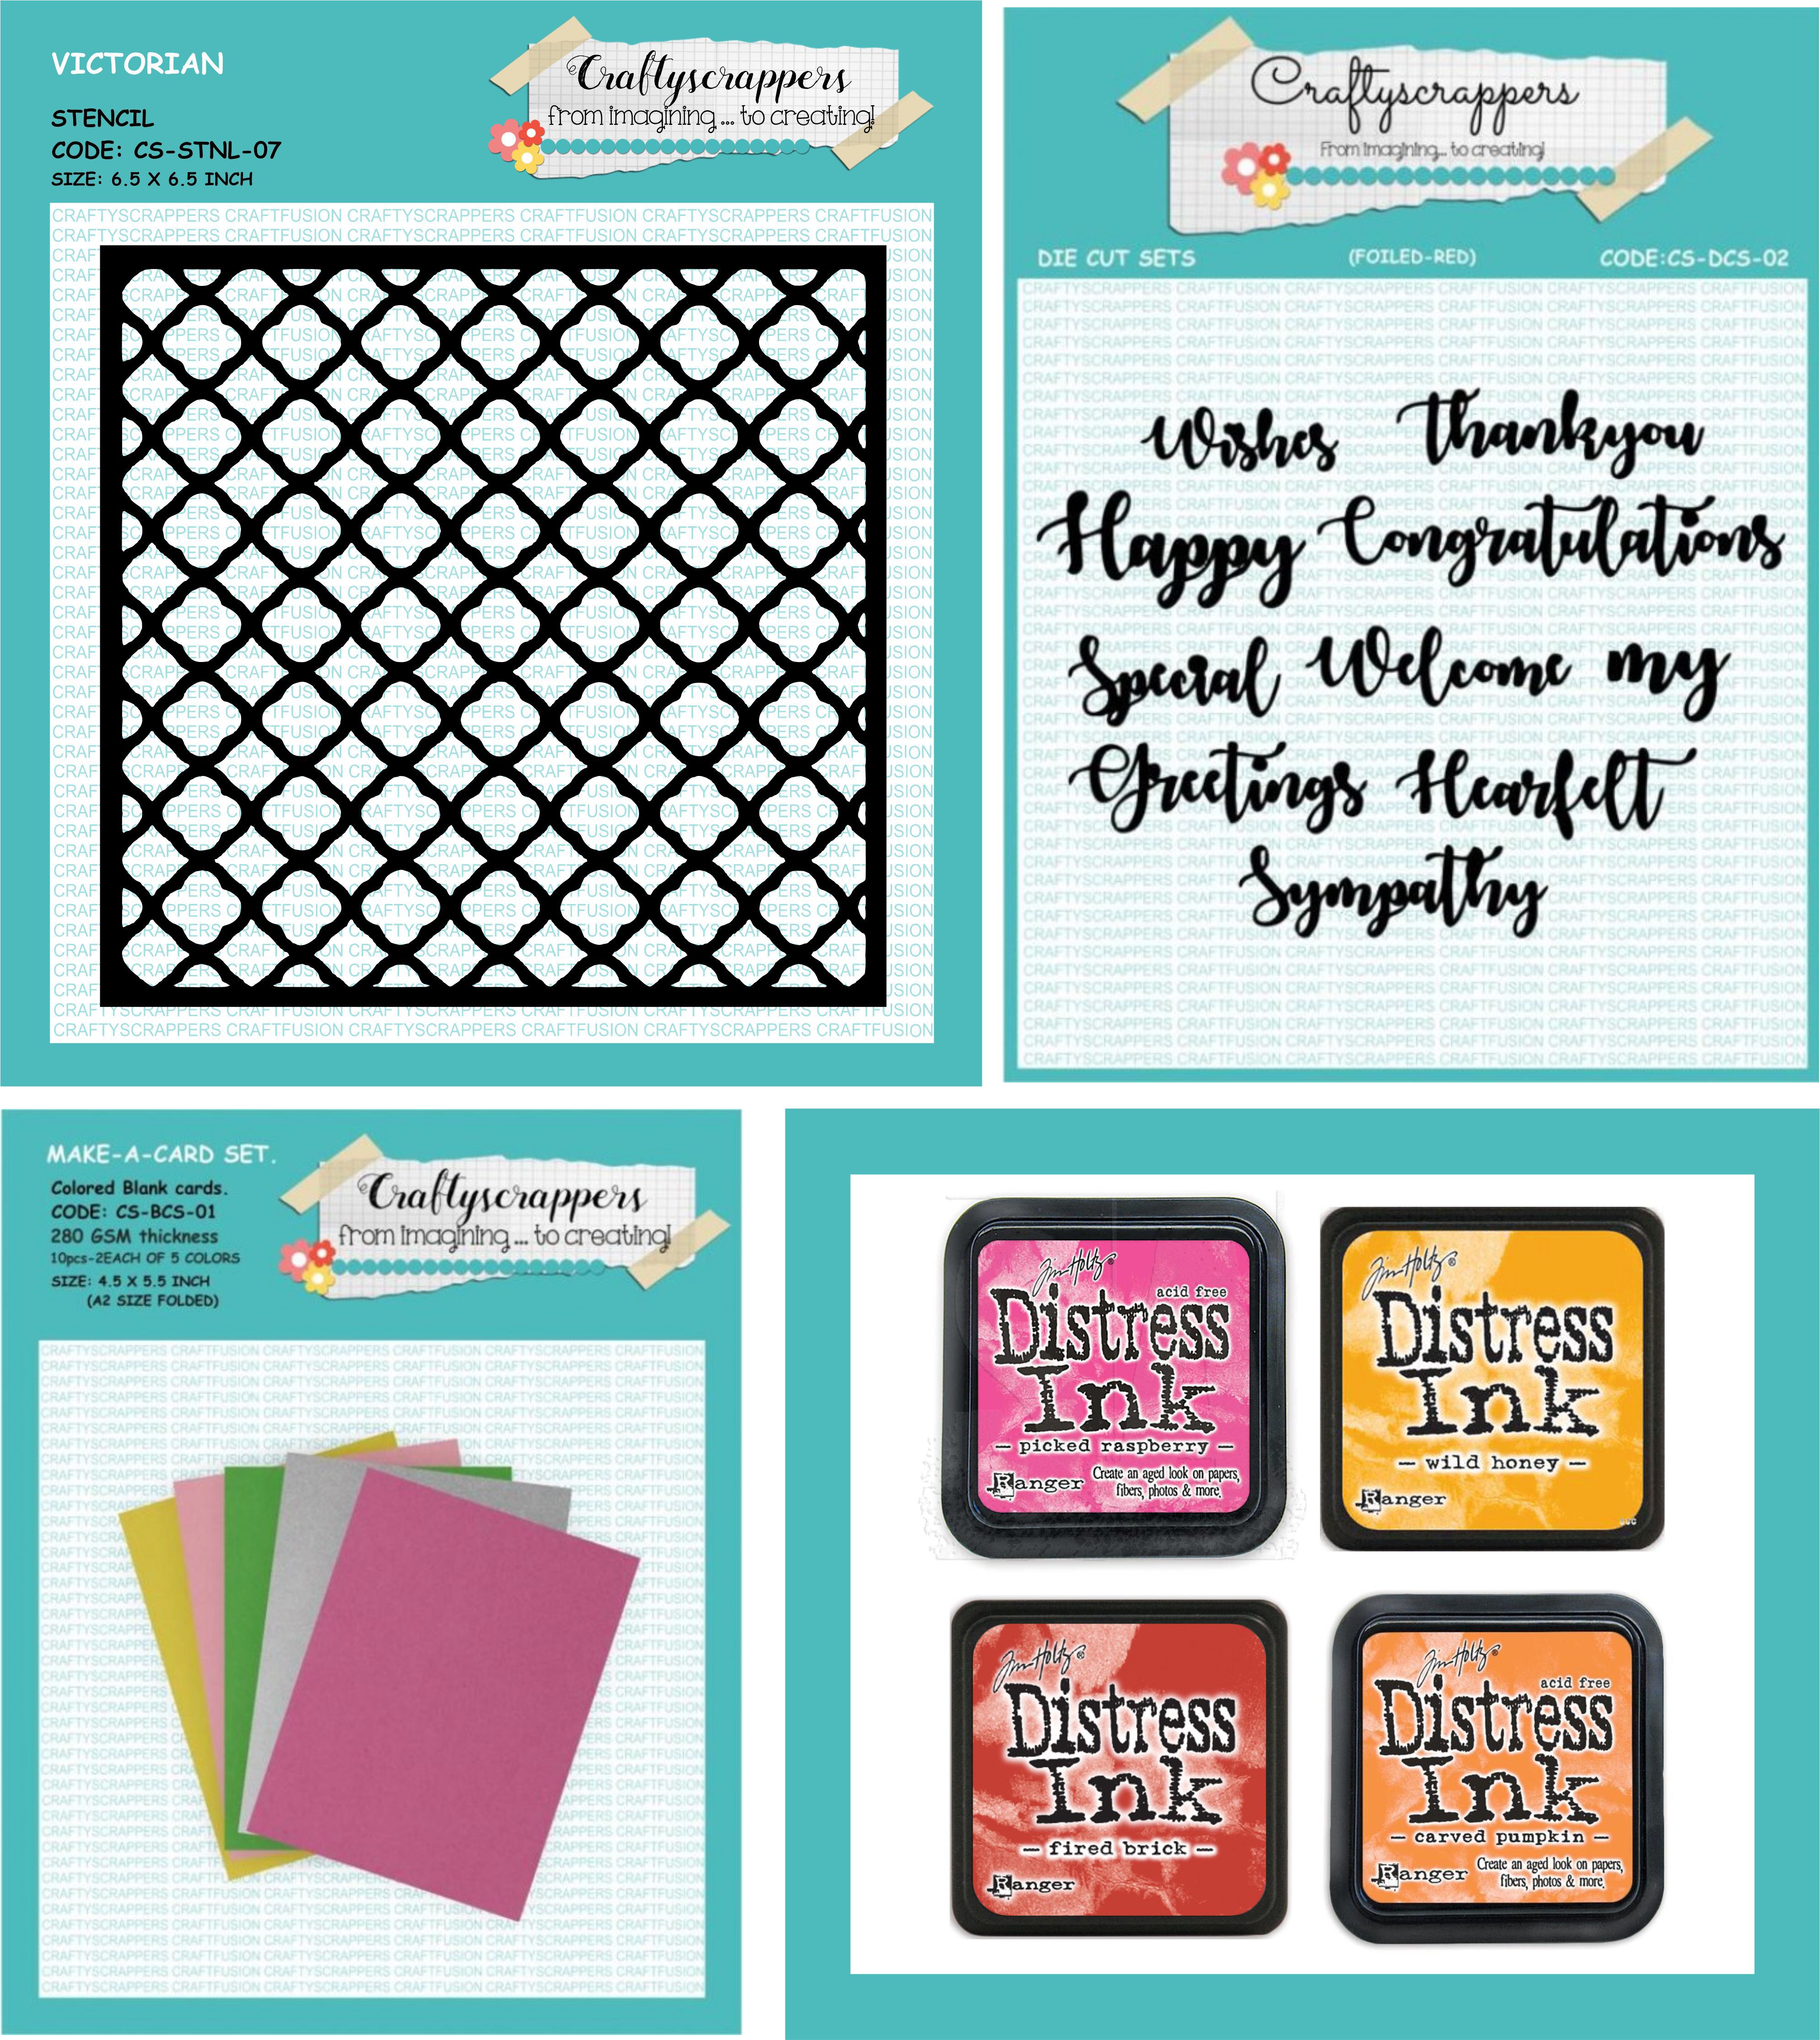
- Craftyscrappers stencil- Victorian
- Craftyscrappers card base set
- Craftyscrappers die cut sets-wishes
- Distress inks- Wild honey,carved pumpkin,picked raspberry and fired brick.
Before moving on to the video tutorial,
let me show you the card I have made for the tutorial :
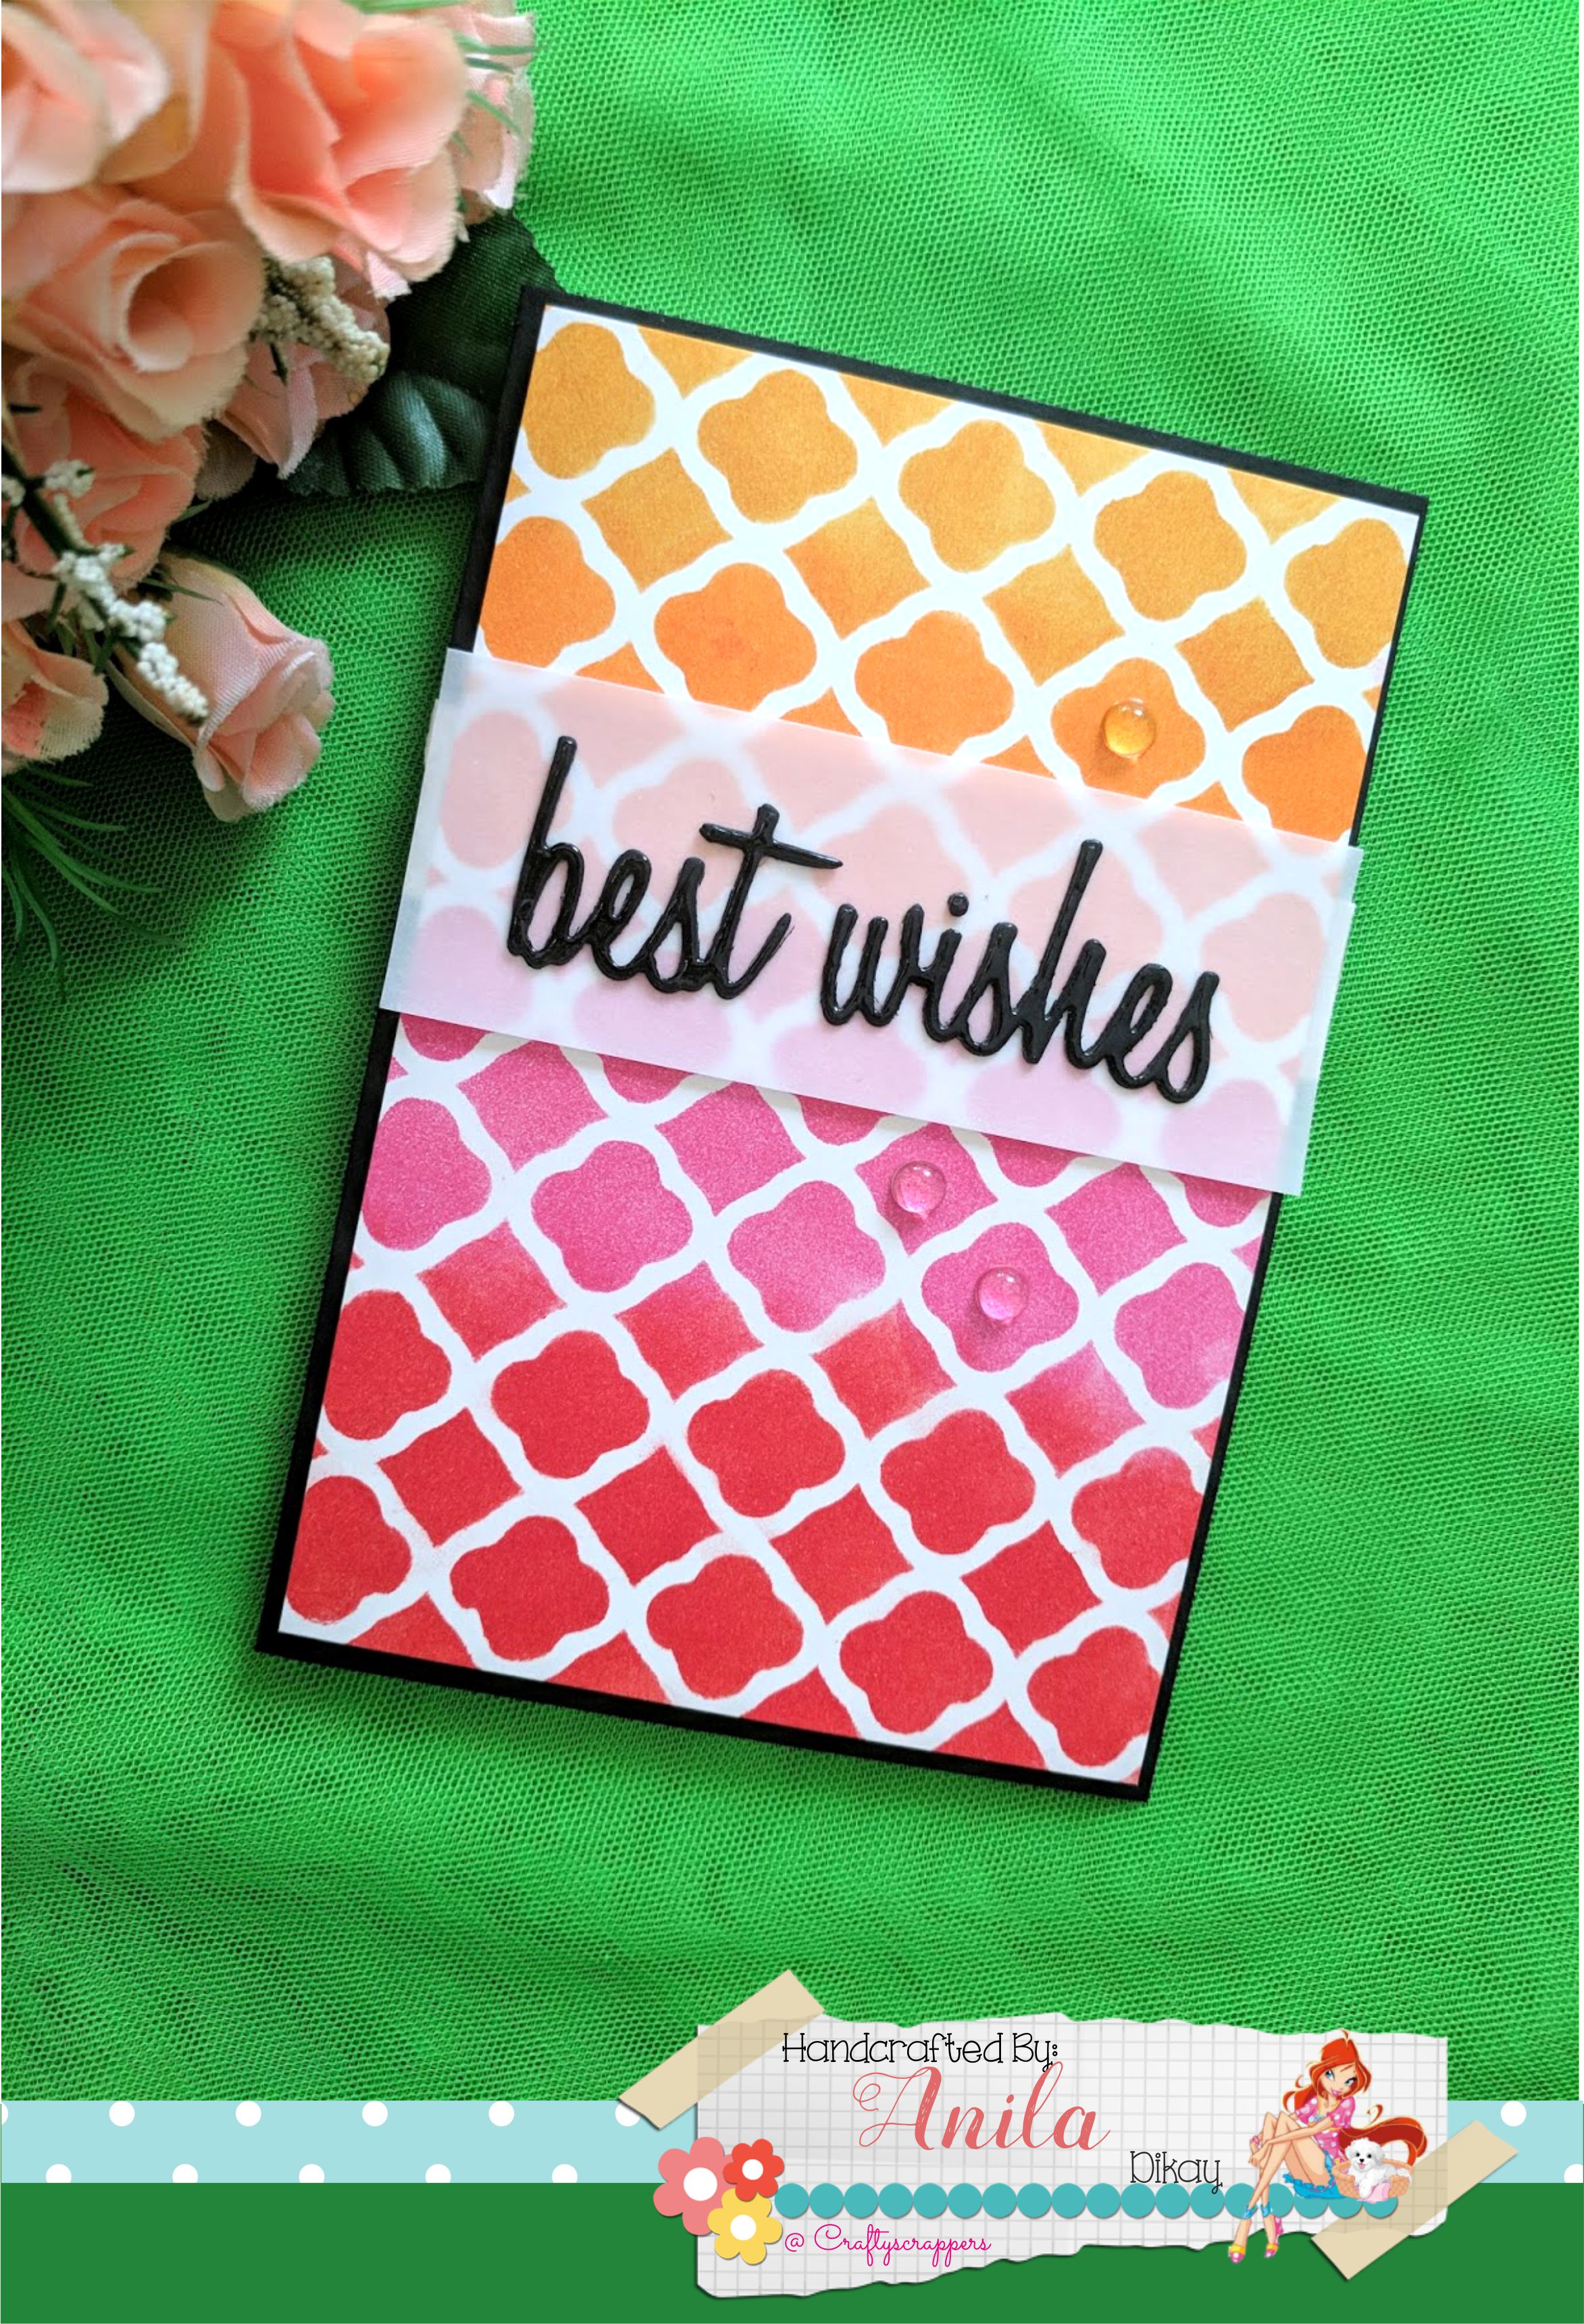
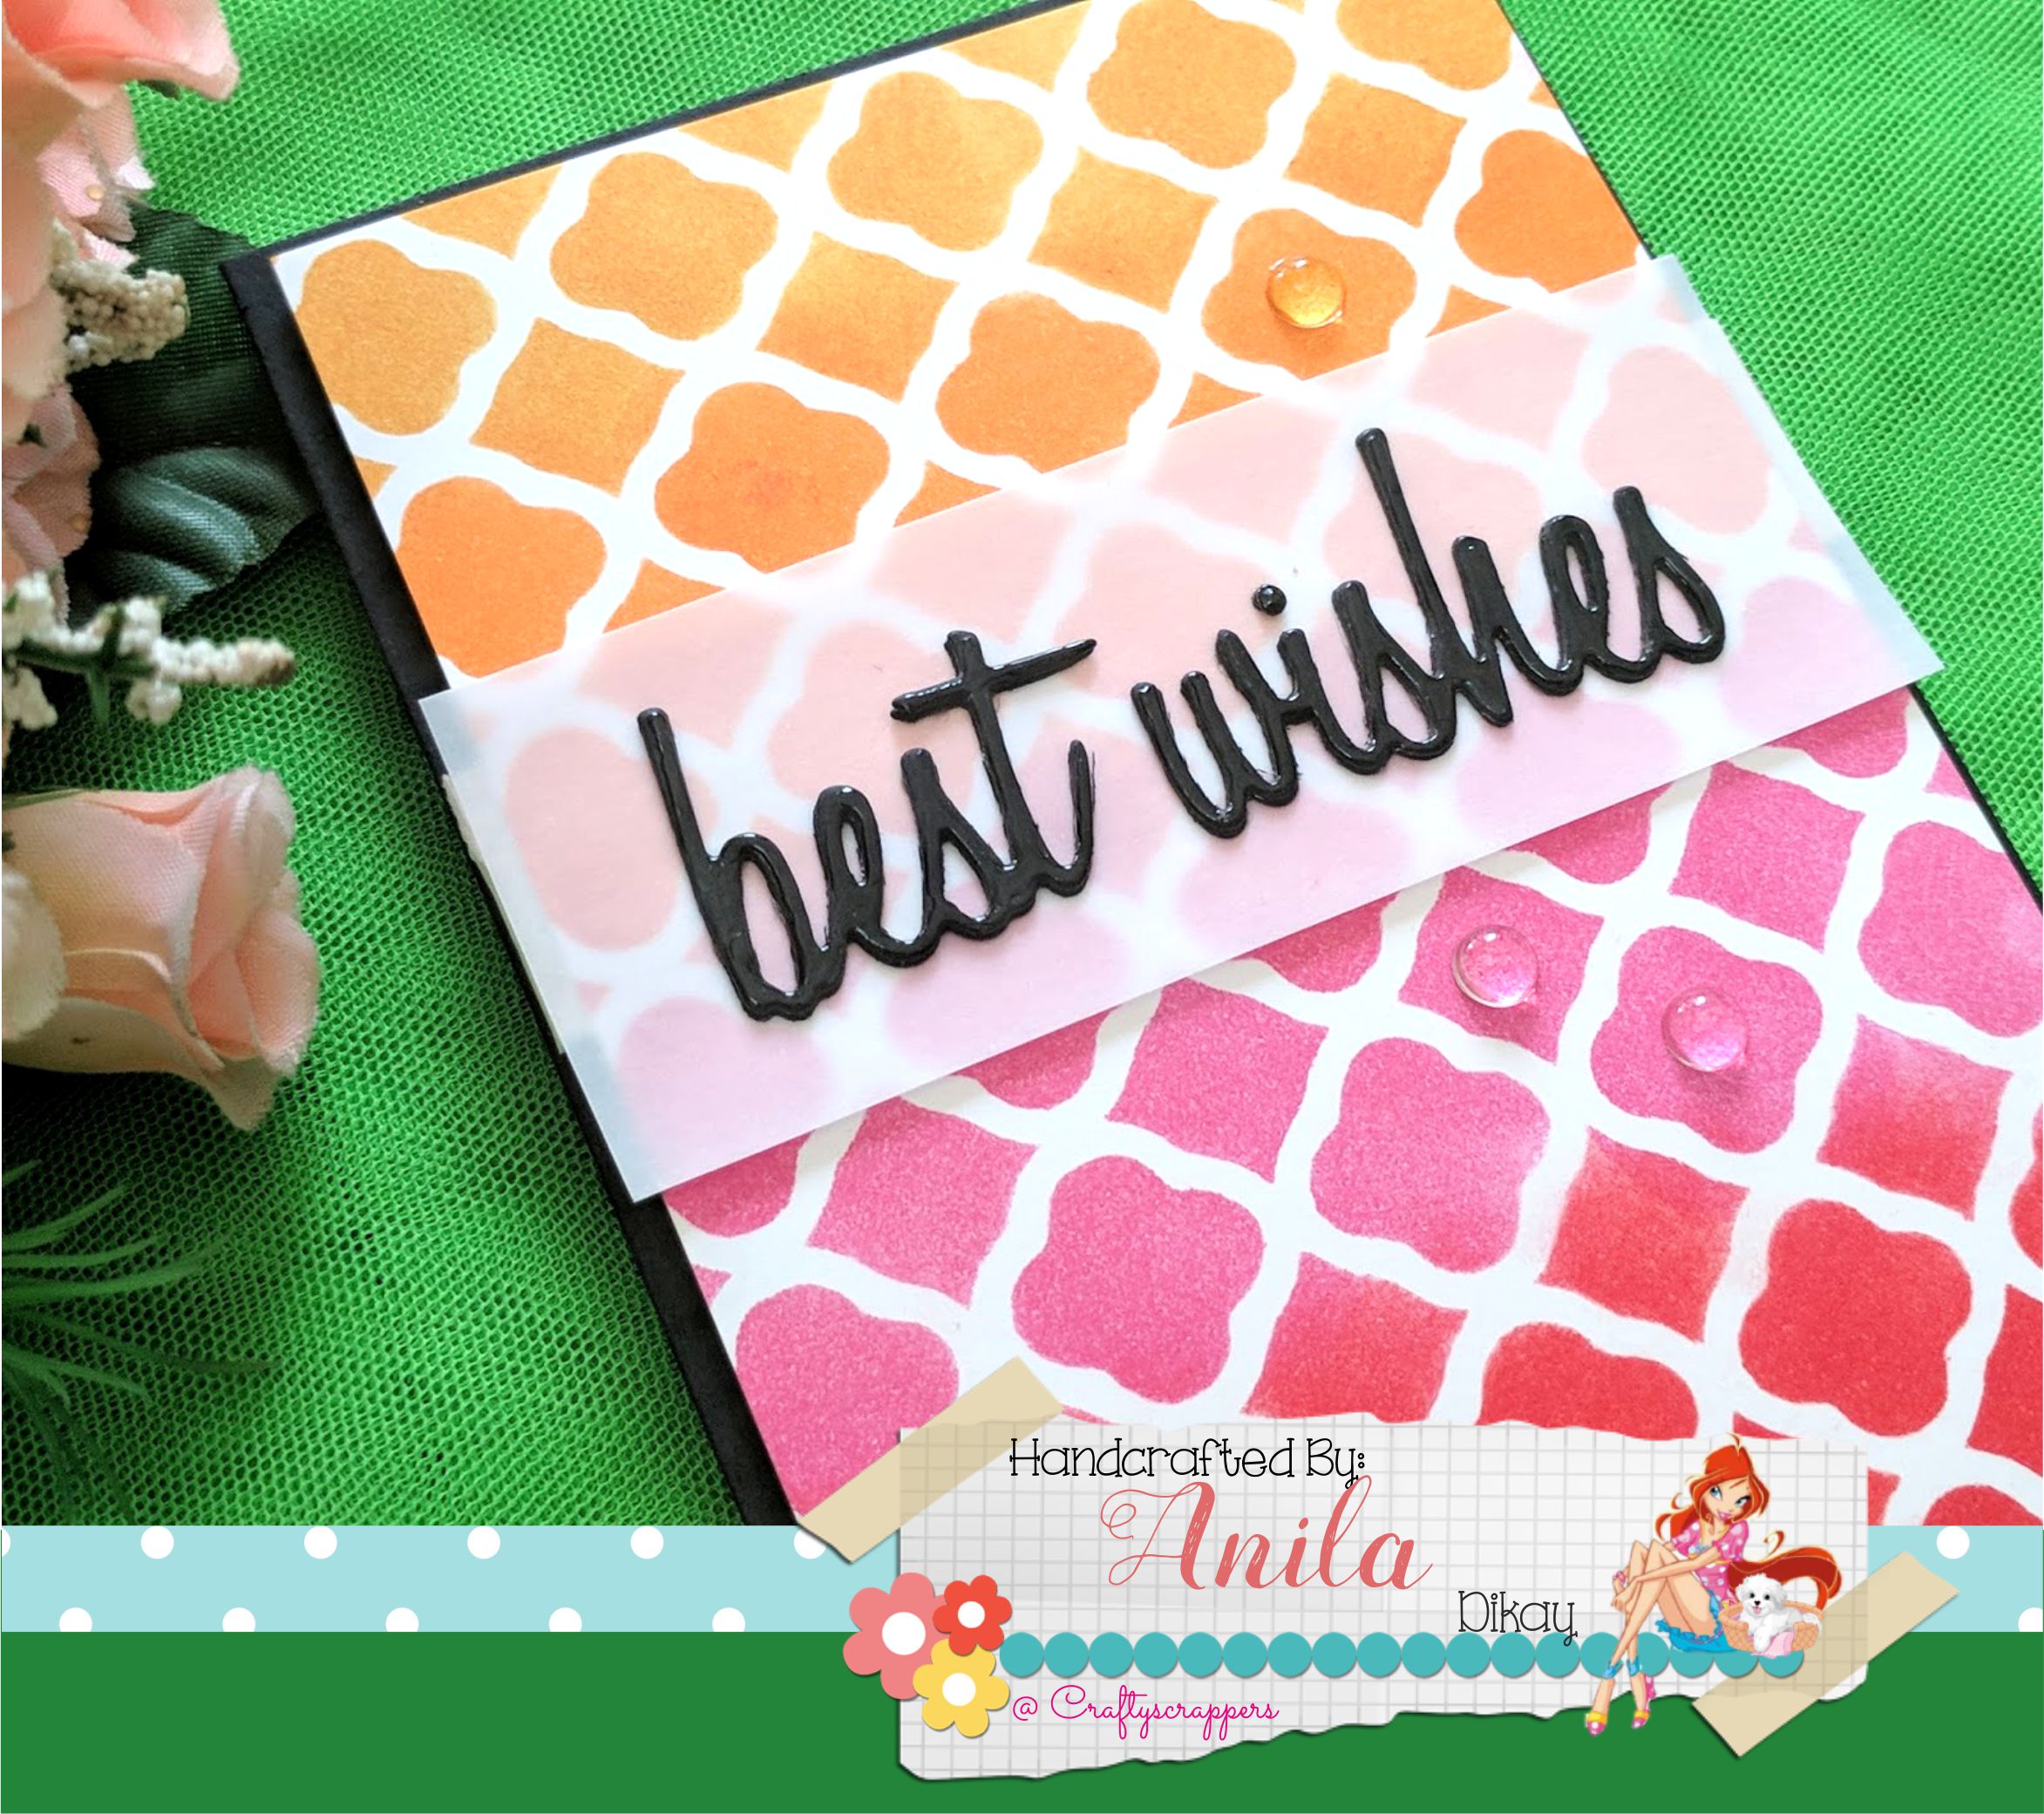
- I took a white card and adhered it using washi tape.
- Adhered the Victorian stencil over it.
- Using a dauber distress the card using various distress inks.
- Trimmed the card panel and mounted it on a black card base.
- Adhered two layers of sentiment die-cuts to give it dimension.
- Mounted it on a strip and vellum and adhered it to the card.
- Lastly, covered the sentiment with glossy accents and added few dew drops to complete the card.
do check out my complete step by step video tutorial here:
It was great fun playing with craftyscrappers Stencils. And the effect that came out was amazing. I am sure you want to check out the entire collection at the store.
Do check them out!!!
I hope you enjoyed the video and i have inspired you enough for the challenge for this month “Sketch”.
Have you participated yet? We still have few more days to go….
You can participate via mr.linky (at the end of the challenge post)or via facebook,Instagram and even via email.
please use #Craftyscrappers challenge17 to qualify for submission,
failing to do so, the entry would be disqualified.)
Do participate and stand a chance to win the amazing goodie bag!
Looking forward to your participation in the challenge.
love,
